Brownies From Scratch Recipe (Fudgy, Rich, Chewy, and Better Than Box Mix)
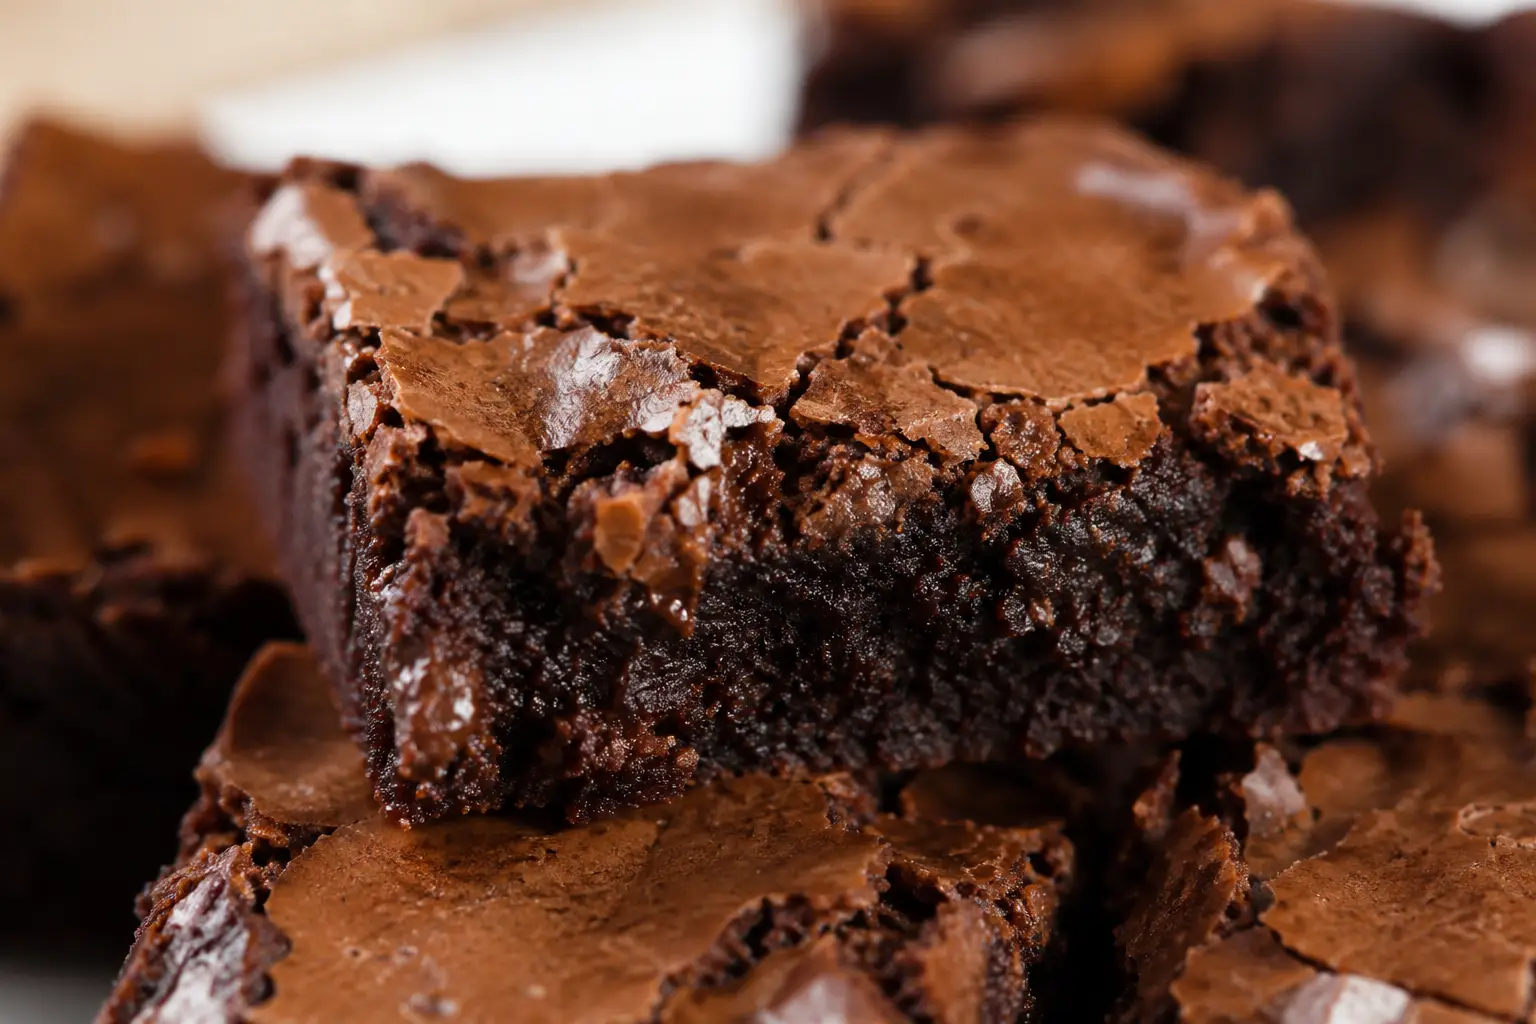
There are brownies — and then there are the brownies everyone remembers. Shiny, paper-thin crackly tops. Rich chocolate flavor. Soft, fudgy centers. Chewy edges that disappear first from the pan. These brownies from scratch have everything: deep chocolate flavor, that iconic crackly top, a moist fudgy center, and chewy edges — all from one bowl with no mixer required.
Whether you are baking for a birthday party, holiday dessert table, school event, or simply because you are craving chocolate, this recipe delivers bakery-quality brownies every single time. Browse more brownies and bars recipes from Sugar Face Bakes.
Why You’ll Love This Brownies From Scratch Recipe
There are thousands of brownie recipes online, but mine focuses on the texture most people are actually searching for—a brownie that’s fudgy without being underbaked, chewy without becoming dry, and intensely chocolatey without being overly sweet.
Here’s why this recipe works so well:
✔ Rich chocolate flavor
✔ Crackly bakery-style tops
✔ Thick, fudgy centers
✔ Perfect chewy edges
✔ Simple pantry ingredients
✔ Ready in about an hour
✔ One bowl recipe
✔ Freezer friendly
✔ Better than boxed brownie mix
✔ Perfect for birthdays, holidays, parties, and gifting
Once you taste these homemade brownies warm from the oven, you’ll never reach for a boxed mix again.
What Makes These the Best Brownies From Scratch?
The best brownies aren’t complicated—they’re balanced.
Many homemade brownie recipes contain too much flour, too little fat, or not enough chocolate. Those recipes often bake up dry, cakey, crumbly, or lacking that rich chocolate flavor everyone expects.
This recipe focuses on five important principles.
1. Butter Creates Incredible Flavor
Unlike oil-only brownie recipes, butter provides richness while complementing the chocolate beautifully.
Using melted butter also helps create a denser texture.
2. Cocoa Powder Builds Deep Chocolate Flavor
High-quality unsweetened cocoa powder gives brownies their signature rich taste.
Dutch-process cocoa produces an extra dark brownie while natural cocoa creates a slightly brighter chocolate flavor.
Both work wonderfully.
3. Eggs Create Structure Without Making Brownies Cakey
Eggs do far more than hold everything together.
They provide:
- lift
- chewiness
- richness
- shiny tops
- fudgy texture
Whisking the eggs and sugar thoroughly helps create that beautiful glossy crust everyone loves.
4. Just Enough Flour
Too much flour is one of the biggest reasons homemade brownies become dry.
This recipe uses only enough flour to support the batter while allowing chocolate to remain the star.
5. Brownies Finish Baking After Leaving the Oven
One of the biggest mistakes home bakers make is waiting until brownies look completely baked before removing them.
Instead, slightly underbaking creates moist centers because residual heat continues cooking the brownies as they cool.
This simple trick transforms the texture.
Brownies From Scratch Ingredients
- Unsalted Butter, melted and slightly cooled (1 cup): Melted butter rather than creamed butter creates a denser, fudgier brownie. Allow it to cool for about 5 minutes after melting so it does not scramble the eggs when combined.
- Granulated Sugar (1 1/2 cups): Sweetens the batter and, when whisked vigorously with the eggs and butter, helps create the glossy crackly top.
- Dark Brown Sugar (1/2 cup): Adds deep, molasses-forward sweetness and keeps the brownies moist and chewy for days after baking.
- Large Eggs (4), room temperature: Added one at a time and whisked well after each addition. The vigorous whisking of eggs with the sugars is the key step that creates the iconic crackly surface.
- Vanilla Extract (2 teaspoons): Enhances and deepens the chocolate flavor throughout the batter.
- Cocoa Powder, Dutch-process (1 cup): The primary source of chocolate flavor. Dutch-process cocoa delivers a deeper color and smoother, richer taste. Sifted into the batter for a silky, lump-free result.
- All-Purpose Flour (1 cup): Use only the amount called for. Too much flour is the single most common reason brownies turn cakey instead of fudgy.
- Espresso Powder (1 teaspoon, optional but recommended): Amplifies the chocolate flavor dramatically without making the brownies taste like coffee. This is the same trick used in the Chocolate Cake.
- Salt (1 teaspoon): Balances the sweetness and makes the chocolate flavor pop.
- Chocolate Chips (1 cup, optional): Fold in at the end for extra pockets of melted chocolate in every bite. Reserve a handful to sprinkle over the top.
Kitchen Tools You’ll Need
The great news is you don’t need expensive equipment.
Gather:
- 8×8-inch metal baking pan
- parchment paper
- mixing bowl
- whisk
- silicone spatula
- measuring cups
- kitchen scale (recommended)
- cooling rack
- sharp knife
A light-colored metal pan produces the most even bake.
Glass pans retain heat longer and may overbake the edges before the center finishes baking.
How to Make Brownies From Scratch
- Step 1 — Preheat and Prep: Preheat the oven to 350 degrees F. Line an 8×8-inch light-colored metal baking pan with parchment paper, leaving overhang on two sides for easy lifting. A 9×9-inch pan also works — reduce the bake time slightly.
- Step 2 — Melt the Butter: Melt the butter in a large microwave-safe bowl or saucepan. Allow it to cool for about 5 minutes so it does not cook the eggs when combined.
- Step 3 — Whisk Butter and Sugars: Add the granulated sugar and dark brown sugar to the cooled melted butter. Whisk together for about 2 minutes until the mixture is glossy and well combined.
- Step 4 — Add the Eggs and Vanilla: Add the eggs one at a time, whisking well after each addition. Stir in the vanilla extract. The mixture should look glossy and slightly lighter in color.
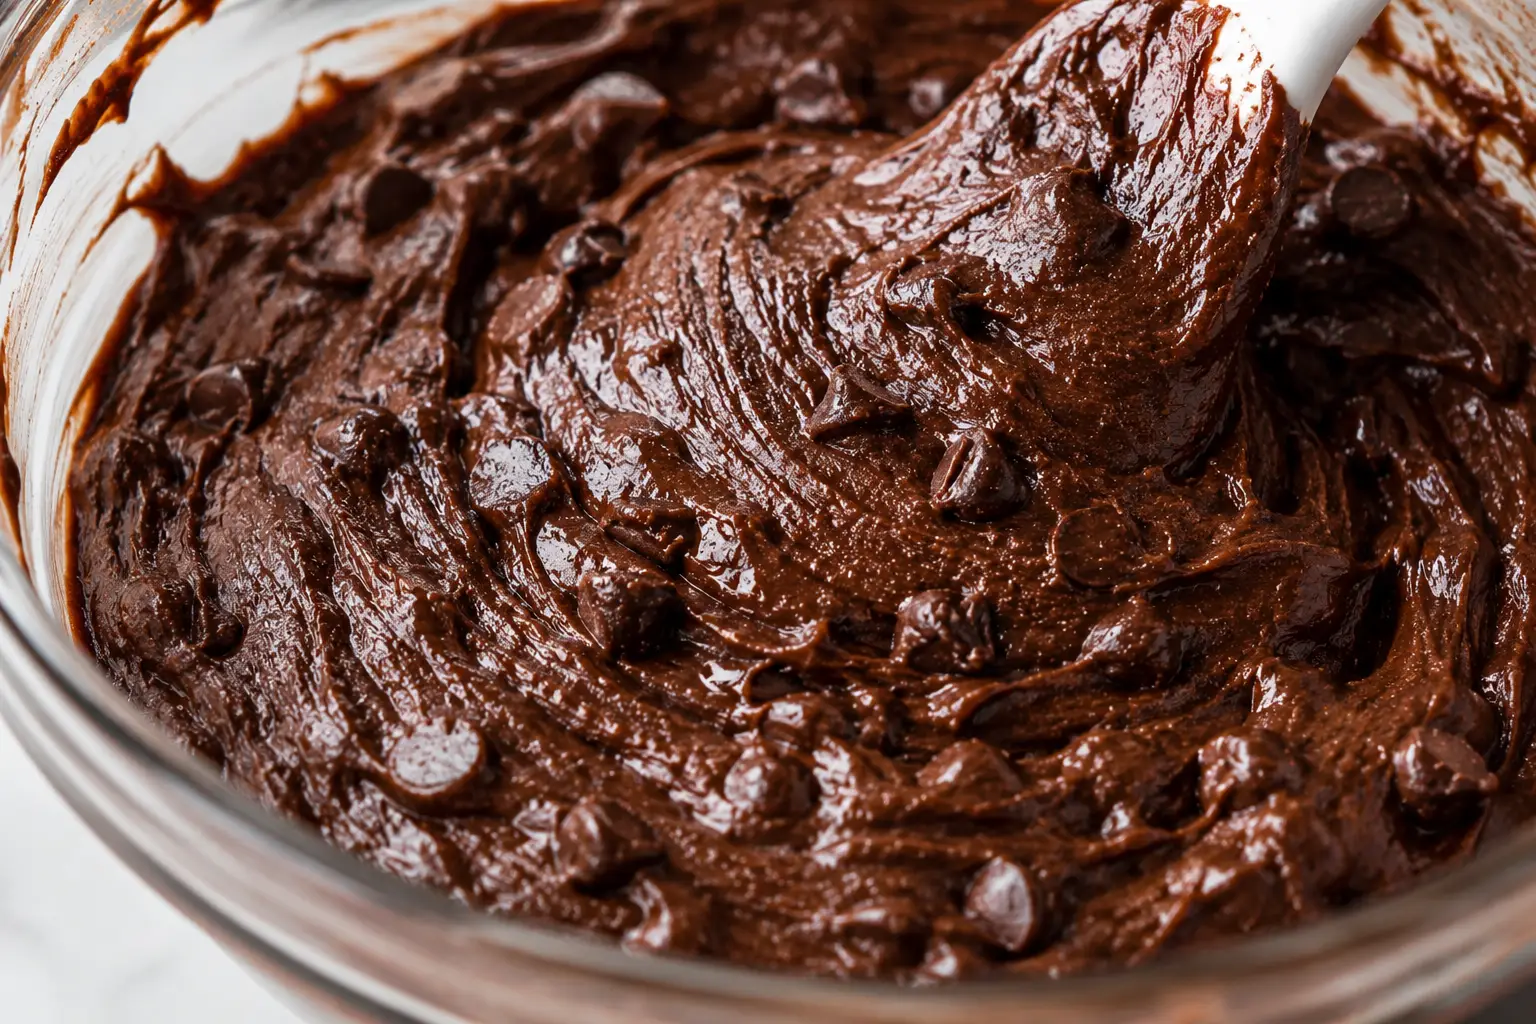
- Step 5 — Sift in the Cocoa: Sift the cocoa powder directly into the bowl. Whisk until silky smooth with no dry cocoa streaks visible.
- Step 6 — Fold in the Dry Ingredients: Add the flour, espresso powder, and salt. Fold with a rubber spatula until the flour just disappears. Do not overmix. Fold in the chocolate chips if using, reserving a handful for the top.
- Step 7 — Bake: Spread the batter evenly into the prepared pan. Sprinkle reserved chocolate chips over the top. Bake at 350 degrees F for 30 to 34 minutes. The brownies are done when the edges are set, the center has a very slight jiggle, and a toothpick inserted in the center comes out with moist crumbs — not wet batter and not clean.
- Step 8 — Cool Completely: Remove from the oven and cool completely in the pan. For the fudgiest brownies, refrigerate for 30 minutes before slicing. Use a hot knife wiped clean between cuts for the cleanest edges.
Pro Tips for the Best Homemade Brownies
Professional bakers rely on small techniques that produce consistently amazing brownies.
These simple tips make an enormous difference.
Measure Flour Correctly
Too much flour is the number one cause of dry brownies.
Use a kitchen scale whenever possible.
If using measuring cups, spoon the flour into the cup and level it off instead of scooping directly from the bag.
Don’t Overmix
Once the flour is added, stir only until combined.
Overmixing develops gluten, leading to brownies that are dense and tough rather than tender and fudgy.
Slightly Underbake for Fudgy Brownies
If you’re unsure whether they’re done, it’s usually better to pull them out a minute early than a minute late.
Residual heat finishes the baking process and preserves that irresistible gooey center.
Let the Brownies Rest Before Cutting
Fresh brownies are delicate straight from the oven.
Giving them time to cool allows the crumb to set, making every slice cleaner while enhancing the texture.
Use Good Chocolate
Since chocolate is the star ingredient, quality matters. A rich cocoa powder and good chocolate chips create deeper flavor than bargain brands.
Add Chocolate Chips on Top
Sprinkling extra chocolate over the batter before baking creates a bakery-style finish and little pools of melted chocolate that make the brownies look just as irresistible as they taste.
Chill for Ultra-Fudgy Brownies
If you love dense, truffle-like brownies, refrigerate them for a few hours before serving. Chilling intensifies the chocolate flavor and creates an even fudgier bite.
What Makes Brownies Fudgy Instead of Cakey?
If you’ve ever searched “why are my brownies cakey instead of fudgy?” you’re not alone. It’s one of the most common brownie questions because the difference comes down to a handful of ingredients and techniques.
Fudgy brownies are all about fat, chocolate, and moisture, while cakey brownies rely more heavily on flour and air. Think of brownies as sitting on a spectrum. On one end are rich, dense, almost truffle-like brownies. On the other are lighter brownies with a crumb similar to chocolate cake.
This recipe intentionally lands right in the sweet spot—thick, chewy, intensely chocolatey, and wonderfully fudgy.
The Secret to Fudgy Brownies
There are several factors working together:
- More butter than flour
- Plenty of eggs for richness
- A generous amount of cocoa powder
- Melted chocolate folded into the batter
- Minimal mixing after adding flour
- Slightly underbaking
- Cooling completely before slicing
Each step builds upon the next to create the texture everyone loves.
One of the biggest mistakes home bakers make is adding extra flour because the batter seems too thin. Resist the temptation. Brownie batter should be thick, glossy, and spreadable—not stiff like cookie dough.
How Do You Get That Shiny Crackly Brownie Top?
That beautiful paper-thin, crackly crust is one of the defining features of bakery-style brownies. Fortunately, it’s easier to achieve than many people think.
The shiny top develops because the sugar partially dissolves into the eggs before baking. As the brownies bake, that sugar rises to the surface and forms a delicate, glossy crust.
Tips for a Crackly Top Every Time
- Whisk the butter and sugars until smooth.
- Beat the eggs in thoroughly, one at a time.
- Use enough sugar—don’t drastically reduce it.
- Avoid overmixing once the flour is added.
- Bake in a fully preheated oven.
- Use room-temperature eggs.
Another trick? Fold a handful of chocolate chips into the batter and sprinkle a few over the top before baking. Not only do they create pools of melted chocolate, but they also give the brownies a bakery-worthy appearance.
Should I Use Cocoa Powder or Melted Chocolate?
One of the biggest debates in brownie baking is whether cocoa powder or melted chocolate makes the better brownie.
The answer is simple: both have advantages, and combining them often creates the richest flavor.
Cocoa Powder
Cocoa powder provides an intense chocolate flavor without adding extra fat. It creates deep chocolate notes and helps develop that signature brownie texture.
Benefits include:
- Concentrated chocolate flavor
- Rich color
- Easy to measure
- Long pantry life
Melted Chocolate
Melted chocolate contributes:
- Extra richness
- Creamier texture
- More luxurious mouthfeel
- Additional cocoa butter
Why This Recipe Uses Both
By combining high-quality cocoa powder with chopped chocolate or chocolate chips, you get the best of both worlds.
The cocoa delivers bold chocolate flavor while the melted chocolate creates little pockets of gooey richness throughout each brownie.
What Is the Best Cocoa Powder for Brownies?
Chocolate is the star of the show, so choosing a good cocoa powder makes a noticeable difference.
Natural Cocoa Powder
Natural cocoa has a brighter chocolate flavor with slight fruity notes.
It’s ideal if you enjoy classic homemade brownies with balanced sweetness.
Dutch-Process Cocoa Powder
Dutch-process cocoa has been treated to reduce acidity, resulting in:
- darker color
- smoother chocolate flavor
- richer appearance
- deeper taste
This is often the cocoa of choice for bakery-style brownies.
Dark Cocoa Powder
Dark cocoa creates nearly black brownies with bold chocolate flavor.
Many bakers enjoy mixing dark cocoa with regular cocoa for extra complexity.
No matter which cocoa you choose, avoid old cocoa powder that’s been sitting in the pantry for years. Fresh cocoa delivers noticeably better flavor.
Why Did My Brownies Turn Out Dry?
Dry brownies are disappointing—but the good news is they’re usually easy to prevent.
Common Reasons Brownies Become Dry
- Too Much Flour
The most common culprit.
Always spoon flour into your measuring cup or, even better, weigh it with a kitchen scale.
Even an extra few tablespoons can dramatically change the texture.
- Overbaking
Brownies continue cooking after leaving the oven.
If you wait until a toothpick comes out perfectly clean, the brownies are already overbaked.
Instead, look for:
- set edges
- slightly soft center
- moist crumbs on the toothpick
- Over Mixing
Too much stirring develops gluten.
That creates brownies that are tougher and less tender.
Once the flour disappears, stop mixing.
- Incorrect Pan Size
Using a larger pan spreads the batter thinner.
Thinner brownies bake much faster and often dry out before you realize they’re done.
Stick with the recommended pan size whenever possible.
Why Are My Brownies Gooey in the Middle?
A gooey center isn’t always a bad thing.
The key is determining whether they’re fudgy or actually underbaked.
Fudgy brownies should have:
- moist center
- dense texture
- rich bite
- no raw batter
If the center is liquid after cooling, they simply needed more time in the oven.
You can often return them to a 325°F oven for another five to eight minutes.
How Do You Know When Brownies Are Done?
Forget the “clean toothpick” rule.
That’s perfect for cake—not brownies.
Instead, watch for these signs:
✔ Edges have pulled slightly away from the pan.
✔ The center no longer looks wet.
✔ The top is shiny with tiny cracks.
✔ A toothpick comes out with moist crumbs attached.
✔ The pan jiggles only slightly.
Remember, brownies continue baking while cooling.
Pulling them out just a minute early often creates the perfect texture.
What Is the Best Pan for Brownies?
Believe it or not, your baking pan affects the final texture.
- Metal Pans
A light-colored metal pan bakes evenly and consistently. Shop my go-to fool-proof pans. There is a generous discount applied at checkout!
This is my favorite choice for homemade brownies.
- Glass Pans
Glass retains heat longer.
That means brownies often continue cooking after leaving the oven, increasing the risk of dry edges.
If using glass, reduce the oven temperature by about 25 degrees and begin checking early.
- Dark Nonstick Pans
Dark pans absorb more heat and may brown the edges faster.
Again, begin checking several minutes before the recipe’s suggested bake time.
Serving Ideas
These brownies are incredible on their own, but they’re also the perfect base for unforgettable desserts.
Serve them:
- Warm with vanilla ice cream
- With hot fudge sauce
- Topped with whipped cream
- Dusted with powdered sugar
- Alongside fresh strawberries or raspberries
- With a drizzle of salted caramel
- Layered into a brownie sundae
- Crumbled over chocolate pudding
- Added to an ice cream sandwich
- Served with fresh espresso or coffee
They also make an excellent homemade gift. Stack cooled brownies in a bakery box, wrap them with parchment paper and ribbon, and you have a thoughtful dessert that’s always appreciated.
Brownie Success Checklist
Before your brownies go into the oven, run through this quick checklist:
✔ Room-temperature eggs
✔ Fresh cocoa powder
✔ Butter melted but not piping hot
✔ Flour measured correctly
✔ Batter mixed just until combined
✔ Chocolate folded in gently
✔ Pan lined with parchment paper
✔ Oven fully preheated
✔ Toothpick checked for moist crumbs
✔ Brownies cooled completely before slicing
Follow these simple steps, and you’ll be rewarded with rich, chewy, deeply chocolatey brownies that look as beautiful as they taste. Whether you’re baking them for a celebration or simply satisfying a chocolate craving, this recipe is one you’ll come back to again and again.
Brownies From Scratch Recipe Tips at a Glance
Whether this is your first batch of homemade brownies or your hundredth, these quick tips will help you achieve rich, fudgy brownies with bakery-quality results every time.
✔ Use room-temperature eggs for a smoother batter and shinier tops.
✔ Melt the butter gently—don’t let it boil or brown.
✔ Use a high-quality cocoa powder for the deepest chocolate flavor.
✔ Measure flour correctly using a kitchen scale or the spoon-and-level method.
✔ Fold the flour in gently to avoid overdeveloping the gluten.
✔ Slightly underbake the brownies. They continue baking as they cool.
✔ Bake in a light-colored metal pan for the most even results.
✔ Line your pan with parchment paper for easy removal and cleaner slices.
✔ Allow brownies to cool completely before cutting for perfect squares.
✔ Wipe your knife clean between cuts for bakery-style presentation.
✔ Sprinkle flaky sea salt on top after baking to enhance the chocolate flavor.
✔ Store brownies in an airtight container to keep them moist for days.
Storage & Freezing
One of the best things about these brownies is that they stay wonderfully moist, making them a perfect make-ahead dessert.
- Room Temperature
Store cooled brownies in an airtight container for up to 4 days.
For the freshest texture, place a sheet of parchment paper between layers if stacking them.
- Refrigerator
Brownies can be refrigerated for up to 1 week.
Many chocolate lovers actually prefer them chilled because the texture becomes even denser and fudgier.
- Freezer
Brownies freeze beautifully.
Wrap each brownie individually in plastic wrap, then place them in a freezer-safe container or zip-top freezer bag.
Freeze for up to 3 months.
To serve, thaw at room temperature for about an hour or warm in the microwave for 10–15 seconds.
My Favorite Bakeware for Homemade Brownies
When it comes to brownies, the baking pan you choose really does make a difference. I always reach for my Caraway Bakeware because it heats evenly, helps prevent over-baked edges, and releases brownies beautifully thanks to its naturally ceramic-coated surface.
Whether I’m making brownies, blondies, cookie bars, or sheet cakes, I love how effortlessly everything lifts from the pan, making cleanup just as enjoyable as baking.
If you’ve been thinking about upgrading your bakeware, you can save with my built-in discount code applied at checkout!
More Chocolate Recipes You’ll Love
If you’re as much of a chocolate lover as I am, don’t stop with these brownies! Here are a few more decadent desserts waiting for you:
- Chocolate Cake – Rich, ultra-moist layers finished with silky chocolate buttercream.
- Chocolate Cheesecake – Creamy, decadent, and topped with a luscious chocolate ganache.
- Red Velvet Cake – Velvety cocoa cake with tangy cream cheese frosting.
- Tiramisu – Espresso-soaked ladyfingers layered with creamy mascarpone.
- Chewy Sugar Cookies – A buttery classic that’s perfect alongside a glass of milk.
- Apple Crisp – Warm cinnamon apples with a buttery oat topping.
- Blueberry Muffins – Bakery-style muffins bursting with juicy blueberries.
- Fudgy Brownies – The ultimate fudgy brownie lover’s recipe.
No matter what you’re craving, there’s always another homemade dessert to bake and share.
For more easy recipe tutorials and expert baking tips, subscribe to Sugar Face Bakes on YouTube and join our growing community of home bakers!

Brownies From Scratch
Ingredients
Wet Ingredients
- 1 cup unsalted butter melted, and slightly cooled
- 1½ cups granulated sugar
- ½ cup dark brown sugar or light brown sugar
- 4 large eggs room temperature
- 2 tsp vanilla extract
Dry Ingredients
- 1 cup Dutch-process cocoa powder or unsweetened cocoa powder
- 1 cup all-purpose flour or gluten-free flour
- 1 tsp espresso powder optional, but recommended
- 1 tsp salt
- 1 cup chocolate chips optional
- sea salt for topping
Instructions
- Preheat your oven to 350℉ (175℃).
- Line an 8×8-inch light-colored metal baking pan with parchment paper, leaving overhang on two sides. Or use baking spray.
- Melt the butter. Allow it to cool for about 5 minutes so it doesn't cook the eggs.
- Whisk together butter, granulated sugar, and brown sugar for about 2 minutes until glossy.
- Add eggs one at a time, whisking well after each addition. Stir in vanilla.
- Sift cocoa powder into the bowl. Whisk until silky smooth.
- Fold together flour, espresso powder, and salt using a rubber spatula. Stop mixing as soon as the flour disappears.
- Fold in chocolate chips. Reserve a handful for sprinkling over the top.
- Spread evenly into prepared pan. Bake 30–34 minutes.
- The brownies are done when the edges are set, the center jiggles slightly, and the toothpick has moist crumbs. Do not wait for a clean toothpick.
- Remove from the oven and cool completely.
Notes
Nutrition Facts
Per Large Brownie (12 servings)
Calories: 412 Fat: 22g Saturated Fat: 13g Carbohydrates: 54g Sugar: 39g Fiber: 3g Protein: 5g Sodium: 210mg Cholesterol: 92mg Potassium: 235mg Iron: 15% DV Calcium: 5% DVFrequently Asked Questions
How do you make brownies from scratch chewy instead of cakey?
The key to chewy brownies from scratch is using melted butter instead of creamed butter, the right ratio of fat to flour, and slightly underbaking. This recipe uses 1 cup of butter to only 1 cup of flour, which creates the dense, fudgy structure. Adding dark brown sugar alongside granulated sugar also adds moisture and chew. Pull the brownies from the oven when the toothpick has moist crumbs — not clean — and let them finish setting in the hot pan.
What gives homemade brownies a shiny crackly top?
The shiny crackly top on brownies from scratch comes from vigorously whisking the eggs and sugars together with the melted butter before adding any dry ingredients. This process partially dissolves the sugar and creates a thin, meringue-like layer on the surface of the batter that crisps up during baking into that iconic crinkled crust. Skipping or rushing this step produces a matte, dull top.
How do you know when brownies from scratch are done baking?
Brownies from scratch are done when the edges are set and firm, the center still has a very slight jiggle, and a toothpick inserted in the center comes out with moist crumbs attached — not wet batter, and not completely clean. A clean toothpick means the brownies are overbaked and will be dry. Check at 30 minutes and add time in 2-minute increments if needed.
Can you use a glass pan to make brownies from scratch?
You can, but a light-colored metal pan produces better results for brownies from scratch. Glass pans retain heat longer and cook more slowly, which means the edges often overbake and dry out before the center is fully set. If you only have a glass pan, reduce the oven temperature to 325 degrees F and add 5 to 10 minutes to the bake time, checking for doneness with the toothpick test.
Can you freeze brownies from scratch?
Yes, brownies from scratch freeze beautifully for up to 3 months. Cut them into individual squares, wrap each one tightly in plastic wrap, and place in a freezer-safe bag. Thaw at room temperature for about 30 minutes before serving. You can also freeze the whole uncut slab — wrap tightly and thaw overnight at room temperature before slicing.
More Brownies & Bars Recipes
Looking for more easy and comforting meals? Browse all recipes here:


