The Best Chocolate Cake Recipe
There is chocolate cake, and then there is the chocolate cake—the one that steals the spotlight at birthdays, holidays, dinner parties, bake sales, and every celebration in between.
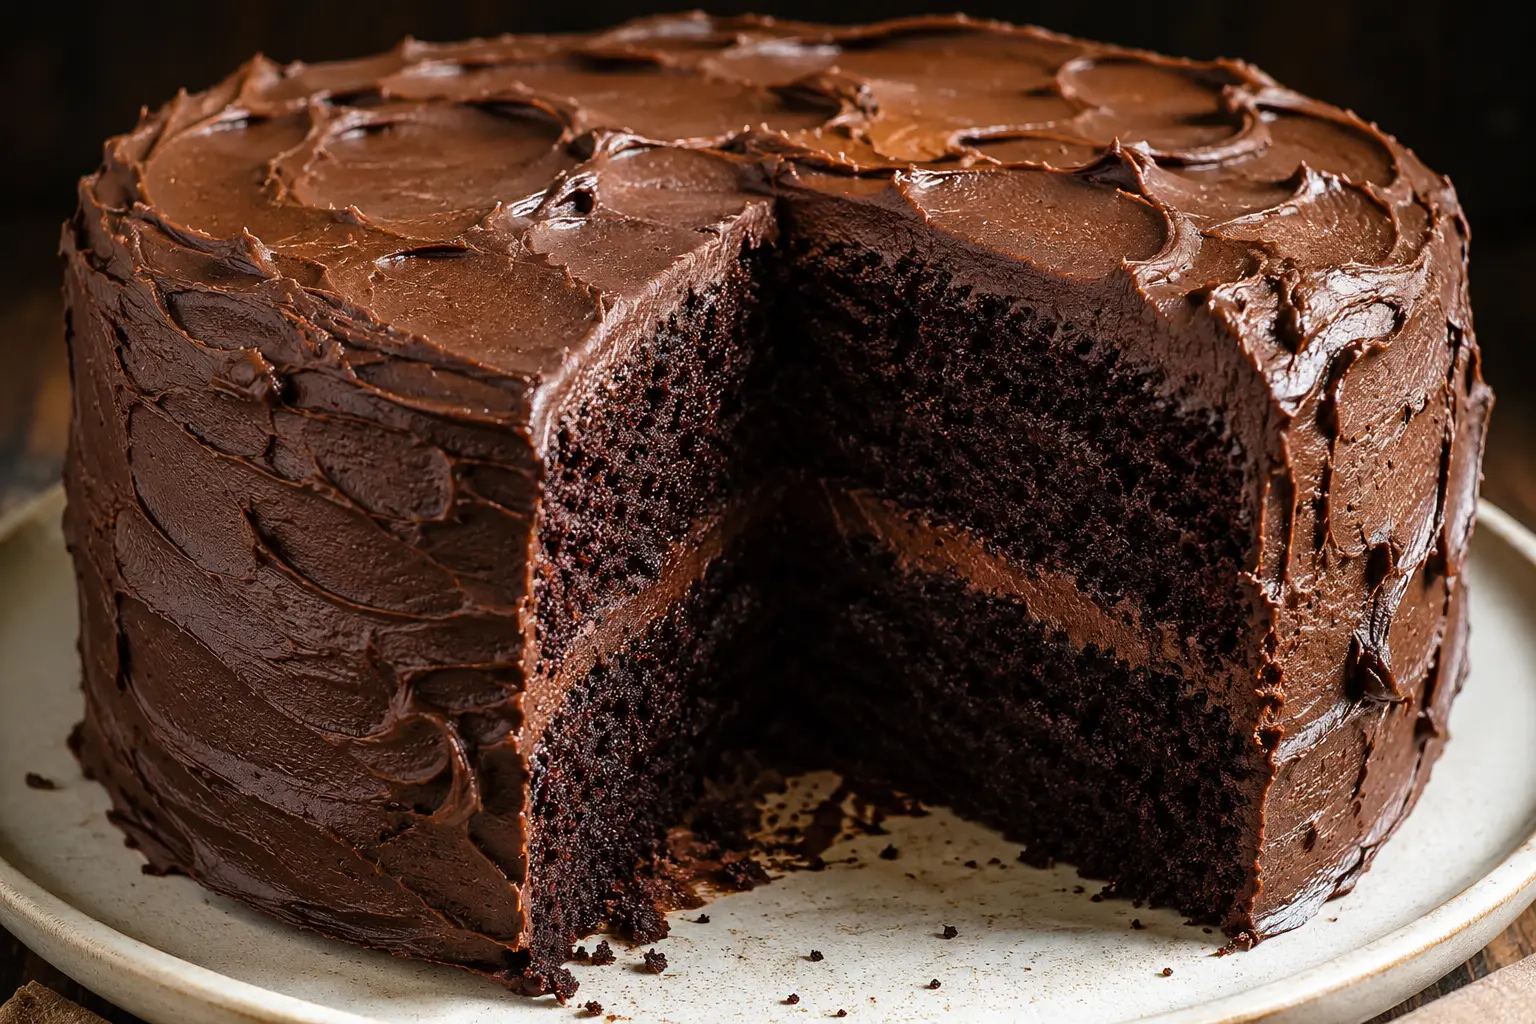
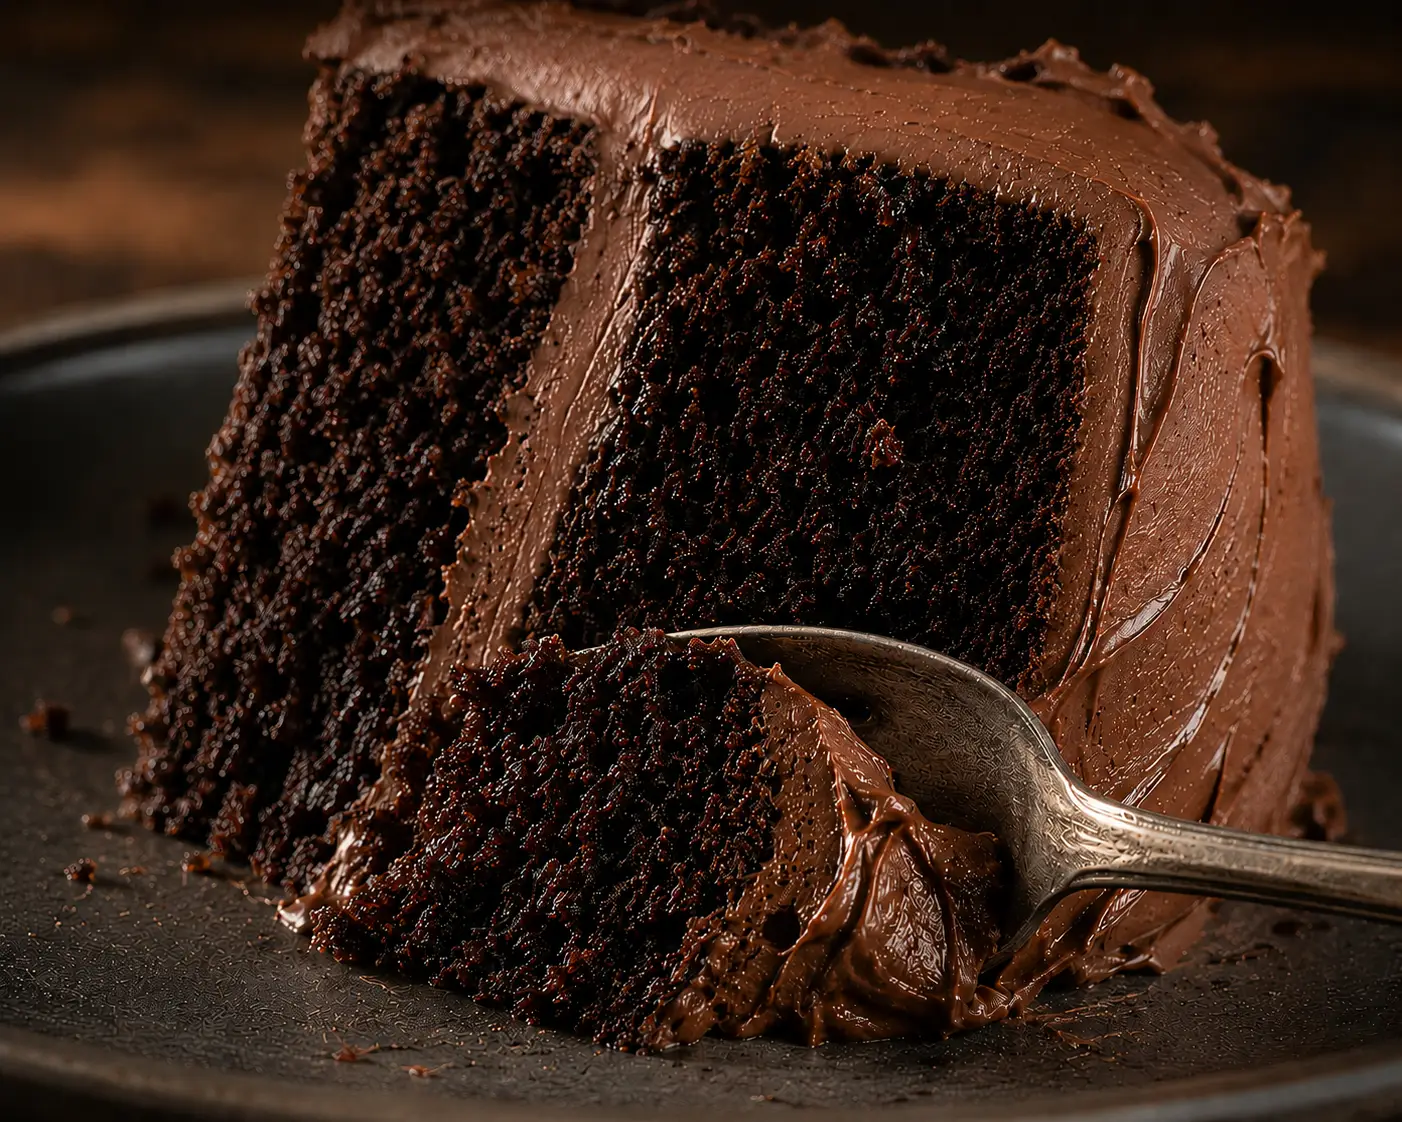
This recipe is everything a chocolate cake should be: intensely chocolatey, unbelievably moist, incredibly soft, and layered with a silky chocolate buttercream frosting that tastes like it came straight from a high-end bakery.
After years of testing cakes with different cocoa powders, fats, mixing methods, and baking temperatures, this recipe consistently delivers the deep chocolate flavor, tender crumb, and perfect texture that chocolate cake lovers crave.
What makes this cake different from many recipes you’ll find online is the balance of ingredients and technique. Every ingredient serves a purpose. Every step contributes to the final texture. The result is a cake that stays moist for days, slices beautifully, and tastes even better the next day.
Whether you’re baking a birthday cake, holiday dessert, Valentine’s Day centerpiece, or simply satisfying a chocolate craving, this homemade chocolate cake recipe deserves a permanent place in your recipe collection.
Why You’ll Love This Chocolate Cake Recipe
Rich Chocolate Flavor
This cake is loaded with cocoa powder and enhanced with a secret bakery trick: hot brewed coffee. Coffee doesn’t make the cake taste like coffee—it simply amplifies the chocolate flavor and creates a deeper, richer taste.
Ultra Moist Texture
Oil, buttermilk, and hot liquid work together to create a soft, moist crumb that stays fresh longer than traditional butter-based cakes.
Easy to Make
No complicated techniques or specialty ingredients required. If you can whisk ingredients together, you can make this cake.
Perfect for Any Occasion
- Birthday cakes
- Wedding showers
- Holiday celebrations
- Graduation parties
- Valentine’s Day desserts
- Mother’s Day treats
- Chocolate lovers everywhere
Bakery-Style Results
Tall layers, rich frosting, and beautiful slices make this cake look professionally made while still being approachable for home bakers.
What Makes This the Best Chocolate Cake?
The secret lies in combining several professional baking techniques.
Many chocolate cakes fail because they are:
- Dry
- Crumbly
- Too sweet
- Not chocolatey enough
- Dense and heavy
This recipe avoids all of those problems by balancing moisture, fat, acidity, and structure.
The combination of:
- Dutch-process cocoa
- Buttermilk
- Oil
- Hot brewed coffee
- Proper mixing
creates a cake that is incredibly soft while still being sturdy enough to stack and frost.
The Science Behind a Perfect Chocolate Cake
Understanding why ingredients work can dramatically improve your baking results.
Cocoa Powder Creates Flavor
Chocolate cake gets most of its flavor from cocoa powder.
Unlike melted chocolate, cocoa powder delivers concentrated chocolate flavor without adding excess fat.
For the richest flavor, use high-quality Dutch-process cocoa whenever possible.
Dutch-process cocoa has:
- Deeper chocolate flavor
- Darker color
- Less acidity
- Smoother taste
Natural cocoa powder can also be used but will produce a slightly lighter cake.
Why Oil Makes Cakes More Moist Than Butter
Many people assume butter automatically makes a better cake.
Not always.
Butter contains approximately 80% fat and 20% water.
Oil contains 100% fat.
Because oil remains liquid at room temperature, cakes made with oil stay softer longer.
This is why bakery cakes often use oil rather than butter.
The result:
- Softer crumb
- More moisture
- Longer freshness
- Better texture after refrigeration
Why Buttermilk Matters
Buttermilk contributes:
- Moisture
- Tangy flavor
- Tender crumb
- Better rise
The acidity in buttermilk reacts with leavening agents to create a lighter cake.
It also breaks down gluten strands, preventing a tough texture.
Why Eggs Are Essential
Eggs perform multiple jobs.
They provide:
- Structure
- Moisture
- Richness
- Stability
Without eggs, cakes often collapse or become gummy.
Room-temperature eggs blend more easily into batter and create a smoother texture.
Why Hot Liquid Creates a Better Cake
This step is often overlooked.
Adding hot coffee or hot water to cocoa powder helps “bloom” the cocoa.
Blooming releases flavor compounds trapped inside cocoa particles.
The result is:
- Richer chocolate flavor
- Darker cake color
- More complex taste
Professional bakers use this technique constantly.
The Secret Ingredient: Coffee
If you’ve ever wondered why bakery chocolate cakes taste richer than homemade versions, here’s one reason:
Brewed Coffee
Coffee enhances chocolate flavor naturally.
The cake will not taste like coffee.
Instead, coffee deepens the chocolate notes and creates a more intense chocolate experience.
You can use:
- Hot brewed coffee
- Strong coffee
- Espresso
- Hot water mixed with espresso powder
If you’re worried about tasting coffee, don’t be.
Most people have no idea it’s included.
They simply notice that the chocolate flavor tastes more pronounced.
Ingredients You’ll Need
For the Chocolate Cake
All-Purpose Flour
Provides structure while keeping the cake soft.
Amount: 2 ½ cups
Granulated Sugar
Adds sweetness and helps retain moisture.
Amount: 2 cups
Dutch-Process Cocoa Powder
Creates deep chocolate flavor.
Amount: 1 cup
Baking Powder
Provides lift.
Amount: 2 teaspoons
Baking Soda
Works with buttermilk to create a lighter texture.
Amount: 1½ teaspoons
Salt
Balances sweetness and enhances chocolate.
Amount: 1 teaspoon
Large Eggs
Room temperature preferred.
Amount: 2
Buttermilk
Adds tenderness and moisture.
Amount: 1 cup
Vegetable Oil
Creates an ultra-moist cake.
Amount: ¾ cup
Vanilla Extract
Rounds out the chocolate flavor.
Amount: 2 teaspoons
Hot Brewed Coffee
Enhances chocolate flavor.
Amount: 1 cup
Equipment You’ll Need
- Two 9-inch cake pans
- Parchment paper
- Mixing bowls
- Stand mixer or hand mixer
- Cooling racks
- Offset spatula
- Cake turntable (optional)
Preparing Your Cake Pans
Proper pan preparation prevents sticking.
- Grease both pans thoroughly.
- Line bottoms with parchment paper.
- Lightly grease parchment.
- Dust with cocoa powder if desired.
This extra step ensures flawless cake release.
Step-by-Step Chocolate Cake Instructions
Step 1: Preheat Oven
Preheat oven to:
350°F (175°C)
Position rack in the center.
Step 2: Mix Dry Ingredients
In a large bowl whisk together:
- Flour
- Cocoa powder
- Sugar
- Baking powder
- Baking soda
- Salt
Whisk thoroughly to eliminate cocoa lumps.
Step 3: Combine Wet Ingredients
In another bowl whisk:
- Eggs
- Buttermilk
- Oil
- Vanilla
Mix until smooth.
Step 4: Combine Wet and Dry
Slowly add wet ingredients to dry ingredients.
Mix until just combined.
Do not overmix.
Overmixing develops gluten and can create a tougher cake.
Step 5: Add Hot Coffee
Slowly pour hot brewed coffee into batter.
The batter will appear thin.
This is normal.
Continue whisking until smooth.
Step 6: Fill Cake Pans
Divide batter evenly between prepared pans.
Tap pans gently on counter to remove air bubbles.
Step 7: Bake
Bake for:
30–35 minutes
The cake is done when:
- Center springs back
- Toothpick comes out with a few moist crumbs
- Internal temperature reaches approximately 205°F
Step 8: Cool
Allow cakes to cool in pans for 15 minutes.
Transfer to cooling racks.
Cool completely before frosting.
The Ultimate Chocolate Buttercream Frosting
This frosting is silky, rich, and perfectly pipeable.
Unlike overly sweet grocery-store frosting, this buttercream balances sweetness with intense chocolate flavor.
Ingredients
- 2 cups unsalted butter, softened
- 1¼ cups cocoa powder
- 5 cups powdered sugar
- ½ cup heavy cream
- 2 teaspoons vanilla extract
- ¼ teaspoon salt
Instructions
Step 1
Beat butter for 4–5 minutes until light and fluffy.
Step 2
Add cocoa powder gradually.
Beat until fully incorporated.
Step 3
Add powdered sugar one cup at a time.
Alternate with cream.
Step 4
Add vanilla and salt.
Beat for another 3–5 minutes.
The frosting should become silky and fluffy.
Assembling the Cake
Step 1
Level cake layers if necessary.
Step 2
Place first layer on serving plate.
Step 3
Spread approximately 1½ cups frosting evenly.
Step 4
Add second cake layer.
Step 5
Apply crumb coat.
Step 6
Refrigerate 20 minutes.
Step 7
Finish frosting cake.
Step 8
Decorate with:
- Chocolate shavings
- Cocoa dusting
- Chocolate curls
- Sprinkles
- Fresh berries
Tips for Bakery-Style Results
Measure Flour Correctly
Too much flour creates dry cake.
Use the spoon-and-level method.
Never scoop directly from the bag.
Use Room Temperature Ingredients
Room-temperature ingredients combine more evenly.
This creates a smoother batter and softer crumb.
Don’t Overmix
Mix only until ingredients are combined.
Overmixing develops gluten and creates dense cake.
Use Hot Coffee
This is one of the most important tips in the entire recipe.
Hot brewed coffee or hot water mixed with instant espresso powder intensifies chocolate flavor dramatically.
The cake does not taste like coffee.
Instead, the chocolate becomes deeper, richer, and more complex.
This is a bakery trick used in professional kitchens and one of the easiest ways to elevate homemade chocolate cake.
Cool Completely Before Frosting
Warm cakes melt buttercream.
Patience is rewarded here.
Why I Love Baking This Cake in Caraway’s 9-Inch Cake Pans
A great cake recipe deserves great bakeware.
I’ve had excellent results using Caraway’s 9-inch baking pans because they heat evenly and help prevent the hot spots that can lead to uneven baking or dry cake edges. Tap here to shop colors and a generous discount applied at checkout
The naturally slick ceramic-coated surface makes cake release easier, especially when paired with parchment paper. I also love that the pans promote even browning without over-darkening the sides of the cake.
For layer cakes like this one, consistent heat distribution is incredibly important. Even layers mean easier stacking, cleaner decorating, and a more professional-looking finished cake.
Whether you’re baking this chocolate cake, vanilla cake, red velvet cake, or funfetti cake, a quality cake pan can make a noticeable difference in your final results.
Common Mistakes to Avoid
Using Cold Ingredients
Cold ingredients don’t blend properly.
Overbaking
Even a few extra minutes can dry out a cake.
Skipping the Coffee
You’ll lose depth of flavor.
Frosting a Warm Cake
Buttercream will melt and slide.
Not Measuring Properly
Baking is a science. Accuracy matters.
Chocolate Cake Success Every Time
When properly made, this cake delivers everything you, as a chocolate lover, wants:
- Deep chocolate flavor
- Moist crumb
- Rich frosting
- Bakery-quality appearance
- Reliable results
It’s the kind of recipe people request year after year and the cake that disappears first from the dessert table.

A Cake Worth Baking
The texture of this cake isn't complete without the help of hot coffee.
Troubleshooting Your Chocolate Cake
Even experienced bakers occasionally encounter baking issues.
Understanding what went wrong—and why—can help you achieve perfect results every single time.
Why Did My Chocolate Cake Sink in the Middle?
A sunken center is one of the most common cake problems.
Possible causes include:
- Opening the oven door too early
- Underbaking
- Too much baking soda or baking powder
- Overmixing the batter
- Incorrect oven temperature
Pro Tip: Invest in an oven thermometer. Many home ovens run 15–25 degrees hotter or cooler than the display indicates.
Why Is My Chocolate Cake Dry?
Dry cake is usually caused by one of the following:
- Too much flour
- Overbaking
- Not enough fat
- Incorrect ingredient measurements
Remember that chocolate cakes continue baking slightly after they leave the oven.
Remove them when a toothpick has a few moist crumbs attached.
Why Is My Cake Dense?
Dense cake often results from:
- Overmixing
- Expired leavening agents
- Too much flour
- Not enough liquid
Always whisk dry ingredients thoroughly and mix only until ingredients are incorporated.
Why Does My Cake Crumble When Frosting?
Usually this happens because:
- The cake wasn’t cooled completely
- It was overbaked
- The crumb is too dry
Applying a crumb coat before the final layer of frosting helps stabilize the cake.
Why Is My Frosting Grainy?
This usually means:
- Butter was too cold
- Powdered sugar wasn’t fully incorporated
- Frosting wasn’t whipped long enough
Beat butter for several minutes before adding any sugar.
How to Store Chocolate Cake
One of the best things about this recipe is how well it keeps.
Room Temperature
Store covered for:
3–4 days
The cake actually becomes even richer after the first day.
Refrigerator
Store in an airtight container for:
Up to 1 week
Allow slices to come to room temperature before serving.
Freezer
Freeze unfrosted layers:
Up to 3 months
Wrap tightly in:
- Plastic wrap
- Aluminum foil
Then place inside a freezer-safe bag.
How to Freeze Frosted Cake
Yes—you can freeze the entire cake.
Method
- Freeze uncovered for 1 hour.
- Wrap securely.
- Freeze up to 2 months.
Thaw overnight in the refrigerator.
Bring to room temperature before serving.
Chocolate Cake Variations
This recipe is incredibly versatile.
Chocolate Birthday Cake
Add:
- Rainbow sprinkles
- Chocolate sprinkles
- Candles
Perfect for celebrations.
Chocolate Raspberry Cake
Add:
- Raspberry preserves between layers
- Fresh raspberries on top
Chocolate and raspberry are a classic pairing.
Chocolate Strawberry Cake
Layer sliced strawberries between cake layers for a fresh summer dessert.
Chocolate Peanut Butter Cake
Replace chocolate frosting filling with peanut butter buttercream.
A favorite combination for chocolate lovers.
Chocolate Espresso Cake
Increase espresso powder slightly for a deeper mocha flavor.
Ideal for coffee enthusiasts.
Triple Chocolate Cake
Add:
- Chocolate chips
- Chocolate ganache drip
- Chocolate buttercream
Maximum chocolate flavor.
Chocolate Salted Caramel Cake
Add salted caramel between layers.
Top with flaky sea salt.
This variation feels bakery-worthy and sophisticated.
Decorating Ideas
Make this cake simple or elaborate depending on the occasion.
Easy Decorations
- Chocolate curls
- Cocoa powder dusting
- Chocolate sprinkles
- Mini chocolate chips
Elegant Decorations
- Chocolate shards
- Chocolate-covered strawberries
- Fresh berries
- Gold leaf
Birthday Decorations
- Colorful sprinkles
- Chocolate candies
- Birthday candles
- Piped frosting borders
The Best Cocoa Powder for Chocolate Cake
Not all cocoa powders perform the same.
Dutch-Process Cocoa
Best for:
- Deep flavor
- Dark color
- Smooth finish
Produces a bakery-style chocolate cake.
Natural Cocoa Powder
Best for:
- Slightly brighter flavor
- More acidity
- Traditional chocolate taste
Both work, but Dutch-process delivers the richest results.
Why This Chocolate Cake Stays Moist for Days
Many cakes dry out within 24 hours.
This one doesn’t.
That’s because of the combination of:
- Oil
- Buttermilk
- Sugar
- Proper baking temperature
Together these ingredients help retain moisture and softness long after baking.
Frequently Asked Questions
Can I Make This Cake Ahead of Time?
Absolutely.
Bake layers up to 2 days ahead and store wrapped tightly.
Can I Freeze the Layers?
Yes.
Freeze up to 3 months.
Can I Make Cupcakes Instead?
Yes.
This recipe yields approximately:
24–30 cupcakes.
Bake at 350°F for 18–22 minutes.
Can I Use Hot Water Instead of Coffee?
Yes.
However, coffee enhances chocolate flavor significantly.
If possible, use coffee.
Will the Cake Taste Like Coffee?
No.
The coffee simply deepens the chocolate flavor.
Most people never realize it’s included.
Can I Use Espresso Powder?
Absolutely.
Mix espresso powder into hot water.
This creates a similar effect.
Can I Use Whole Milk Instead of Buttermilk?
You can, but the texture won’t be as tender.
What If I Don’t Have Buttermilk?
Make a substitute:
1 cup milk + 1 tablespoon lemon juice or vinegar.
Let sit for 5 minutes.
Can I Make This Cake Gluten-Free?
Yes.
Use a quality 1:1 gluten-free flour blend.
Can I Make This Cake Dairy-Free?
Yes.
Use:
- Dairy-free milk
- Dairy-free butter
- Dairy-free cream
- Dairy-free chocolate
Can I Make It as a Sheet Cake?
Yes.
Bake in a 9×13-inch pan.
Increase baking time to approximately 35–40 minutes.
How Do I Get Flat Cake Layers?
Use cake strips or reduce oven temperature slightly.
Should I Refrigerate the Cake?
Not necessarily.
Room temperature storage works beautifully for several days.
What Chocolate Frosting Is Best?
The chocolate buttercream included in this recipe is my favorite because it’s:
- Rich
- Silky
- Easy to spread
- Easy to pipe
Can I Use Chocolate Ganache Instead?
Absolutely.
Ganache creates an elegant bakery-style finish.
How Do Bakeries Make Chocolate Cake So Moist?
They often use:
- Oil
- Buttermilk
- Coffee
- Proper mixing techniques
This recipe uses all four.
Can I Add Chocolate Chips?
Yes.
Fold in 1 cup mini chocolate chips.
How Do I Make the Cake Even Richer?
Use:
- Dutch-process cocoa
- Espresso powder
- Chocolate ganache
for maximum chocolate flavor.
Why Does This Recipe Use Oil Instead of Butter?
Oil creates a softer, moister crumb and keeps cakes fresh longer.
Can I Turn This into a Three-Layer Cake?
Yes.
Divide batter among three 8-inch pans.
Adjust baking time accordingly.
Can I Add Filling Between Layers?
Absolutely.
Popular fillings include:
- Raspberry preserves
- Chocolate ganache
- Salted caramel
- Peanut butter frosting
How Long Does Frosting Last?
Stored properly:
Up to 1 week refrigerated.
Serving Suggestions
Serve this chocolate cake with:
- Fresh berries
- Vanilla ice cream
- Whipped cream
- Hot coffee
- Cold milk
The contrast of rich chocolate and fresh fruit is especially delicious.
For More Recipes
More Chocolate Desserts
Classic Cake Recipes
- Eggless Vanilla Cake
- Almond Coconut Peach Cake
- Cinnamon Roll Cake
- Carrot Cake
- Mini Chocolate Bundt Cakes
Frosting Recipes
Chocolate Cake Recipe With Chocolate Frosting
Ingredients
Chocolate Cake
- 2½ cups all-purpose flour or gluten-free flour
- 2 cups granulated sugar
- 1 cup Dutch-process cocoa powder or unsweetened cocoa powder
- 2 tsp baking powder
- 1½ tsp baking soda
- 1 tsp salt
- 2 large eggs room temperature
- 1 cup buttermilk room temperature
- ¾ cup vegetable oil
- 2 tsp vanilla extract
- 1 cup hot brewed coffee
Chocolate Buttercream
- 2 cups unsalted butter softened, room temperature
- 1¼ cup cocoa powder
- 5 cups powdered sugar
- ½ cup heavy cream room temperature
- 2 tsp vanilla extract
- ¼ tsp salt
Instructions
For The Cake
- Preheat your oven to 350℉. Position your rack in the center. Spray and line two 9" baking pans. Seta side.
- In a large bowl, whisk flour, cocoa powder, sugar, baking powder, baking soda, and salt.
- In another bowl, whisk eggs, buttermilk, oil, and vanilla until smooth.
- Slowly add the wet ingredients to the dry ingredients. Mix to combine, but try not to overmix.
- Slowly pour hot brewed coffee into the batter. The batter will thin out.
- Divide the batter evenly between pans. Tap the pans gently to remove the air bubbles.
- Bake for 30-35 minutes. The cake is done when the center bounces back, the toothpick comes out with a few moist crumbs, and the internal temperature reaches 205℉.
- Allow cakes to cool in the pans for 15 minutes before removing.
- Cool completely before frosting.
For The Frosting
- Beat butter for 4–5 minutes until light and fluffy.
- Add cocoa powder gradually. Beat until fully incorporated.
- Add powdered sugar one cup at a time. Alternate with cream.
- Add vanilla and salt. Beat for another 3–5 minutes. The frosting should become silky and fluffy.
Assemble The Cake
- Level cake layers if necessary.
- Place first layer on a serving plate.
- Spread an even layer of frosting on top.
- Add second cake layer.
- Apply the crumb coat around the whole cake and chill for 20 minutes.
- Use remaining frosting to frost the cake. Enjoy!

