Why You’ll Love These Halloween Cheesecake Brownies
Two desserts in one: You get fudgy chocolate brownies and creamy cheesecake without making two separate recipes.
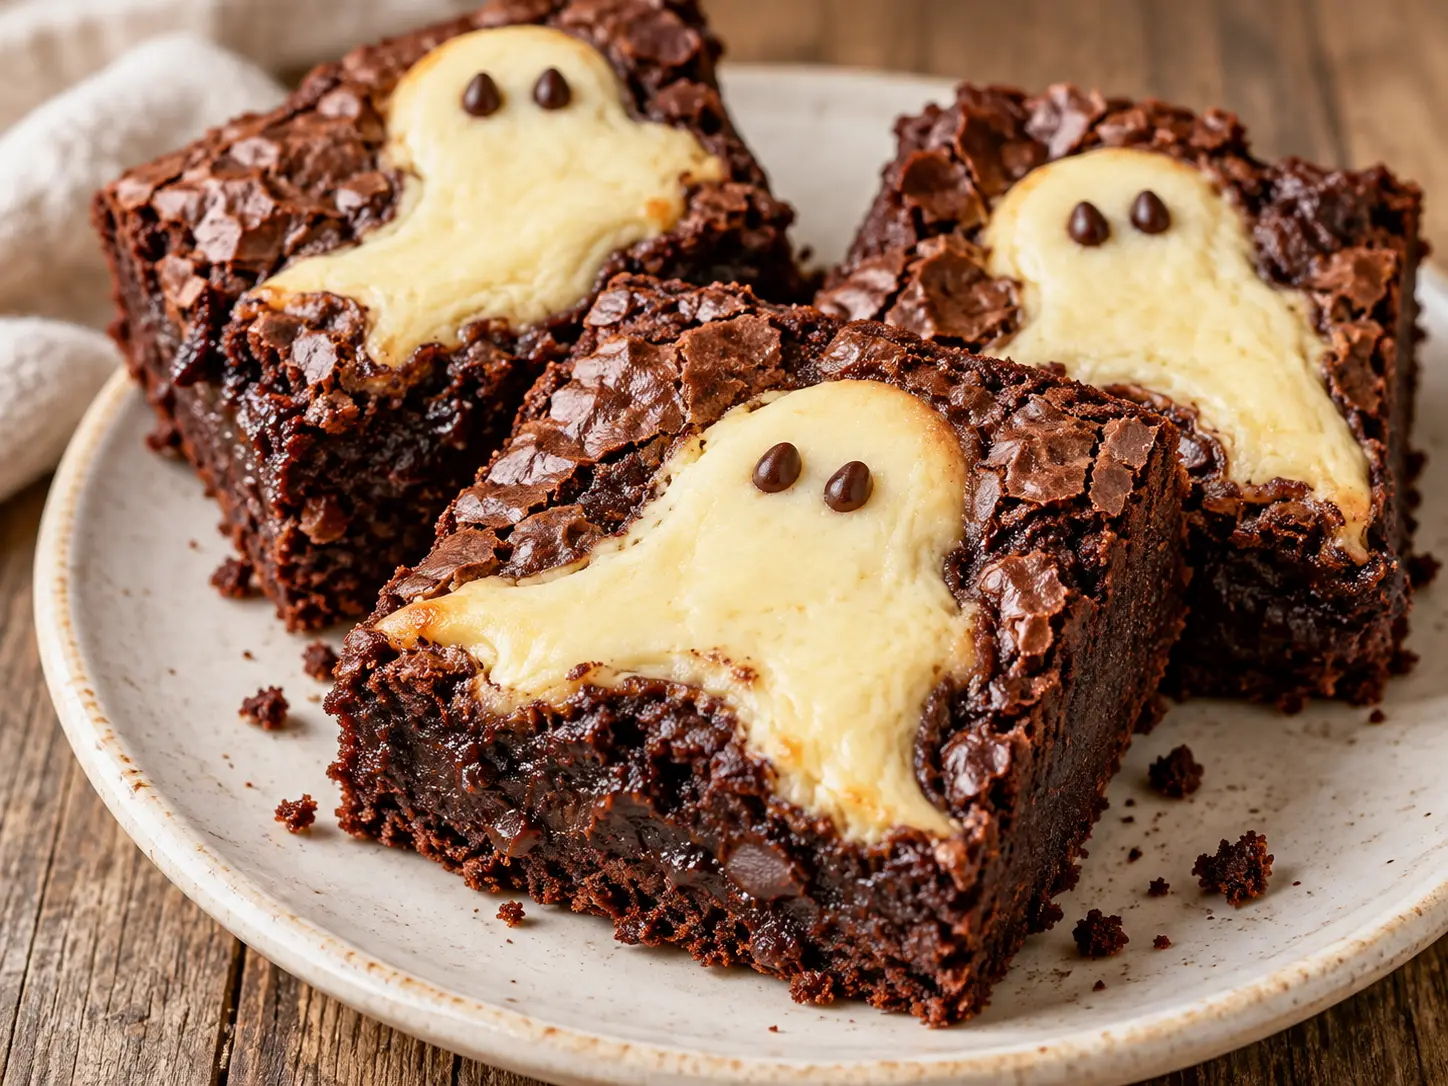
Perfect for Halloween parties: The little cheesecake ghosts make these brownies a fun addition to any spooky dessert spread.
Made completely from scratch: No boxed brownie mix needed.
Rich chocolate flavor: Melted chocolate and cocoa powder create a brownie that’s dense and chocolatey.
Easy to decorate: You don’t need fancy piping skills or complicated frosting.
Make-ahead friendly: These brownies taste wonderful after chilling, making them perfect for party preparation.
Kid-friendly decorating: Little helpers can add the chocolate eyes once the brownies cool.
The Secret to Making Fudgy Ghost Cheesecake Brownies
A good Halloween brownie should still taste like a really good brownie.
That’s why I’m sticking with the same chocolate base from my original cheesecake brownies recipe.
Melted Chocolate and Cocoa Powder
Using both ingredients gives these brownies their deep chocolate flavor.
Melted semisweet chocolate adds richness and helps create that dense, soft center, while cocoa powder gives the brownies an extra chocolate boost.
Brown Sugar Keeps the Brownies Moist
Brown sugar contains molasses, which helps keep baked brownies soft and chewy.
Combined with granulated sugar, it gives the brownie base a rich texture without turning it into chocolate cake.
An Extra Egg Yolk Makes a Difference
My original brownie recipe uses three whole eggs plus one extra egg yolk.
That additional yolk adds richness and helps produce a softer, fudgier brownie.
Thick Cheesecake Batter Holds the Ghost Shapes
The cheesecake mixture needs to be smooth enough to spoon or pipe, but thick enough to hold its shape.
Full-fat cream cheese works best here. Softening the cream cheese before mixing also helps prevent lumps.
Don’t Overbake
This is probably my biggest brownie tip.
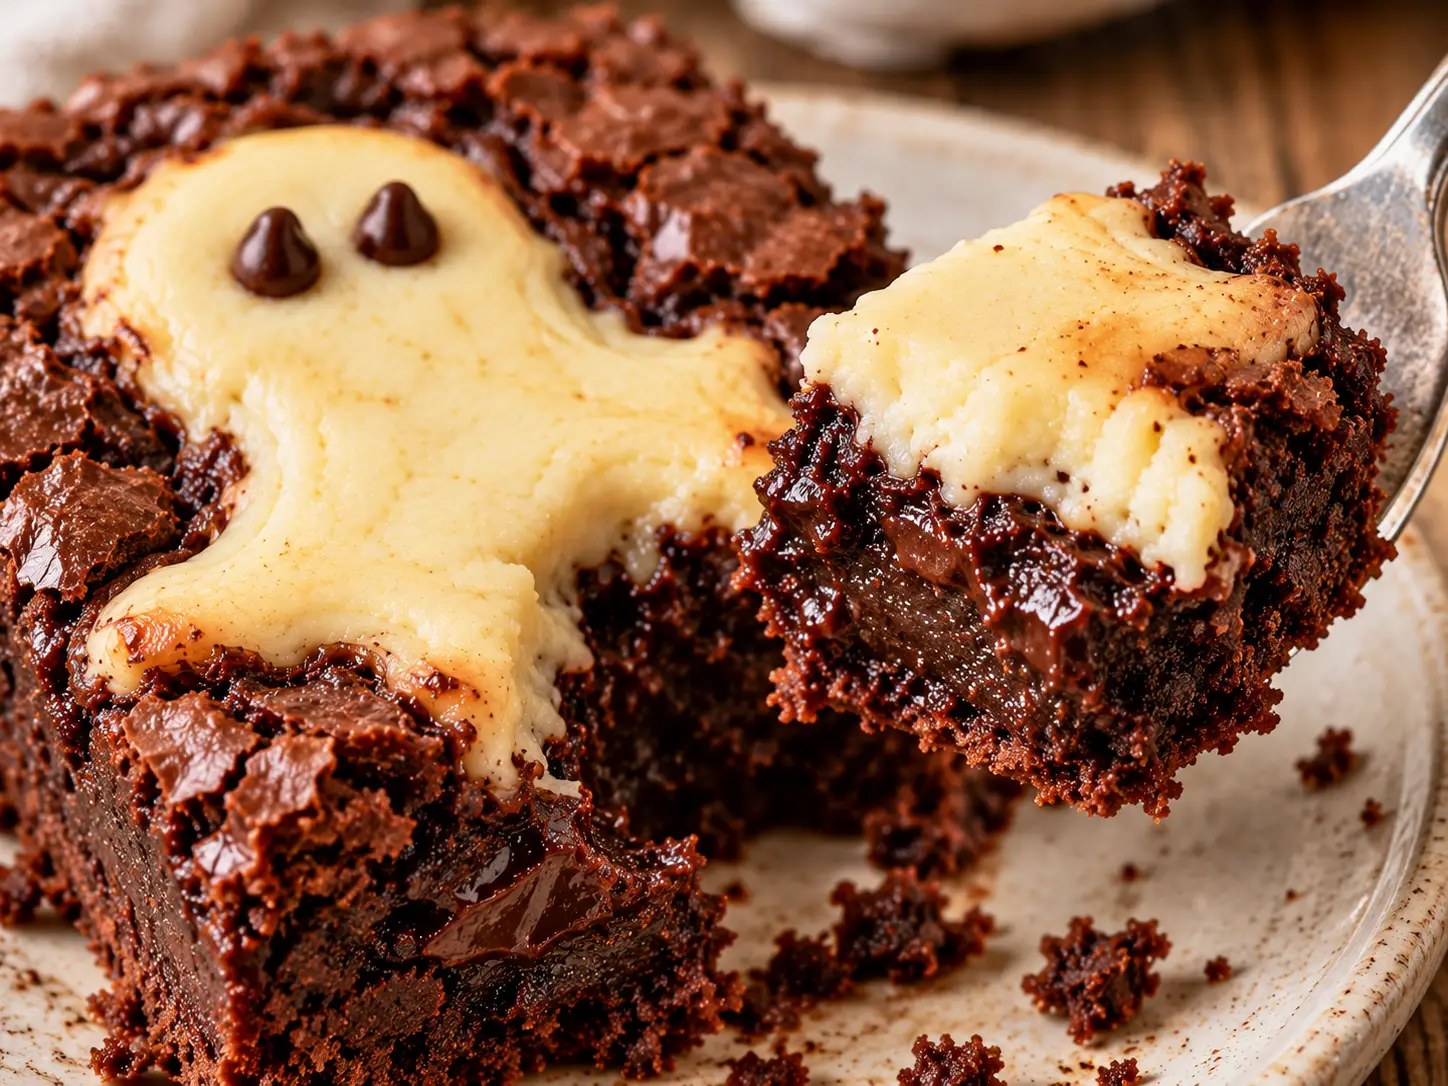
You want the edges set and the middle slightly soft. Brownies continue to firm up as they cool, so waiting until the center is completely dry can leave you with overbaked brownies.
How to Make Ghost Cheesecake Brownies Step by Step
These brownies are made in three parts: preparing the chocolate brownie batter, mixing the cheesecake filling, and shaping the ghosts.
Step 1: Prepare Your Baking Pan
Preheat your oven to 350°F.
Line an 8×8-inch metal baking pan with parchment paper, leaving a little extra hanging over the sides.
Lightly grease the parchment so the brownies release easily after baking.
An 8×8-inch pan gives you thick brownies with plenty of room for the cheesecake ghosts.
Step 2: Melt the Butter and Chocolate
Place the unsalted butter and chopped semisweet chocolate into a microwave-safe bowl.
Microwave in 20-second intervals, stirring between each, until the chocolate is completely melted and smooth.
Let the mixture cool for a few minutes before adding it to the eggs.
You want the chocolate warm and fluid, but not hot enough to cook the eggs.
Step 3: Whisk the Eggs and Sugars
In a separate large mixing bowl, combine the granulated sugar, brown sugar, three eggs, extra egg yolk, and vanilla extract.
Whisk vigorously for approximately 2 to 3 minutes.
The mixture should look slightly thicker and glossy.
This step helps dissolve some of the sugar and contributes to that classic shiny brownie surface.
Step 4: Add the Melted Chocolate
Slowly pour the cooled chocolate mixture into the egg and sugar mixture while whisking.
Continue mixing until everything is combined and the batter looks thick and glossy.
Step 5: Fold in the Dry Ingredients
Add the all-purpose flour, cocoa powder, salt, and optional espresso powder.
Using a spatula, gently fold the dry ingredients into the chocolate mixture until no dry flour remains.
Avoid overmixing. Too much mixing after adding the flour can make the brownies tougher and less fudgy.
The finished brownie batter should be thick and spreadable.
Step 6: Make the Cheesecake Filling
In a separate bowl, beat the softened cream cheese until smooth.
Add the granulated sugar, egg, and vanilla extract.
Mix on low speed until creamy and completely combined.
Avoid whipping too much air into the filling because that can cause the cheesecake ghosts to puff up and crack during baking.
Step 7: Spread the Brownie Batter
Transfer the chocolate brownie batter into your prepared baking pan.
Use an offset spatula or the back of a spoon to spread it evenly into the corners.
Unlike my traditional cheesecake swirl brownies, we’re keeping the chocolate layer underneath and placing the cheesecake mixture on top.
This gives the ghosts a darker background so their shapes stand out.
Step 8: Create the Cheesecake Ghosts
This is the fun part!
Transfer the cheesecake mixture into a piping bag or a zip-top bag with one corner snipped off.
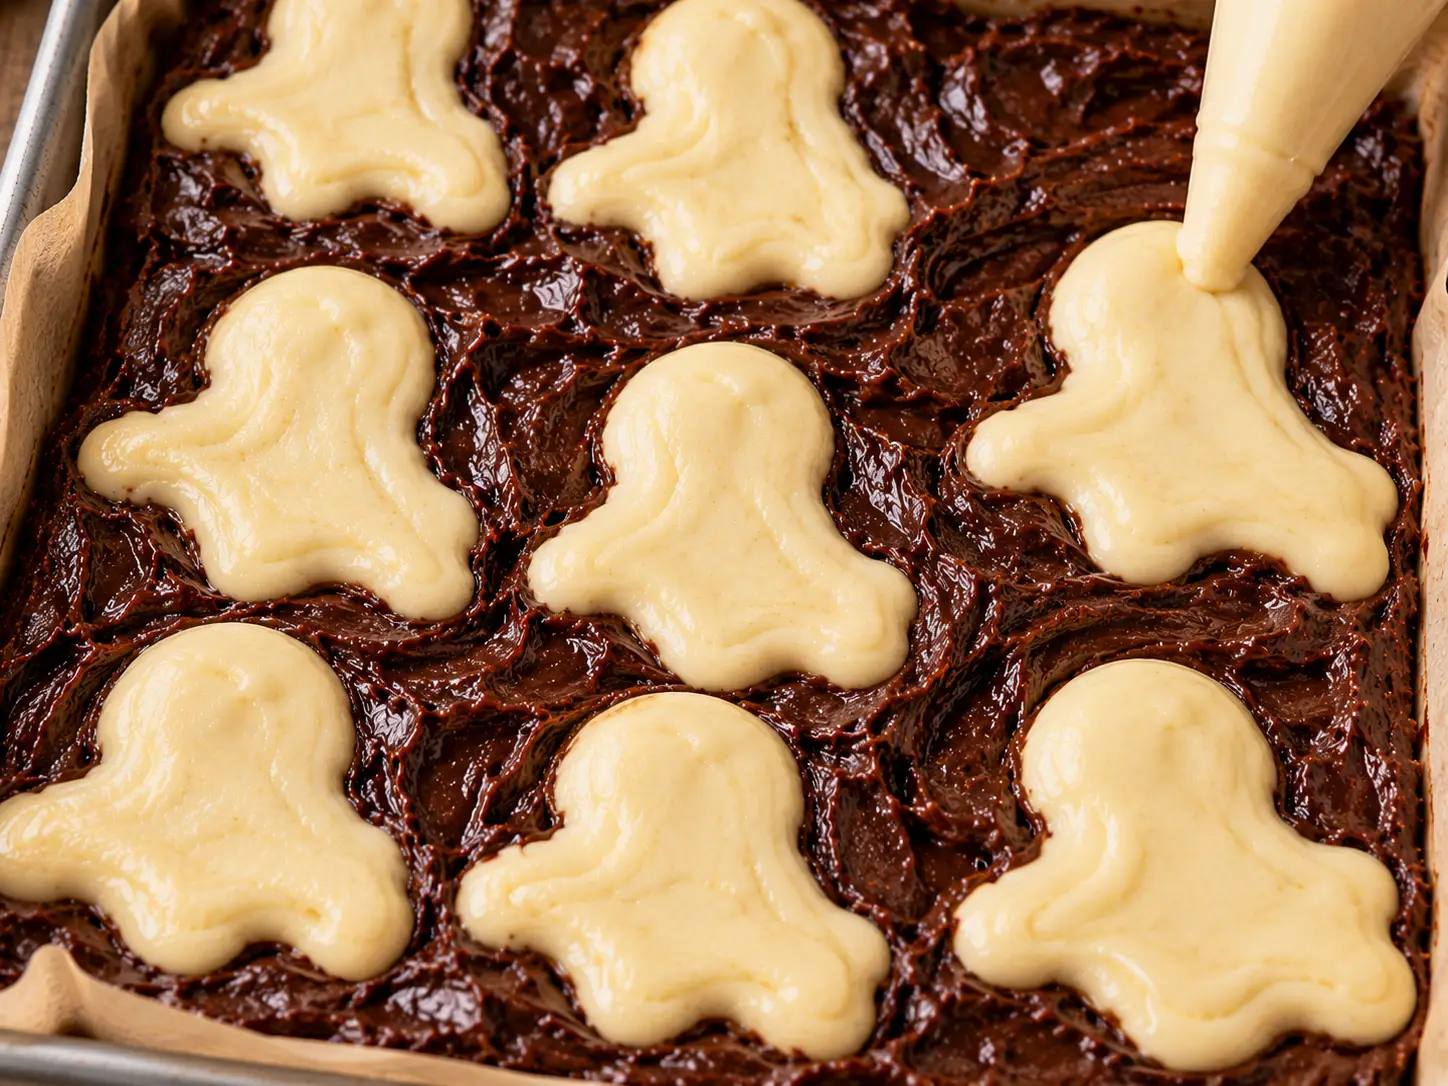
Pipe small, rounded portions of cheesecake batter onto the chocolate brownie surface.
Start with a rounded head and gently move downward to create a slightly wider, wavy ghost body.
You can also use a spoon to drop small amounts of cheesecake mixture onto the brownie batter, then drag the bottom gently with a toothpick to create a ghostly tail.
My tip: Leave a little space between each ghost because the cheesecake can spread slightly as it bakes.
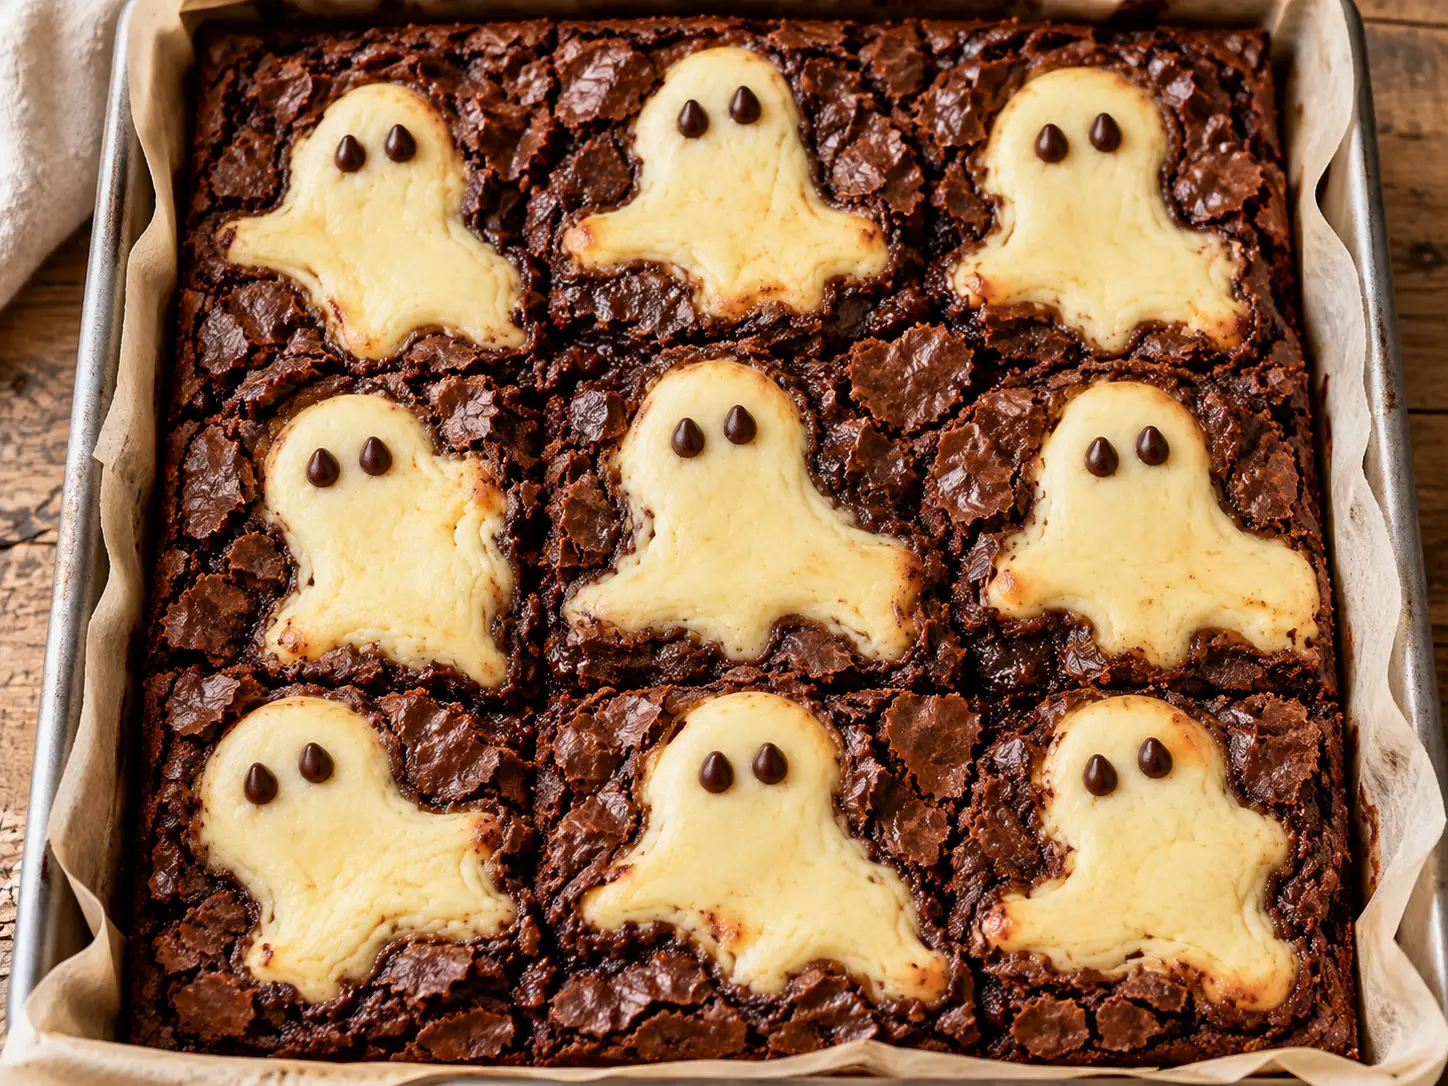
For an 8×8-inch pan, aim for nine ghosts arranged in three rows of three.
You may have some cheesecake mixture left over, depending on how large you make your ghosts. Don’t force all the filling onto the surface or the shapes may run together. You can refrigerate the extra mixture and bake it separately in a small greased, oven-safe ramekin until set.
Step 9: Bake the Ghost Cheesecake Brownies
Place the pan in the preheated oven and bake for approximately 38 to 45 minutes.
Because the cheesecake is arranged differently from the original swirled recipe, start checking around 35 minutes. The exact time may vary.
Look for these signs:
The brownie edges are set.
The cheesecake ghosts no longer look wet or liquid.
The center has a slight movement when gently shaken.
A toothpick inserted into a chocolate-only section comes out with moist crumbs rather than raw batter.
Don’t wait for a completely clean toothpick.
Step 10: Cool and Add the Ghost Faces
Allow the brownies to cool completely in the pan.
Refrigerate for at least 1 to 2 hours before decorating and slicing.
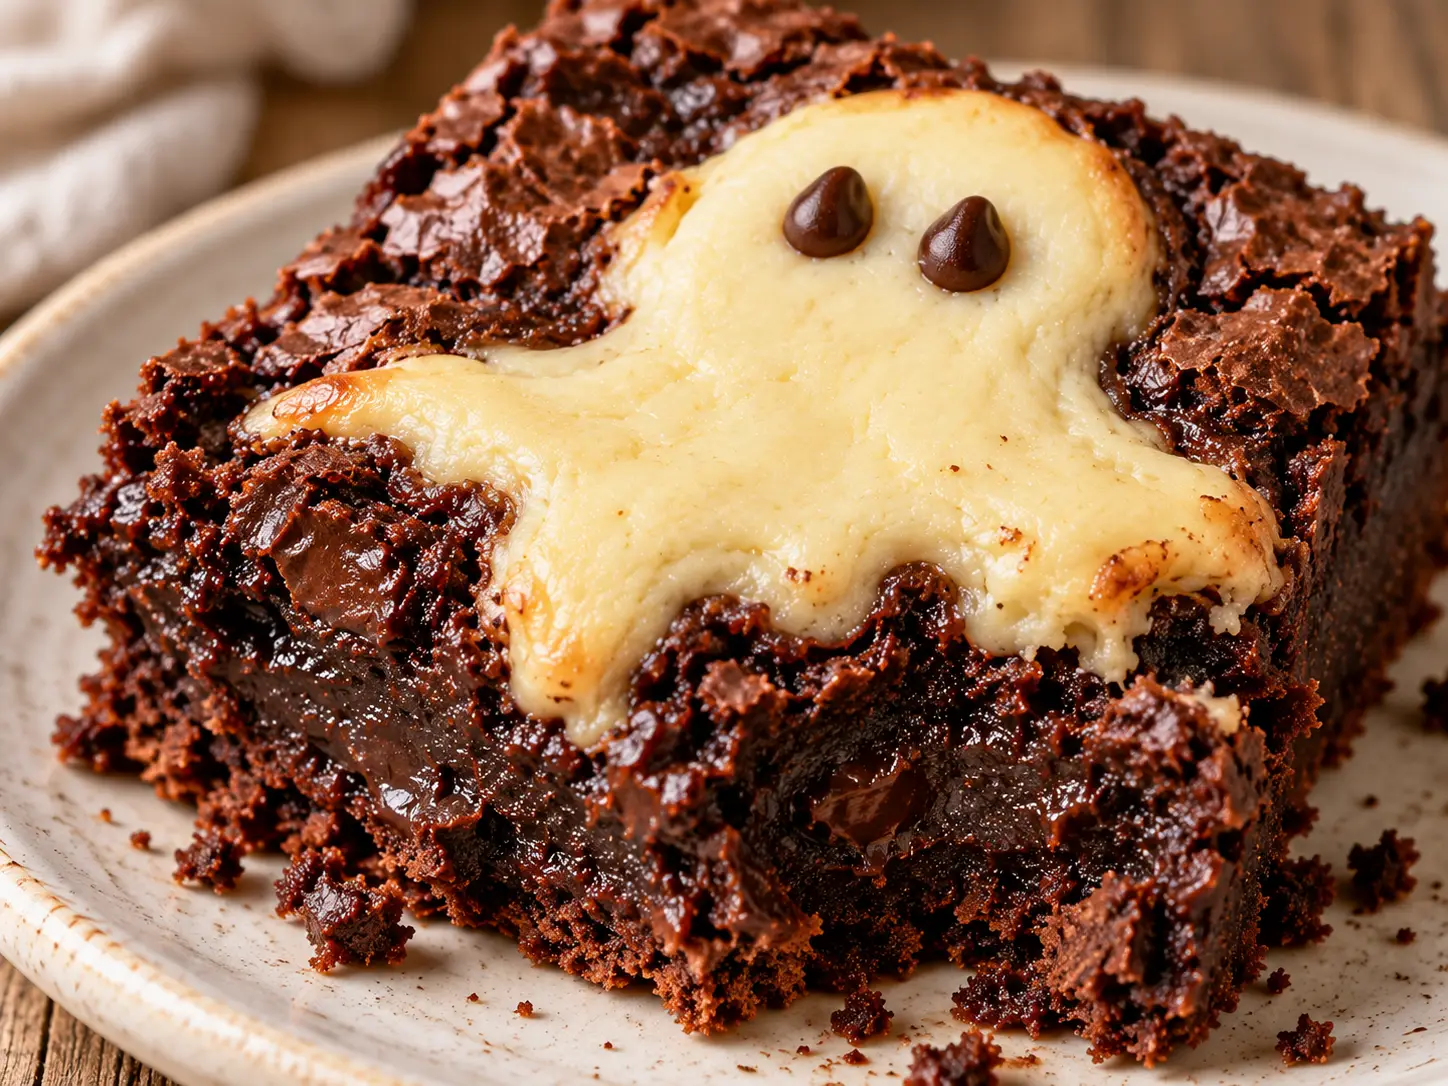
Once chilled, melt a small amount of dark chocolate and use a toothpick to place two tiny eyes on each cheesecake ghost.
If you want a surprised-looking ghost, add a tiny oval mouth underneath the eyes.
Let the chocolate set before cutting.
Important: I recommend adding the chocolate faces after baking. This keeps the eyes dark and defined instead of letting them melt or shift in the oven.
Step 11: Slice and Serve
Lift the chilled brownies out of the pan using the parchment paper.
Cut them into nine large squares, ideally with one ghost centered on each brownie.
For smaller party portions, you can cut the brownies into 16 pieces, although some pieces may not have a complete ghost.
Use a sharp knife, wiping it clean between cuts for neat edges.
How to Make Cheesecake Ghosts That Keep Their Shape
Getting those cute little ghosts right is easier than you might think, but there are a few things worth knowing.
Use Softened, Not Melted, Cream Cheese
Your cream cheese should be soft enough to mix smoothly but not warm or runny.
If it becomes too soft, refrigerate the finished cheesecake mixture briefly before piping.
Keep the Ghosts Small
Large cheesecake ghosts are more likely to spread and lose their shape.
Smaller ghosts with rounded heads and slightly wavy bottoms tend to look better once baked.
Don’t Press the Cheesecake into the Brownie Batter
Pipe the ghosts gently onto the surface rather than pushing the piping bag down into the chocolate.
You want the white cheesecake to remain visible on top.
Avoid Overworking the Shapes
Once you have a recognizable ghost shape, leave it alone.
Too much dragging or swirling can mix the cheesecake into the brownie batter.
Add the Eyes After Baking
Chocolate eyes added after baking will look darker, cleaner, and more defined.
Common Mistakes to Avoid
Brownies That Turn Out Dry
The most common reason is overbaking.
Start checking before the full baking time is up, especially if your oven runs hot.
Cheesecake Ghosts That Spread Too Much
This usually happens when the cream cheese mixture is too warm, the filling is overmixed, or too much cheesecake is piped into one spot.
Chilling the filling briefly can help it hold its shape.
Cheesecake Ghosts That Crack
Overmixing the cheesecake filling or baking it too long can cause cracks.
Mix the ingredients just until smooth and remove the brownies once the filling is set.
Brownies That Fall Apart When Sliced
Warm cheesecake brownies are much softer than chilled brownies.
Give them enough time to cool and refrigerate before cutting.
Ghosts That Disappear into the Brownie Batter
If you drag the cheesecake mixture too deeply into the brownie batter, the ghosts can lose their definition.
Keep the cheesecake sitting on the surface and shape it gently.
Can You Make Ghost Cheesecake Brownies with Boxed Brownie Mix?
Absolutely!
If you’re short on time, you can make a quicker version using your favorite boxed brownie mix.
Prepare the brownie batter according to the package directions for an 8×8-inch pan.
Then prepare the homemade cheesecake filling from this recipe and pipe the ghosts over the top.
Because boxed brownie mixes vary in thickness and baking time, follow the package temperature and begin checking for doneness near the recommended baking time. The cheesecake topping may require additional time.
For the richest flavor and best homemade texture, though, I recommend using the original brownie recipe.
Fun Halloween Brownie Variations
Oreo Ghost Cheesecake Brownies
Add crushed chocolate sandwich cookies to the brownie batter before baking.
The cookies add a little crunch and make the brownies even more chocolatey.
Gluten-Free Ghost Brownies
Replace the all-purpose flour with a 1:1 gluten-free baking flour blend.
Choose a blend intended for direct substitution and make sure your chocolate and decorations are gluten-free if needed.
Extra Chocolate Ghost Brownies
Fold ½ cup of semisweet chocolate chips into the brownie batter before spreading it into the pan.
This creates little pockets of melted chocolate throughout the brownies.
Peanut Butter Ghost Brownies
Add small spoonfuls of peanut butter beneath the cheesecake ghosts.
Keep the peanut butter away from the outer edges of the ghosts so the white shapes stay visible.
Mini Ghost Cheesecake Brownie Bites
Use a lined muffin pan to make individual Halloween brownie bites.
Add brownie batter to each liner, then pipe a small cheesecake ghost on top.
Because these are smaller, they will bake faster than a full pan. Start checking around 18 to 22 minutes, adjusting as needed.
How to Serve Ghost Cheesecake Brownies for Halloween
These spooky brownies are cute enough to be the centerpiece of a Halloween dessert table.
I love serving them on a simple white or dark ceramic platter so the little cheesecake ghosts stand out.
You can pair them with Halloween cookies, chocolate-covered pretzels, candy corn, or other homemade Halloween treats.
For a Halloween party, arrange the brownies on a large serving board with a few small pumpkins nearby.
If you’re making them for kids, cut the brownies into smaller portions and use extra chocolate eyes to give each piece its own ghost face.
Because these contain cream cheese, keep them refrigerated until shortly before serving and avoid leaving them out for more than two hours.
How to Store Ghost Cheesecake Brownies
Refrigerator
Store the brownies in an airtight container in the refrigerator for up to 5 days.
Place parchment paper between layers to prevent the decorations from sticking.
For a softer brownie texture, let them sit at room temperature for about 10 to 15 minutes before serving.
Freezer
These Halloween cheesecake brownies can be frozen for up to 2 months.
First, refrigerate them until completely chilled.
Wrap individual brownies tightly and place them in a freezer-safe container.
For the prettiest presentation, freeze the brownies before adding the chocolate faces and decorate after thawing.
Thawing
Transfer frozen brownies to the refrigerator and allow them to thaw overnight.
Avoid microwaving decorated brownies because the chocolate eyes may melt.
Can You Make Ghost Cheesecake Brownies Ahead of Time?
Yes, and I actually prefer making cheesecake brownies ahead of time.
The brownie layer firms up as it chills, while the cheesecake becomes easier to slice.
You can bake the brownies the day before your Halloween party, refrigerate them overnight, and add the chocolate ghost faces the next morning.
This makes party preparation so much easier, especially if you’re making several Halloween desserts.
More Halloween Recipes to Try
If you’re planning a Halloween party or just love making spooky treats, here are a few more recipes from my blog to add to your baking list.
Frequently Asked Questions About Ghost Cheesecake Brownies
What are ghost cheesecake brownies made of?
Ghost cheesecake brownies are made with a rich chocolate brownie base and a creamy cheesecake topping shaped into little ghosts. The brownie layer typically contains butter, chocolate, cocoa powder, sugar, eggs, and flour, while the ghosts are made from cream cheese, sugar, egg, and vanilla.
How do you make ghosts on brownies?
To make cheesecake ghosts on brownies, spoon or pipe thick cheesecake batter onto the surface of unbaked chocolate brownie batter. Shape each portion into a rounded head with a slightly wavy bottom. Bake until the cheesecake is set, then add chocolate eyes after the brownies have cooled.
Can I use boxed brownie mix for Halloween cheesecake brownies?
Yes. Prepare your favorite boxed brownie mix according to the package directions, then add homemade cheesecake ghosts on top before baking. You may need to adjust the baking time depending on the brownie mix and pan size.
How do you keep cheesecake ghosts from spreading?
Use softened but not overly warm cream cheese, avoid overmixing the cheesecake batter, and keep the ghost shapes relatively small. If the filling seems too soft, refrigerate it briefly before piping.
Can I make ghost cheesecake brownies without a piping bag?
Absolutely. A small spoon works just fine. Drop little portions of cheesecake filling onto the brownie batter, then gently drag the bottom of each portion with a toothpick to create a ghost shape.
Do cheesecake brownies need to be refrigerated?
Yes. Because these brownies contain a baked cream cheese filling, they should be stored in an airtight container in the refrigerator. They will keep for up to 5 days.
Can I freeze ghost cheesecake brownies?
Yes. Allow the brownies to cool completely, then wrap them individually and freeze for up to 2 months. For the best appearance, add the chocolate faces after thawing.
Why are my cheesecake brownies still gooey in the middle?
Cheesecake brownies naturally have a softer center than regular cake-like brownies. However, the middle should not be liquid or contain raw batter. If the center looks very wet, continue baking in short intervals and check again.
How do I know when ghost cheesecake brownies are done?
The edges should be set, the cheesecake ghosts should look firm rather than wet, and a toothpick inserted into a chocolate section should come out with moist crumbs. A slight softness in the center is normal.
Can I make ghost cheesecake brownies gluten-free?
Yes. Substitute the all-purpose flour with a 1:1 gluten-free baking flour blend. Check that your chocolate and decorations are gluten-free as well.
Can I use low-fat cream cheese?
Full-fat cream cheese is recommended because it creates a thicker, creamier cheesecake filling. Lower-fat cream cheese may produce a softer topping that spreads more during baking.
Can I make these Halloween brownies the night before?
Yes. In fact, making them the night before is a great option because the brownies have plenty of time to cool and firm up in the refrigerator. Add the chocolate faces before serving for the cleanest appearance.
How do I cut cheesecake brownies without making a mess?
Refrigerate the brownies until firm, then use a sharp knife warmed under hot water and dried completely. Wipe the blade clean after every cut to keep the chocolate and cheesecake layers looking neat.
Are ghost cheesecake brownies good for Halloween parties?
Definitely! They’re easy to make ahead, simple to serve, and look adorable on a Halloween dessert table. You can make nine large brownies with one ghost per square or cut smaller portions for a crowd.
Can I make ghost cheesecake brownies without eggs?
This particular recipe relies on eggs for both the brownie texture and the cheesecake structure. Removing them would require a different brownie and cheesecake formula, so I wouldn’t recommend leaving them out without using a tested egg-free recipe.