The Best Chocolate Mousse Recipe
The Best Chocolate Mousse Recipe You’ll Ever Make
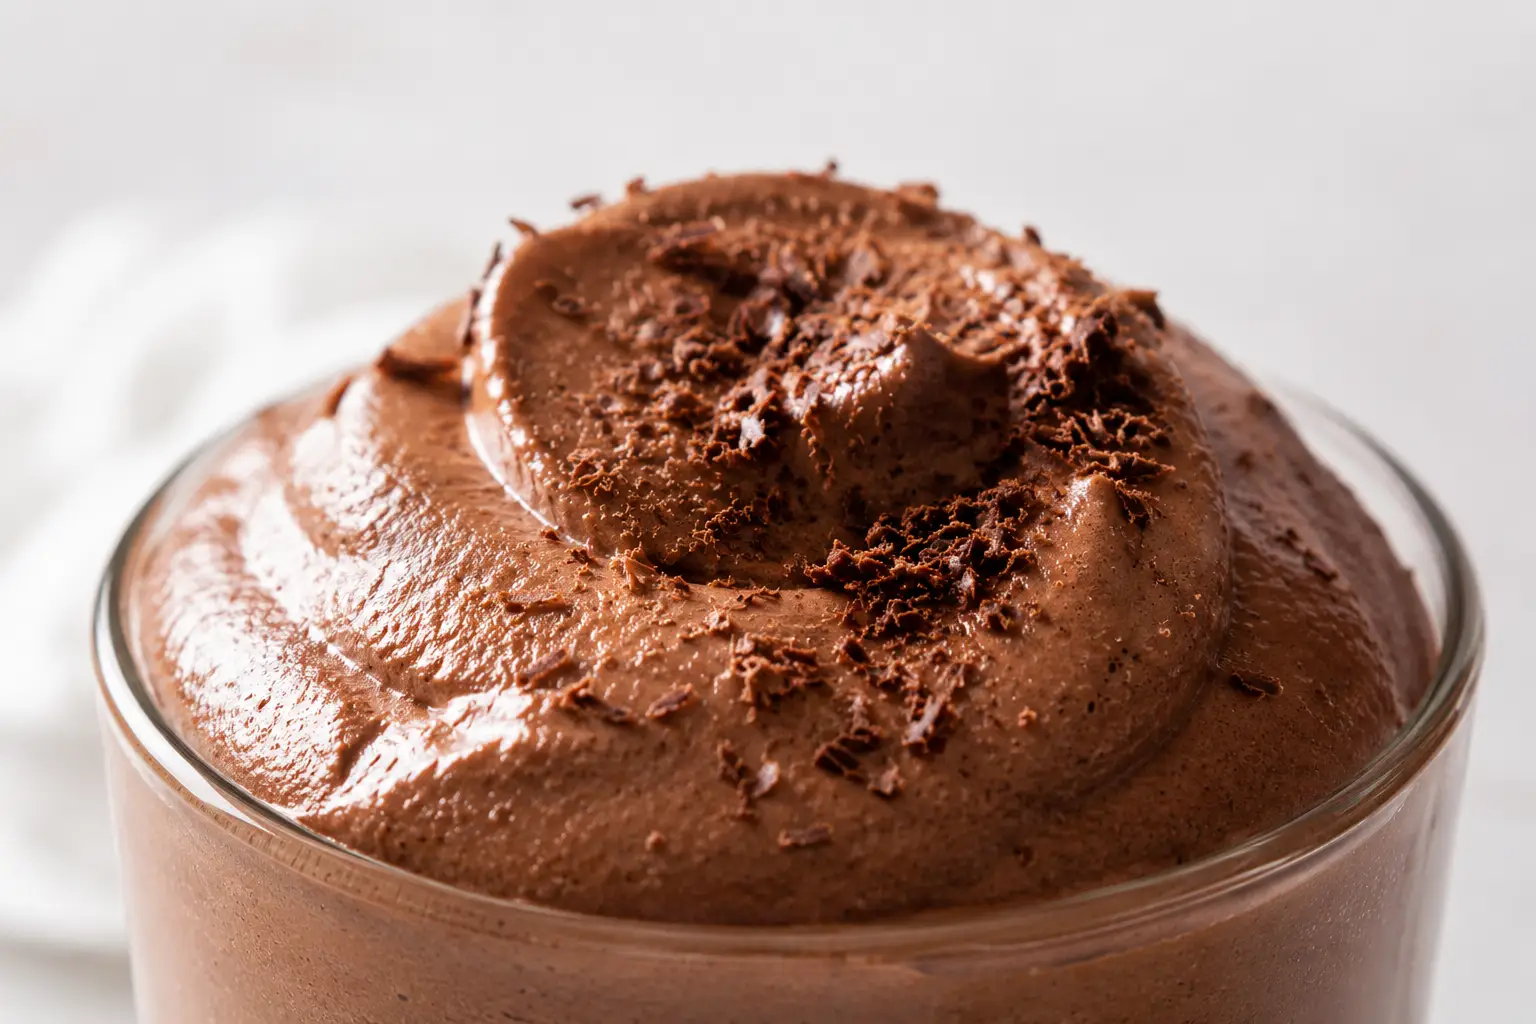
If you have ever ordered chocolate mousse at a fine dining restaurant and wished you could recreate that same silky, luxurious dessert at home, this is the recipe. This homemade chocolate mousse is rich without feeling heavy, deeply chocolatey, unbelievably creamy, and surprisingly easy to make with simple ingredients. Every spoonful melts on your tongue with an airy, cloud-like texture balanced by an intensely rich chocolate flavor.
Whether you are planning an elegant dinner party, a Valentine’s Day dessert, a holiday gathering, or simply craving something chocolatey after dinner, this easy chocolate mousse is guaranteed to impress. It can be made a full day ahead, making entertaining almost effortless. Browse more dessert recipes from Sugar Face Bakes.
Why You’ll Love This Chocolate Mousse Recipe
✔ Rich, luxurious chocolate flavor
✔ Light, airy texture that melts in your mouth
✔ No gelatin required
✔ Easy enough for beginners
✔ Elegant enough for dinner parties
✔ Made with simple ingredients
✔ Make-ahead friendly
✔ Beautifully pipes into dessert glasses
✔ Perfect for holidays and celebrations
✔ Tastes like restaurant-quality mousse
Every bite is smooth, creamy, and balanced—not overly sweet, not overly bitter, just perfectly chocolatey.
What Makes This Chocolate Mousse Better Than the Rest?
Chocolate mousse seems simple, but the smallest details make the biggest difference.
Many recipes become:
- grainy
- dense
- overly sweet
- too airy
- too firm
- overly rich
After countless test batches, I found that the perfect chocolate mousse comes down to balancing four things:
1. Use High-Quality Chocolate
Chocolate is the star of this dessert.
Since there are so few ingredients, the chocolate you choose directly determines how your mousse tastes.
Look for chocolate containing around 60–70% cacao.
This percentage gives:
- rich flavor
- smooth melt
- balanced sweetness
- deep cocoa notes
Avoid chocolate chips whenever possible. They contain stabilizers designed to help them hold their shape while baking, which means they don’t melt as smoothly as baking bars.
Instead, use chopped baking chocolate for the silkiest results.
2. Bloom a Little Dutch Cocoa
Here’s one small upgrade that gives this recipe an edge.
Along with melted chocolate, I whisk in a small amount of Dutch-process cocoa powder.
Why?
It intensifies the chocolate flavor without making the mousse heavier.
The result tastes deeper, richer, and more complex—almost like dark chocolate truffles.
Most classic recipes skip this step, but it’s one of my favorite professional baking tricks.
3. Fold Gently
One of the biggest mistakes people make is stirring instead of folding.
Whipped cream contains thousands of tiny air bubbles.
Those bubbles create the signature light texture of mousse.
Aggressive stirring pops those bubbles, leaving the dessert dense.
Instead:
- Use a rubber spatula.
- Cut down through the center.
- Lift from the bottom.
- Rotate the bowl.
- Repeat slowly.
Patience creates fluffier mousse.
4. Chill Long Enough
Chocolate mousse doesn’t fully develop its texture immediately.
Although it’s delicious after a couple of hours, overnight chilling creates an even silkier consistency and allows the chocolate flavor to deepen beautifully.
If you have the time, make it the day before serving.
What Is Chocolate Mousse?
Chocolate mousse is a classic French dessert known for its airy texture and rich chocolate flavor.
The word mousse means “foam” in French, describing the dessert’s signature lightness.
Traditional French versions often relied on whipped egg whites or whipped egg yolks for volume. Modern recipes frequently use whipped cream, creating a smoother, creamier dessert that’s approachable for home bakers while still delivering luxurious results.
This version offers the best of both worlds: classic elegance with a foolproof method that doesn’t require advanced pastry skills.
Ingredients You’ll Need
- Bittersweet Chocolate, 60-70% cacao (8 ounces), finely chopped: The foundation of the mousse. Use high-quality chocolate bars — not chocolate chips. Chocolate bars melt more smoothly and create a silkier ganache base. Bittersweet at 60% to 70% cacao delivers the most intense, complex flavor without being too bitter or too sweet.
- Cocoa Powder, Dutch-process (1 tablespoon): Added to the chocolate base to intensify the chocolate flavor and deepen the color.
- Espresso Powder (1 teaspoon, optional): Amplifies the chocolate flavor dramatically without making the mousse taste like coffee. This is the same technique used in the Chocolate Cake and Brownies from Scratch.
- Heavy Whipping Cream (2 cups total), divided: Used in two ways: 1/2 cup heated and poured over the chocolate to create the ganache base, and the remaining 1 1/2 cups whipped to medium peaks and folded in for the airy mousse texture. Both portions must be at the right temperature — hot for the ganache, cold for whipping.
- Granulated Sugar (3 tablespoons): Sweetens the whipped cream and balances the bittersweet chocolate.
- Vanilla Extract (1 teaspoon): Adds warmth and rounds out the bittersweet chocolate.
- Sea Salt (for topping): A light sprinkle of flaky sea salt just before serving enhances every other flavor and creates the perfect finishing touch.
Kitchen Equipment
You don’t need any fancy equipment.
Gather:
- Mixing bowls
- Heatproof bowl
- Saucepan
- Rubber spatula
- Fine whisk
- Electric hand mixer or stand mixer
- Kitchen scale (recommended)
- Measuring cups
- Dessert glasses or ramekins
- Offset spatula (optional for presentation)
Step-by-Step Instructions
- Step 1 — Melt the Chocolate: Finely chop 8 ounces of bittersweet chocolate and place in a large heatproof bowl along with the cocoa powder and espresso powder.
- Step 2 — Make the Ganache Base: Heat 1/2 cup of the heavy cream in a small saucepan over medium-low heat until steaming. Do not let it boil. Pour the hot cream over the chocolate. Let it stand for 2 minutes without stirring, then whisk until completely smooth. Stir in the vanilla extract and a pinch of sea salt.
- Step 3 — Cool the Chocolate Base: Allow the chocolate ganache mixture to cool until just lukewarm — warm to the touch but not hot. This is critical. If the chocolate is too hot when the whipped cream is folded in, it will deflate the cream and produce a dense, heavy mousse.
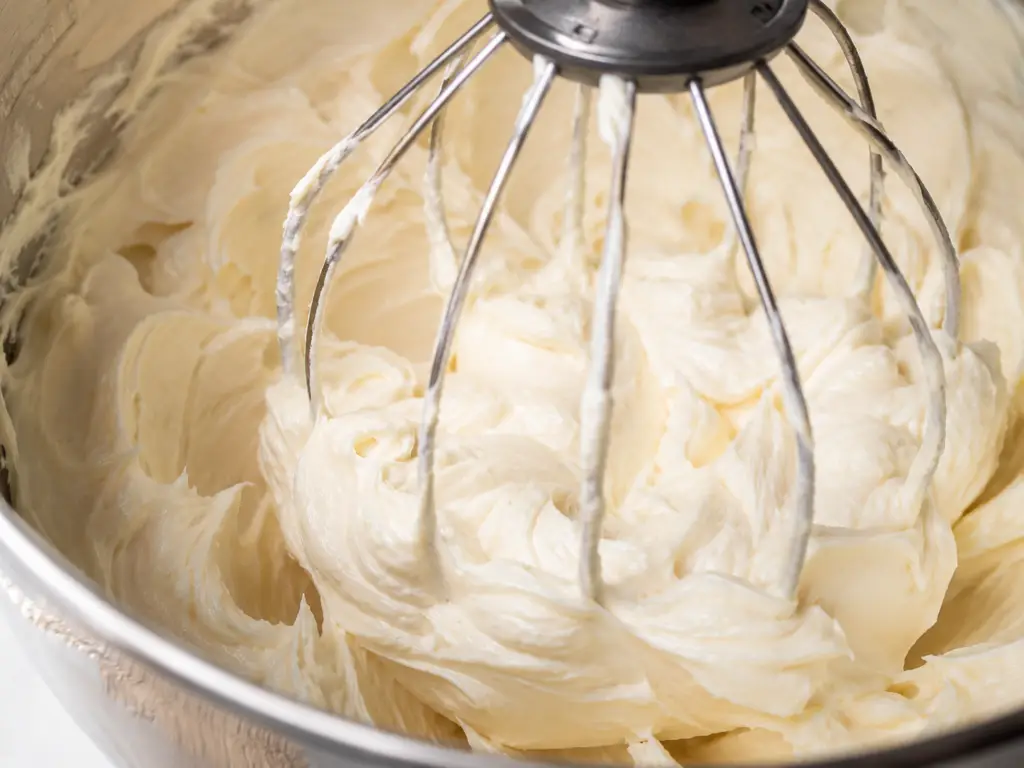
- Step 4 — Whip the Cream: In a chilled mixing bowl, whip the remaining 1 1/2 cups of cold heavy cream with the granulated sugar until medium peaks form. The cream should hold its shape but still have a soft, silky appearance. Do not overwhip — stiff peaks make the mousse dense.
- Step 5 — Fold Together: Fold one-third of the whipped cream into the cooled chocolate base to lighten it. Gently fold in the remaining whipped cream in two additions until no streaks remain. Work gently and patiently — preserve as much air as possible.
- Step 6 — Portion and Chill: Spoon or pipe the mousse into 6 serving glasses or ramekins. Cover and refrigerate for at least 4 hours, or overnight for the best texture and flavor.
- Step 7 — Garnish and Serve: Top with fresh whipped cream, chocolate shavings, a dusting of cocoa powder, or fresh raspberries just before serving.
Pro Tips for the Silkiest Chocolate Mousse
Use a kitchen scale. Measuring chocolate by weight provides more consistent results than measuring by volume.
Let the chocolate cool slightly. If it’s too hot, it can deflate the whipped cream. If it’s too cold, it can harden into tiny bits. Aim for lukewarm.
Don’t rush the folding. Slow, gentle folds preserve the air that gives mousse its signature lightness.
Chill your mixing bowl. Placing the bowl and beaters in the freezer for 10–15 minutes before whipping the cream helps it whip faster and hold more volume.
Choose quality ingredients. Because this dessert has so few components, each one shines. High-quality chocolate, pure vanilla, and fresh heavy cream make a noticeable difference.
My Best Chocolate Mousse Tips
After making this recipe countless times, these are the little tricks that consistently produce bakery-quality results.
Start with Cold Cream
Heavy cream whips best when it’s very cold.
For even better volume, chill your mixing bowl and beaters for 10–15 minutes before whipping.
Don’t Overheat the Chocolate
Chocolate should melt gently.
Too much heat can cause it to become grainy or oily.
Always remove the cream from the heat just before it reaches a boil.
Fold—Don’t Stir
This is the single most important step.
Think of folding as preserving tiny air bubbles instead of mixing ingredients.
Those bubbles create the light, cloud-like texture that makes chocolate mousse so irresistible.
Use Good Chocolate
Since chocolate is the main ingredient, choose one you genuinely enjoy eating on its own.
A quality chocolate bar will always produce better flavor than inexpensive baking chocolate or chocolate chips.
Chill Overnight If Possible
Freshly made mousse is delicious, but overnight chilling transforms it into something extraordinary.
The flavor deepens, the texture becomes silkier, and the mousse sets beautifully.
Common Chocolate Mousse Mistakes
Even simple recipes can go wrong if a few key steps are overlooked.
Grainy Mousse
Usually caused by:
- Chocolate overheating
- Water getting into the chocolate
- Using chocolate chips instead of baking chocolate
Dense Mousse
Usually happens when:
- The whipped cream is overmixed.
- The chocolate is too warm.
- The mousse is stirred instead of folded.
Runny Mousse
Often caused by:
- Under-whipped cream
- Not chilling long enough
- Chocolate not cooling slightly before folding
Chocolate Seized
If your chocolate becomes thick and grainy, it likely overheated or came into contact with water.
Start over with fresh chocolate for the smoothest results.
Delicious Variations
Once you’ve mastered the classic version, try one of these fun twists.
Use 70–72% dark chocolate for a richer, more intense chocolate flavor.
Swap bittersweet chocolate for high-quality milk chocolate and reduce the sugar slightly.
The result is sweeter and especially kid-friendly.
Double the espresso powder and garnish with chocolate-covered espresso beans.
Perfect for coffee lovers.
Add one teaspoon of finely grated orange zest to the chocolate mixture.
Orange and chocolate are a timeless combination.
- Salted Caramel Chocolate Mousse
Layer the mousse with homemade salted caramel sauce for an elegant restaurant-style dessert.
- Peppermint Chocolate Mousse
Mix in a tiny amount of peppermint extract during the holidays and garnish with crushed candy canes.
- Raspberry Chocolate Mousse
Layer fresh raspberry puree between the mousse for a beautiful Valentine’s Day or anniversary dessert.
Serving Ideas
Chocolate mousse is elegant enough to stand on its own, but pairing it with complementary flavors takes it to the next level.
Serve it with:
- Fresh berries
- Homemade whipped cream
- Chocolate wafer cookies
- Biscotti
- Butter cookies
- Shortbread
- Chocolate curls
- Espresso
- Fresh mint
- Toasted almonds
- Crushed pistachios
- Homemade brownie bites
- Chocolate-covered strawberries
It’s equally at home at a casual family dinner or the centerpiece of a holiday dessert table.
Storage
- Fridge: Cover individual glasses or the serving dish with plastic wrap and refrigerate for up to 3 days.
- Freezer: Chocolate mousse can be frozen for up to 1 month. The texture will be slightly denser after thawing. Thaw overnight in the refrigerator before serving.
More Dessert Recipes You’ll Love
If you loved this rich and creamy chocolate mousse recipe, there are plenty more bakery-style desserts waiting for you here at Sugar Face Bakes! Whether you’re planning a holiday dessert table, celebrating a birthday, or simply treating yourself to something sweet, these reader-favorite recipes are guaranteed to satisfy every craving.
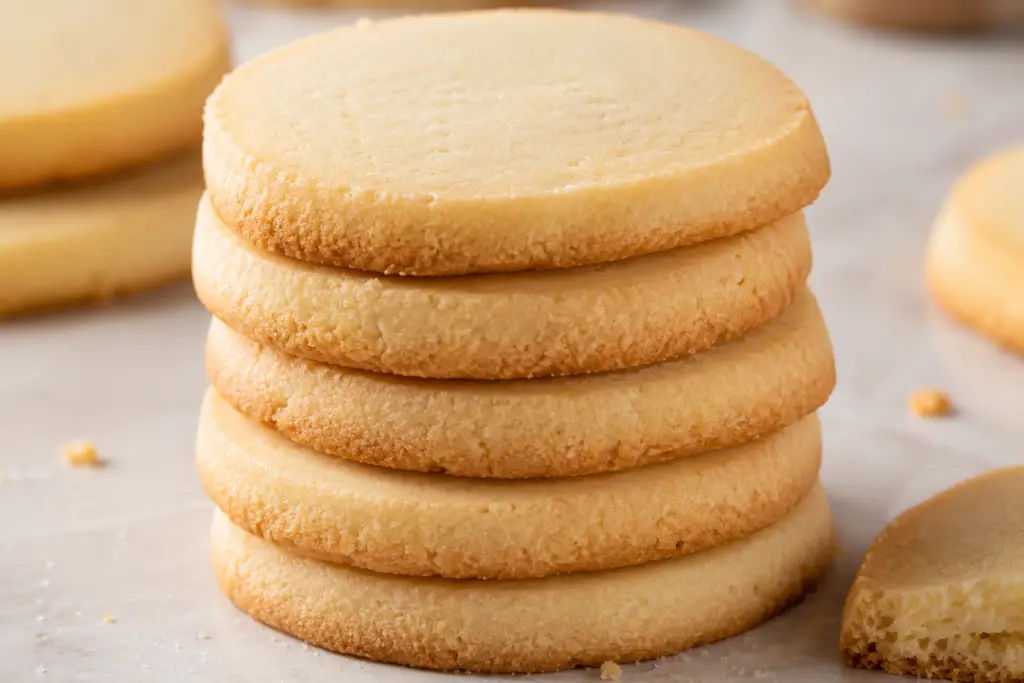
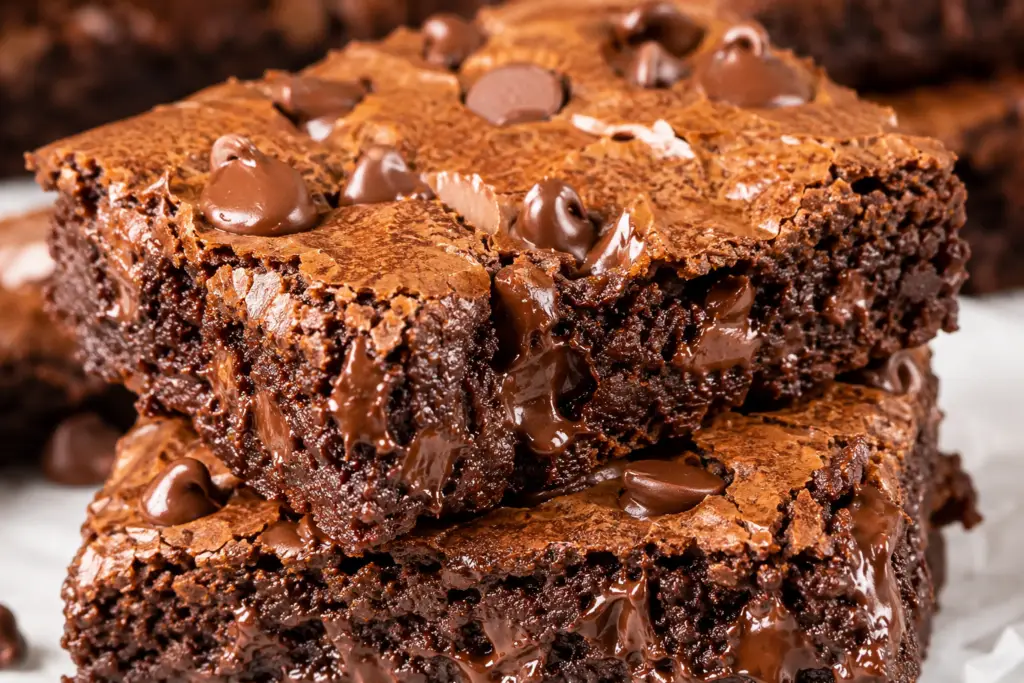
- Homemade Fudgy Brownies – Thick, ultra-fudgy brownies with shiny crinkly tops, rich chocolate flavor, and gooey centers that rival your favorite bakery.
- Classic No-Bake Cheesecake – A silky smooth cheesecake with a buttery graham cracker crust that’s perfect for warm weather and effortless entertaining.
- Chocolate Cheesecake – Rich chocolate filling, an Oreo cookie crust, and a decadent ganache topping make this an unforgettable dessert for chocolate lovers.
- Easy Homemade Tiramisu – Layers of espresso-soaked ladyfingers, creamy mascarpone filling, and cocoa powder create this elegant Italian-inspired favorite.
- Moist Chocolate Cake – Incredibly tender chocolate cake layered with smooth chocolate buttercream for the ultimate celebration dessert.
No matter what you’re baking, you’ll find plenty of easy dessert recipes, homemade cakes, cookies, cheesecakes, and bars to keep your dessert menu fresh all year long. Be sure to browse the full recipe collection—you just might discover your next family favorite!
Caraway Cookware Favorite
One of my favorite kitchen tools for making this recipe is my Caraway ceramic saucepan. It’s perfect for gently warming heavy cream without scorching and melts chocolate beautifully thanks to its even heat distribution. The naturally non-toxic ceramic coating also makes cleanup incredibly easy.
If you’re ready to upgrade your kitchen, you can save on your favorite Caraway cookware/bakeware with my built-in discount applied at checkout.


