How to Make Chocolate Cream Pie
1. Fully bake the pie crust
Heat your oven to 375°F. Fit the pie dough into a 9-inch pie plate, crimp the edges, and chill it for 20 minutes. Line the crust with parchment and fill it with pie weights or dried beans.
Bake for 20 minutes. Carefully lift out the parchment and weights, then bake for another 10 to 15 minutes, until the bottom looks dry and the crust is golden brown. If it puffs while baking, gently press it down with the back of a spoon. Let the crust cool completely.
Why this matters: The chocolate filling won’t go back into the oven. A pale, partly baked crust can turn soft under the custard.
2. Mix the filling ingredients
In a medium, heavy-bottomed saucepan, whisk together the sugar, cocoa powder, cornstarch, and salt. Add the milk gradually, whisking until smooth. Whisk in the egg yolks until fully combined.
Mixing everything while the pan is still cool helps the cornstarch disperse and makes the filling less likely to develop lumps.
3. Cook until thick
Set the saucepan over medium heat. Whisk frequently as the mixture warms, making sure to reach the corners and bottom of the pan. Once it begins to thicken, whisk constantly.
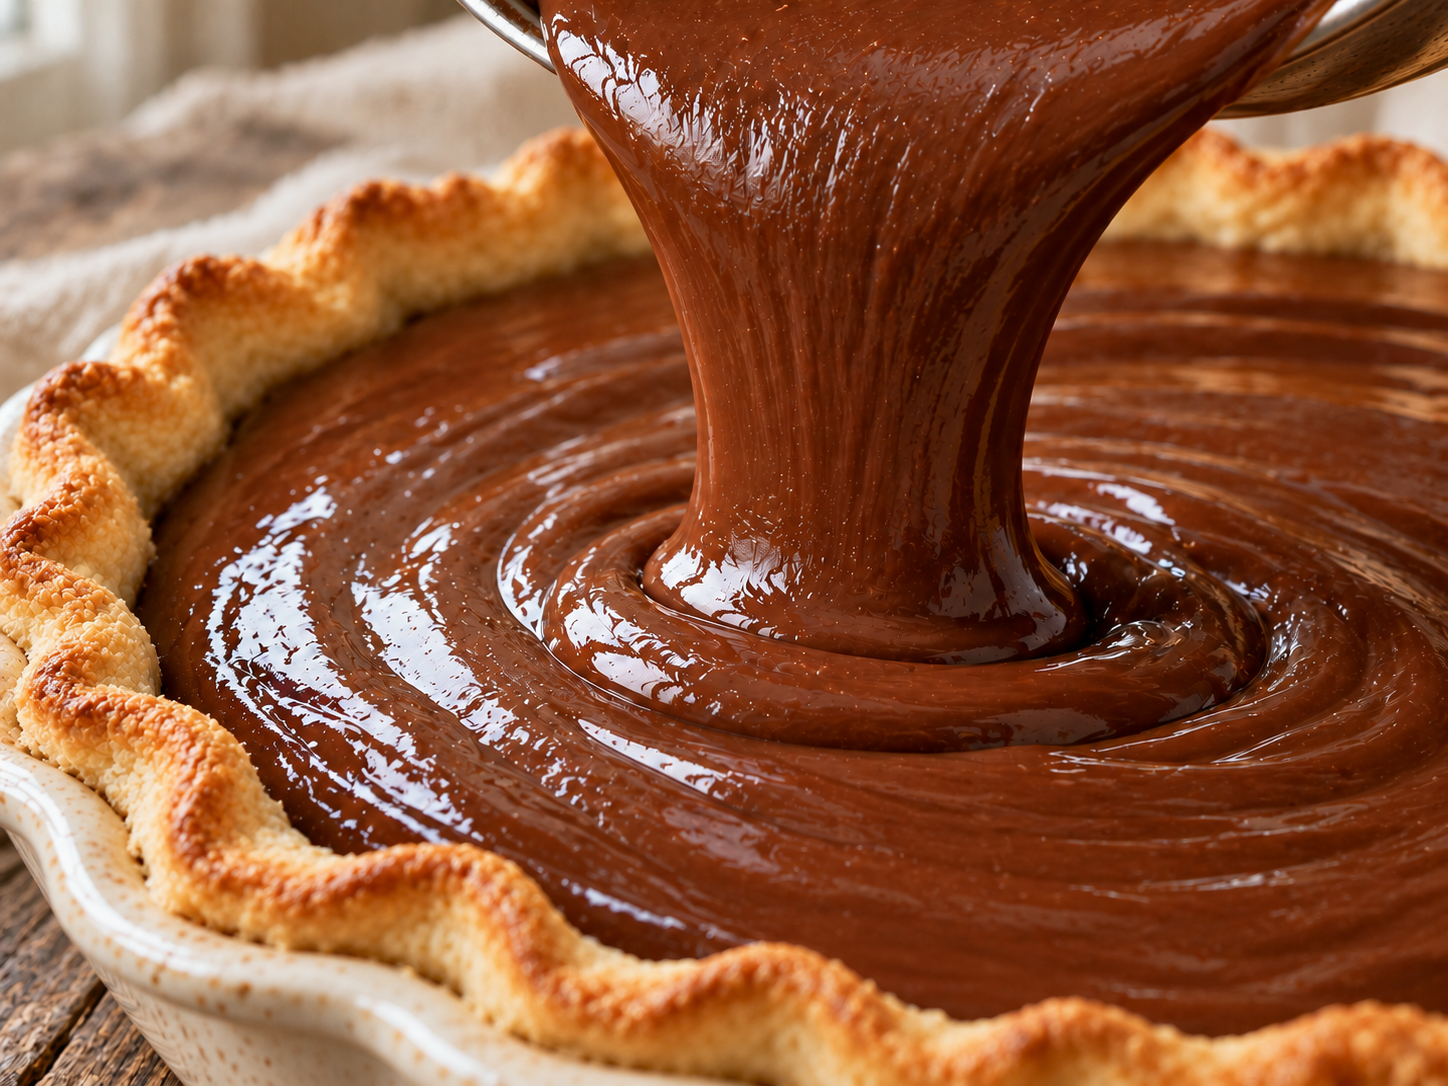
When the filling reaches a steady bubble, continue cooking and whisking for 1 full minute. It should look thick and glossy, and a whisk should leave visible trails through it. If it only looks lightly thickened, keep cooking until it reaches that stage.
4. Add the chocolate
Take the pan off the heat. Add the chopped chocolate, butter, and vanilla. Whisk until the chocolate has melted and the filling is smooth. If you see any lumps, press the filling through a fine-mesh sieve.
5. Fill and chill the pie
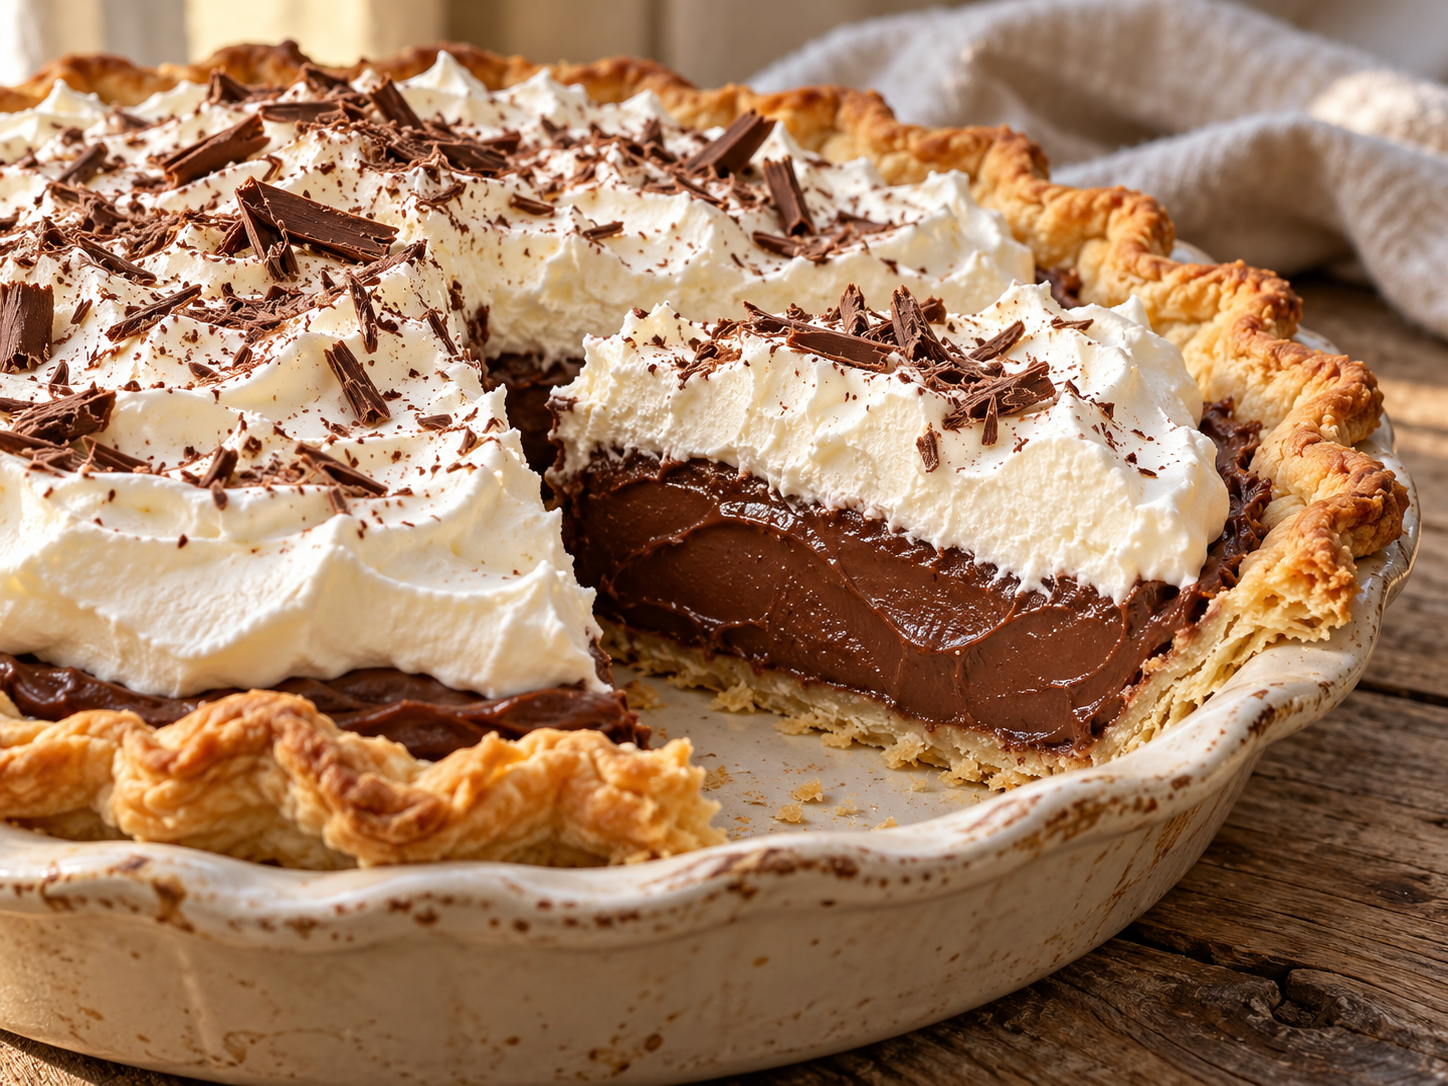
Pour the warm chocolate filling into the cooled crust and smooth the top. Press a piece of plastic wrap directly against the filling to prevent a skin from forming.
Refrigerate for at least 6 hours, preferably overnight, until the filling is completely cold and set.
6. Add the whipped cream
Just before serving, beat the cold heavy cream, powdered sugar, and vanilla until medium peaks form. The cream should hold its shape while still looking soft and smooth.
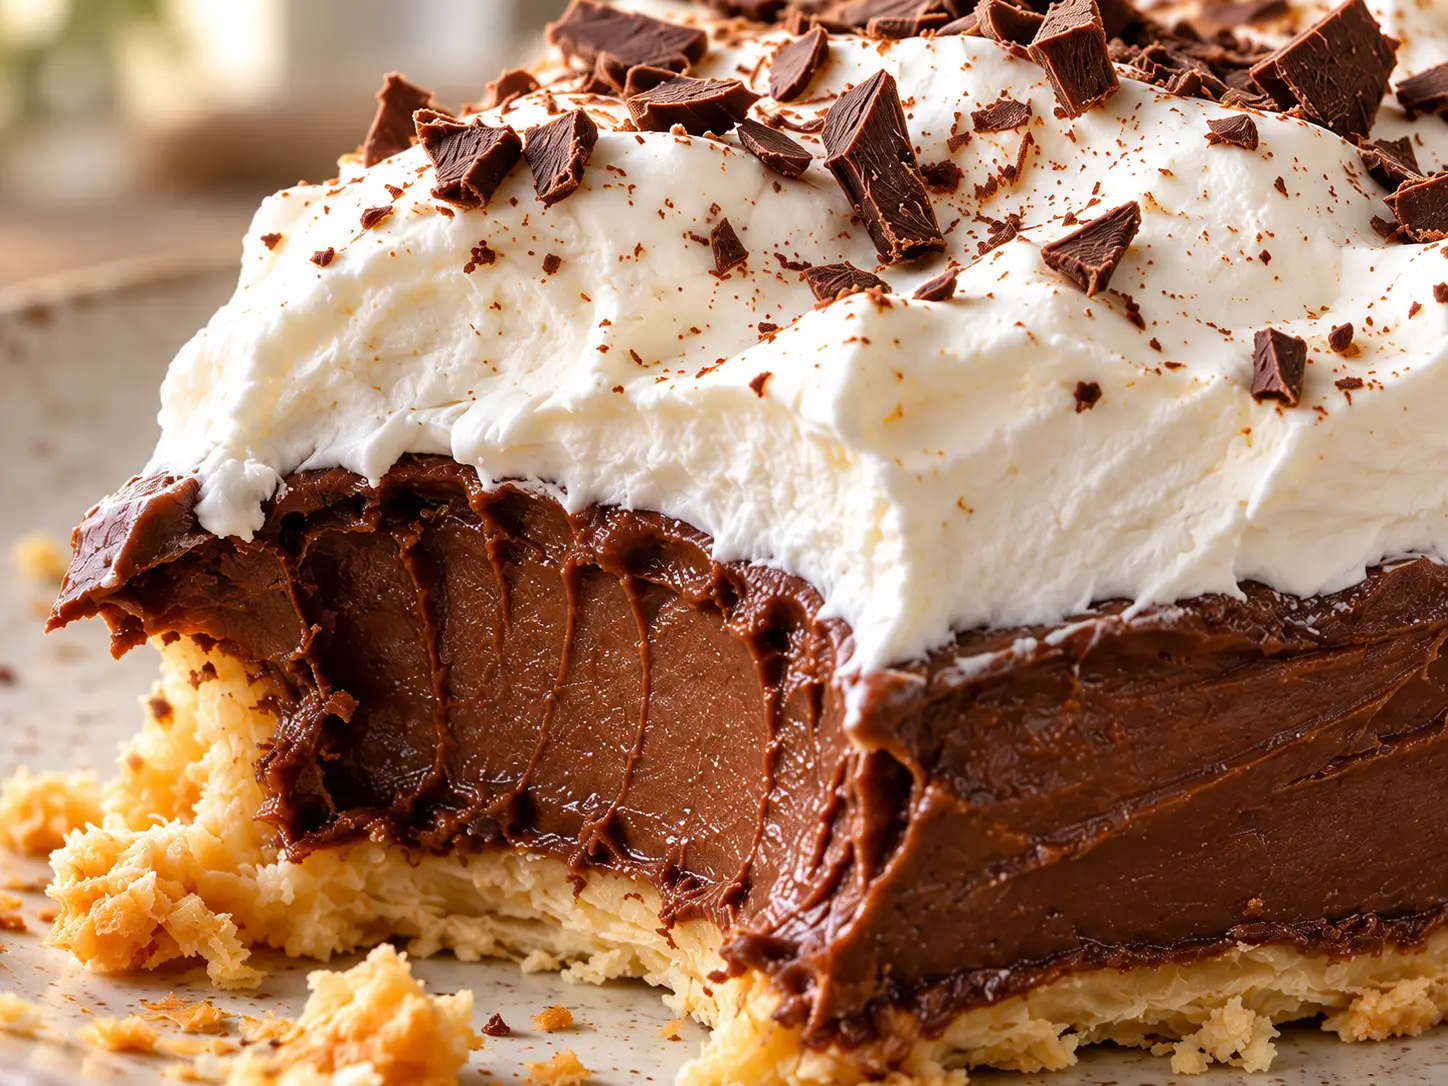
Remove the plastic wrap from the pie. Spoon or pipe the whipped cream over the filling, add chocolate shavings, and slice with a sharp knife. Wipe the knife between cuts for neat slices.
My Best Tips for a Pie That Sets
Wait for a real bubble. The filling may look thick before the cornstarch has finished cooking. Once it bubbles steadily, cook it for another minute while whisking.
Keep the heat at medium. High heat can scorch the bottom of the pan before the center of the filling thickens evenly.
Chop the chocolate finely. Small pieces melt quickly into the hot custard, giving you a smoother filling.
Let the crust cool. Pouring filling into a hot crust adds moisture while the crust is still cooling.
Give the pie enough refrigerator time. Six hours is a minimum. For the easiest slicing, make it the day before.
Why Is My Chocolate Cream Pie Runny?
The most common reason is that the filling didn’t cook long enough after it started bubbling. Cornstarch-thickened custards need that cooking time to reach their final thickness. The filling should already be thick in the saucepan; chilling firms it further, but it won’t turn a thin sauce into a sliceable pie.
A pie that has chilled for only an hour or two may also seem runny. Give it the full 6 hours before judging the texture. If you’re serving it for a holiday, overnight chilling takes the guesswork out of dessert time. King Arthur Baking also uses a stovetop cocoa-and-cornstarch filling for its classic chocolate cream pie. King Arthur Baking
Can I Use a Chocolate Cookie Crust?
Yes. For a cookie crust, mix 24 finely crushed chocolate sandwich cookies with 5 tablespoons melted butter. Press the mixture firmly across the bottom and up the sides of a 9-inch pie plate. Bake at 350°F for 10 minutes, then cool completely before adding the filling.
The cookie crust gives you a sweeter, all-chocolate pie. I like the flaky pastry crust when I want a little contrast with the soft filling, but both are good choices.
Make-Ahead and Storage Tips
Make the filled pie one day ahead and keep it covered in the refrigerator. Add the whipped cream close to serving time for the freshest look and texture.
Cover leftovers and refrigerate them promptly. A custard-style pie keeps for 3 to 4 days in the refrigerator at 40°F or below. For the best crust and whipped cream texture, I’d serve it within the first two days. Keep the pie refrigerated until serving, and don’t leave it at room temperature for more than two hours. FoodSafety.gov
I don’t recommend freezing the finished pie. Custard fillings and whipped cream can change texture after thawing, and the crust may become soggy. FoodSafety.gov also advises against freezing custard pies. FoodSafety.gov
Easy Ways to Change It Up
- Dark chocolate cream pie: Use bittersweet chocolate in place of semisweet for a deeper chocolate flavor.
- Chocolate cookie crust: Use the baked cookie crust described above.
- Coffee and chocolate: Add ½ teaspoon instant espresso powder with the cocoa. It gives the chocolate a deeper flavor without making the pie taste strongly of coffee.
- Chocolate curls: Drag a vegetable peeler along the edge of a room-temperature chocolate bar and scatter the curls over the whipped cream.
More Recipes to Try
Planning a dessert table? I like to give everyone a few choices: something chocolatey, something fruity, and a dessert you can cut into small squares for anyone who wants to try a little of everything.
- Chocolate Pecan Pie: Choose this when you want another chocolate dessert with a completely different texture. The pecan topping adds crunch alongside the creamy filling in this pie.
- Pecan Pie Brownies: These are easy to cut into small squares, making them a good choice for a crowded dessert table.
- Caramel Dulce de Leche Cheesecake: If your guests love creamy desserts but want a break from chocolate, this cheesecake brings a sweet caramel flavor to the table.
- Apple Pie Bars: Add these for a fruity option that’s easy to pick up and serve.
- Classic Apple Pie: You can’t go wrong with warm apple pie, especially if you have vanilla ice cream ready.
- Dutch Apple Pie: Its crumb topping adds a buttery crunch and gives apple lovers another choice.
- Pumpkin Cheesecake: Make this ahead when you want a pumpkin dessert that feels a little different from traditional pumpkin pie.
- No-Bake Pumpkin Cheesecake: A handy choice when oven space is tight and you still want something creamy and pumpkin spiced.
- Pecan Pie Bars: Slice these into small pieces so guests can sample one alongside a slice of chocolate cream pie.