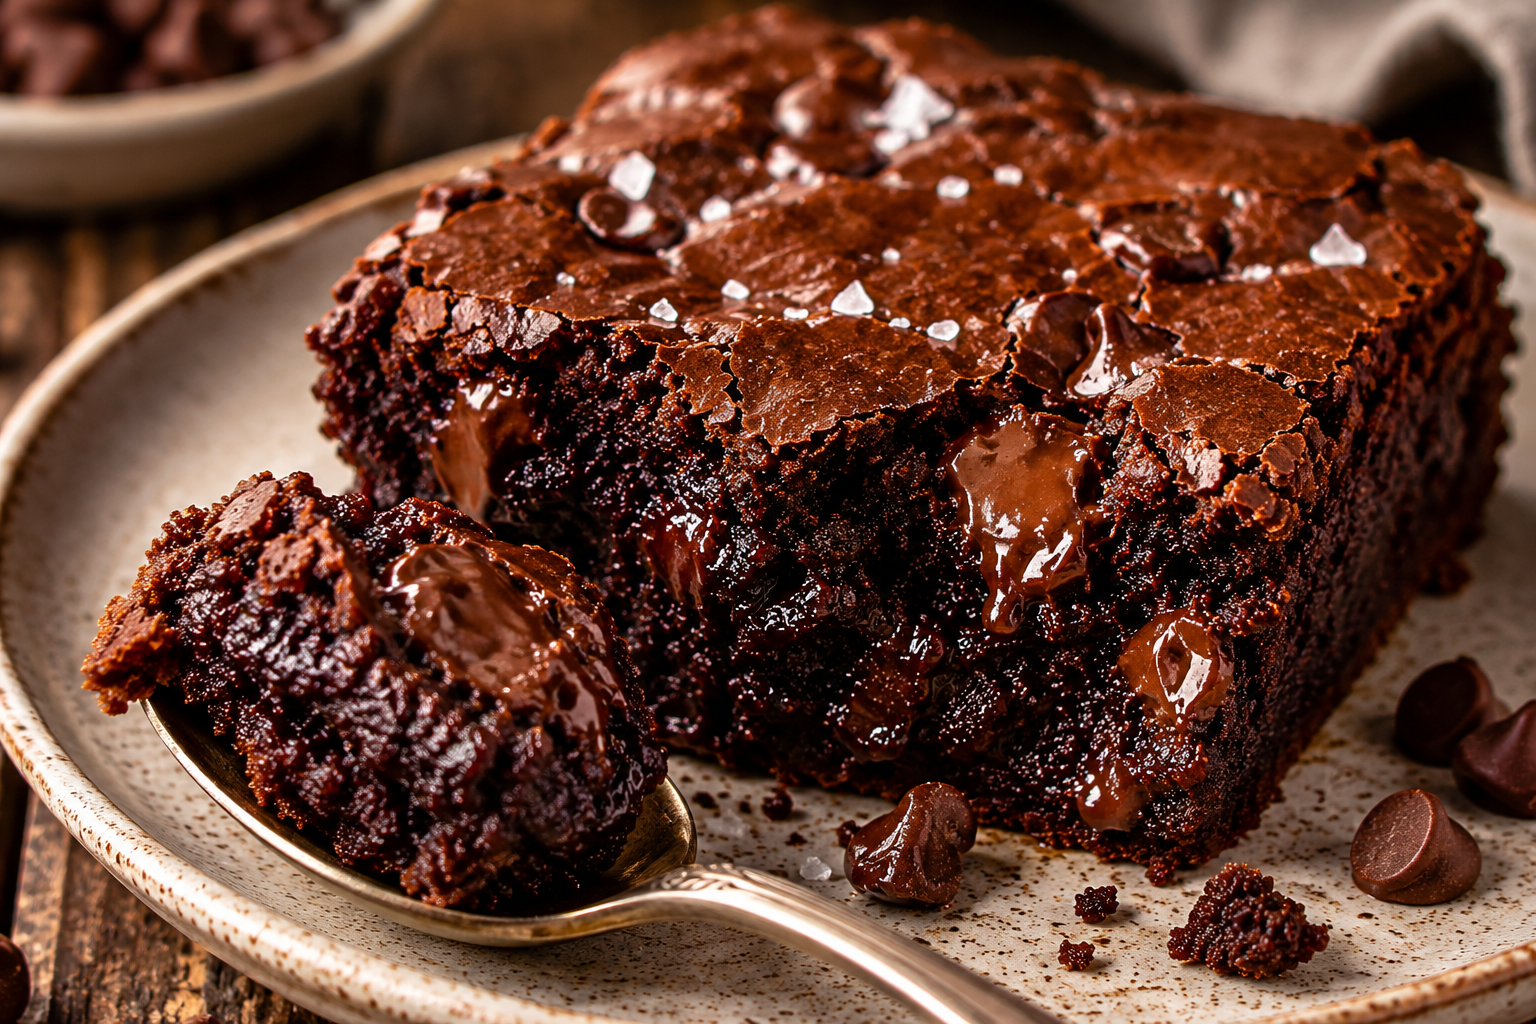
Chocolate Brownies with Cocoa Powder
The Best Chocolate Brownies with Cocoa Powder
Sometimes the simplest recipes become the ones you make over and over again. That’s exactly what happened with these chocolate brownies with cocoa powder. They don’t rely on expensive chocolate bars or fancy ingredients—just pantry staples transformed into rich, intensely chocolatey brownies with glossy tops, chewy edges, and irresistibly fudgy centers.
If you’ve ever wondered whether cocoa powder can really produce bakery-style brownies, the answer is absolutely yes. In fact, many professional bakers prefer cocoa powder because it delivers concentrated chocolate flavor without adding extra cocoa butter that can sometimes interfere with the perfect brownie texture.
This recipe creates everything most brownie lovers want: a paper-thin crackly top, dense yet soft centers, perfectly chewy edges, and deep chocolate flavor that tastes even better the next day. Best of all, everything comes together in one bowl, making cleanup almost as enjoyable as eating the brownies.
Unlike many recipes that call for melted chocolate, this version uses high-quality unsweetened cocoa powder to create a richer, more pronounced chocolate flavor while keeping the ingredient list simple and affordable. Whether you’re baking for birthdays, bake sales, holidays, school events, or simply satisfying a late-night chocolate craving, these brownies never disappoint.
After years of testing different ratios of butter, sugar, cocoa powder, and flour, I found the balance that creates that classic brownie texture somewhere between chewy and fudgy without becoming overly dense or cakey. They’re sturdy enough to cut into beautiful squares but soft enough to practically melt in your mouth.
If you’re searching for the best homemade brownies with cocoa powder, you’ve officially found your new favorite recipe.

Why You’ll Love These Chocolate Brownies with Cocoa Powder
There are hundreds of brownie recipes online, but this one stands apart because it focuses on maximizing chocolate flavor while keeping the process incredibly simple.
You’ll love this recipe because:
• Made entirely with pantry staples
• No chocolate bars required
• Rich chocolate flavor from cocoa powder
• Thick, fudgy centers
• Beautiful crackly brownie tops
• One-bowl recipe with minimal cleanup
• Ready in about 45 minutes
• Perfect for beginners
• Freezes beautifully
• Easy to customize with mix-ins
• Better than most bakery brownies
• Less expensive than recipes requiring premium chocolate
• Foolproof method that works every time
These brownies are also incredibly versatile. Serve them plain, dusted with powdered sugar, topped with vanilla ice cream, layered into trifles, or drizzled with salted caramel for an elevated dessert everyone will rave about.
Why Cocoa Powder Makes Incredible Brownies
Many people assume brownies made with melted chocolate are automatically better, but that’s not necessarily true.
Cocoa powder is essentially pure chocolate solids with most of the cocoa butter removed. Because it’s more concentrated than baking chocolate, it delivers an even stronger chocolate flavor.
It also allows you to better control the amount of fat in the recipe. Instead of relying on cocoa butter found in chocolate bars, you’re able to use butter in carefully measured amounts to achieve the exact chewy, fudgy texture you want.
This gives these brownies:
• More intense chocolate flavor
• Less greasy texture
• Better structure
• Perfectly chewy edges
• Dense fudgy centers
• Beautiful glossy tops
Many award-winning brownie recipes use cocoa powder for exactly these reasons.
Cocoa Powder vs. Melted Chocolate Brownies
Both styles are delicious, but they offer very different textures.
Cocoa Powder Brownies
• Richer chocolate flavor
• Slightly chewier texture
• Easier to make
• Pantry-friendly ingredients
• Less expensive
• One bowl
• Better shiny tops
Melted Chocolate Brownies
• Slightly softer chocolate flavor
• More truffle-like texture
• Requires baking chocolate
• More expensive ingredients
• Extra melting step
• Slightly denser crumb
If your goal is maximum chocolate flavor with minimal effort, cocoa powder brownies are hard to beat.
The Secret to Deep Chocolate Flavor
The biggest mistake many brownie recipes make is simply not using enough cocoa powder.
Chocolate flavor comes from balancing cocoa, butter, sugar, and salt—not simply increasing sweetness.
This recipe uses enough cocoa powder to create an intensely chocolatey brownie without becoming dry or bitter.
Another secret is blooming the cocoa powder.
When cocoa powder is mixed with warm melted butter, the fat helps release hundreds of aromatic chocolate compounds, resulting in a richer, smoother chocolate flavor throughout the finished brownies.
This small step is one of the easiest ways to make homemade brownies taste like they came from a high-end bakery.
Ingredients You’ll Need
One of my favorite things about this recipe is that every ingredient serves an important purpose.
Unsalted Butter
Butter provides richness, moisture, and chewiness. Melting it instead of creaming creates the dense texture brownies are known for.
For an even deeper flavor, lightly brown the butter before adding the cocoa powder. Brown butter adds subtle notes of toasted caramel, hazelnut, and toffee that pair beautifully with dark chocolate.
Unsweetened Cocoa Powder
This is the heart of the recipe.
Choose a high-quality cocoa powder because it contributes nearly all of the chocolate flavor.
Natural cocoa powder gives brownies a classic nostalgic chocolate taste, while Dutch-process cocoa creates a darker color and smoother, slightly less acidic flavor.
Either works beautifully in this recipe depending on your preference.
Granulated Sugar
Sugar does much more than sweeten brownies.
It helps create the signature shiny, paper-thin top while also keeping the brownies moist for several days.
Properly dissolving the sugar into the warm butter is one of the biggest secrets to achieving that bakery-style crackly crust.
Brown Sugar
A small amount of brown sugar adds moisture, chewiness, and subtle caramel notes that deepen the overall chocolate flavor.
The molasses in brown sugar also helps create soft centers that stay fresh longer.
Eggs
Eggs provide structure while also creating richness.
Beating the eggs thoroughly before baking incorporates just enough air to create glossy tops without making the brownies cakey.
Room-temperature eggs blend more smoothly into the batter and help everything bake evenly.
Vanilla Extract
Never underestimate vanilla.
It doesn’t make brownies taste like vanilla—it enhances the chocolate and rounds out every bite.
Use pure vanilla extract whenever possible for the best flavor.
Espresso Powder (Optional but Highly Recommended)
No, your brownies won’t taste like coffee.
A small amount of espresso powder intensifies chocolate flavor and makes every bite taste richer.
This is one of the best-kept secrets used in professional bakeries.
Salt
Salt balances sweetness while amplifying chocolate flavor.
Even sweet desserts need salt to taste complete.
A sprinkle of flaky sea salt on top before serving makes these brownies even more irresistible.
All-Purpose Flour
A modest amount of flour keeps these brownies dense and fudgy rather than fluffy.
Using too much flour is one of the most common reasons homemade brownies turn cakey.
Always spoon and level your flour instead of scooping directly from the bag for the most accurate measurement.
Chocolate Chips
Chocolate chips aren’t required, but they’re highly recommended.
As they melt throughout the brownies, they create little pockets of molten chocolate that make every bite even more decadent.
Dark chocolate chips provide the richest flavor, while semi-sweet chips create a more classic brownie taste.
The Best Cocoa Powder for Brownies
Not all cocoa powders bake the same.
If you want truly bakery-quality brownies, choosing a good cocoa powder makes a noticeable difference.
Some excellent options include:
• Ghirardelli Unsweetened Cocoa Powder
• Hershey’s Natural Cocoa Powder
• Guittard Cocoa Rouge
• Rodelle Gourmet Baking Cocoa
• Valrhona Cocoa Powder
• Droste Dutch Cocoa
Natural cocoa powder creates a brighter chocolate flavor that’s familiar and nostalgic.
Dutch-process cocoa produces darker brownies with a smoother, slightly more sophisticated chocolate profile.
Both are delicious—the choice simply depends on the flavor you’re after.
Equipment You’ll Need
One of the best parts of this recipe is that it doesn’t require any special baking tools.
Gather these basics before you begin:
• 8×8-inch metal baking pan
• Large mixing bowl
• Whisk
• Silicone spatula
• Measuring cups and spoons
• Parchment paper
• Cooling rack
Lining the baking pan with parchment paper creates easy handles, allowing you to lift the entire batch out before slicing for beautifully clean brownie squares.
Pro Tips Before You Start Baking
A few small details can make the difference between good brownies and unforgettable brownies.
Use room-temperature eggs for smoother mixing and even baking.
Measure your flour carefully using the spoon-and-level method to avoid dry brownies.
Mix the batter only until the flour disappears. Overmixing develops gluten, which creates a tougher texture.
Don’t overbake. Brownies continue cooking as they cool, so removing them when a few moist crumbs cling to a toothpick ensures perfectly fudgy centers.
Allow the brownies to cool completely before slicing. As tempting as warm brownies are, cooling lets the crumb set so you get clean, bakery-style squares instead of a gooey mess.
For picture-perfect cuts, chill the brownies for 30 minutes before slicing and wipe your knife clean between each cut.
These simple techniques consistently produce brownies with shiny tops, chewy edges, and rich, fudgy centers—the kind that disappear almost as quickly as they come out of the oven.
How to Make Chocolate Brownies with Cocoa Powder
This recipe comes together in just one bowl, making it one of the easiest homemade desserts you’ll ever bake. The key is following the order of the ingredients, which helps develop the shiny top, fudgy texture, and deep chocolate flavor these brownies are known for.
Step 1: Prepare Your Pan
Preheat your oven to 325°F (163°C).
Line an 8×8-inch metal baking pan with parchment paper, leaving an overhang on two sides to make lifting the brownies out easier once cooled.
Lightly grease the parchment with baking spray or butter to prevent sticking.
Using a light-colored metal pan produces the most even bake. Glass pans tend to retain more heat, which can lead to overbaked edges before the center is finished.
Step 2: Melt the Butter
In a large microwave-safe bowl or saucepan, melt:
- ¾ cup unsalted butter
The butter should be completely melted but not boiling.
Step 3: Bloom the Cocoa Powder
Immediately whisk into the warm butter:
- 1 cup unsweetened cocoa powder
- 1 teaspoon espresso powder (optional)
Whisk until smooth and glossy.
This simple step is called blooming the cocoa powder. Warm fat unlocks the cocoa’s natural oils and creates a much richer chocolate flavor than simply stirring cocoa into the dry ingredients.
Professional bakers use this trick to intensify chocolate desserts without adding more chocolate.
Step 4: Add the Sugars
Whisk in:
- 1 cup granulated sugar
- ½ cup packed light brown sugar
Continue whisking for about one minute.
The warm butter begins dissolving the sugar, which helps create the signature shiny, crackly brownie crust everyone loves.
Step 5: Add Eggs and Vanilla
Add:
- 2 large eggs
- 1 egg yolk
- 2 teaspoons pure vanilla extract
Whisk until the batter becomes slightly lighter and silky smooth.
Avoid over-whipping. You want everything incorporated without adding too much air, which can create a cakier brownie.
Step 6: Stir in Dry Ingredients
Add:
- ¾ cup all-purpose flour
- ½ teaspoon fine sea salt
Using a silicone spatula, gently fold everything together until only a few streaks of flour remain.
Do not overmix.
Brownies are best when mixed gently.
Step 7: Fold in Chocolate Chips
Add:
- ¾ cup semi-sweet chocolate chips
Fold until evenly distributed.
Chocolate chunks, chopped dark chocolate, or mini chocolate chips all work wonderfully here.
Step 8: Transfer to the Pan
Spread the batter evenly into your prepared pan.
Use an offset spatula or the back of a spoon to smooth the surface.
If desired, sprinkle extra chocolate chips and flaky sea salt over the top before baking.
Step 9: Bake
Bake for 27–34 minutes.
Begin checking around 27 minutes.
The edges should appear set while the center still has a slight jiggle.
A toothpick inserted near the center should come out with moist crumbs—not wet batter and not completely clean.
Remember:
Clean toothpick = overbaked brownies.
Wet batter = underbaked brownies.
Moist fudgy crumbs = perfect brownies.
Step 10: Cool Completely
Allow the brownies to cool in the pan for about 30 minutes-1 hour.
Then lift them out using the parchment paper and continue cooling on a wire rack.
For the cleanest cuts, refrigerate the brownies for 20–30 minutes before slicing.
Use a large chef’s knife wiped clean between every cut.
Expert Tips for Perfect Cocoa Powder Brownies
Great brownies aren’t difficult, but they do reward attention to detail. These tips make a noticeable difference in the final texture and appearance.
Use Quality Cocoa Powder
Since cocoa powder is the star ingredient, better cocoa equals better brownies.
Cheap cocoa often tastes flat or slightly dusty, while premium cocoa produces a deeper, richer chocolate flavor.
Don’t Skip Blooming the Cocoa
Blooming the cocoa in warm butter develops the chocolate flavor dramatically.
This is one of the easiest upgrades you can make.
Measure Flour Correctly
Flour is one of the biggest reasons brownies become dry.
Always fluff the flour first, spoon it into your measuring cup, then level it with a knife.
Never scoop directly from the flour bag.
Slightly Underbake
Brownies continue cooking after leaving the oven.
Removing them just before they’re fully baked creates soft, fudgy centers.
Let Them Cool
Fresh brownies smell incredible, but cutting too soon causes them to fall apart.
Cooling allows the chocolate and butter to firm back up, creating clean slices.
Chill Before Cutting
Professional bakeries often chill brownies before slicing.
This produces those perfectly square bakery-style pieces you see in photos.
Brownie Texture Guide
Every brownie lover has a favorite texture.
Here’s how small adjustments change the finished brownies.
For Extra Fudgy Brownies
Reduce flour by 2 tablespoons.
Bake 2–3 minutes less.
Add an extra egg yolk.
For Chewier Brownies
Increase brown sugar slightly.
Use bread flour instead of all-purpose flour.
Bake until the edges are fully set.
For Cakier Brownies
Add one extra egg.
Increase flour by ¼ cup.
Beat the batter longer.
Bake slightly longer.
Easy Brownie Variations
This cocoa brownie recipe is incredibly versatile.
Here are some fun ways to customize it.
Double Chocolate Brownies
Add:
1 cup chocolate chips
Triple Chocolate Brownies
Use:
Dark chocolate chips
Milk chocolate chips
White chocolate chips
Walnut Brownies
Fold in:
1 cup toasted chopped walnuts
Pecan Brownies
Add:
1 cup toasted pecans
The buttery flavor pairs beautifully with chocolate.
Peanut Butter Swirl Brownies
Warm ½ cup peanut butter.
Drop spoonfuls across the batter.
Swirl gently using a butter knife before baking.
Salted Caramel Brownies
Drizzle caramel sauce into the batter before baking.
Finish with flaky sea salt.
Cookies and Cream Brownies
Fold in chopped chocolate sandwich cookies.
Mint Chocolate Brownies
Add peppermint extract and chopped mint chocolate.
Espresso Brownies
Increase espresso powder to 2 teaspoons.
Perfect for coffee lovers.
S’mores Brownies
Top with mini marshmallows, graham crackers, and chocolate during the last five minutes of baking.
Common Brownie Mistakes
Even experienced bakers occasionally run into problems.
Here’s how to avoid the most common issues.
My Brownies Are Dry
Usually caused by:
Too much flour
Overbaking
Using a glass pan
Incorrect oven temperature
My Brownies Are Cakey
Likely because:
Too much flour
Too many eggs
Overmixed batter
My Brownies Didn’t Get Shiny Tops
Possible causes include:
Sugar didn’t dissolve enough
Butter wasn’t warm
Overmixed after flour was added
Incorrect sugar ratio
Brownies Sink in the Middle
This usually happens because they’re slightly underbaked.
The good news?
Many brownie lovers actually prefer that rich, fudgy center.
Brownies Stick to the Pan
Always line the pan with parchment paper.
It makes removal effortless.
How to Store Brownies
One of the best things about homemade brownies is that they stay delicious for days.
Store completely cooled brownies in an airtight container.
Room Temperature:
Up to 4 days.
Refrigerator:
Up to one week.
Place parchment paper between layers if stacking.
Recipe Success Tips
- Use room-temperature eggs for a smoother batter.
- Weigh ingredients whenever possible for the most accurate results.
- Use high-quality cocoa powder for the richest chocolate flavor.
- Fold the batter gently once the flour is added.
- Bake just until the center is set with moist crumbs on a toothpick.
- Allow brownies to cool completely before slicing.
- For ultra-clean cuts, chill the brownies for 30 minutes and wipe your knife clean between slices.
Storage
Store brownies in an airtight container at room temperature for up to 4 days.
To keep them extra soft, place a slice of sandwich bread in the container—the bread will dry out before the brownies do, helping them stay moist.
Refrigerating
For an even fudgier texture, refrigerate brownies in an airtight container for up to 1 week.
Enjoy them cold for a dense, truffle-like bite, or let them sit at room temperature for about 15 minutes before serving.
Freezing
These brownies freeze exceptionally well.
- Cool completely.
- Wrap each brownie individually in plastic wrap.
- Place in a freezer-safe bag or airtight container.
- Freeze for up to 3 months.
Thaw overnight in the refrigerator or at room temperature for about an hour. Warm in the microwave for 10–15 seconds if you prefer a gooey center.
Make-Ahead Instructions
This is an excellent make-ahead dessert because the texture actually improves after resting overnight.
Bake the brownies a day in advance, cool completely, and store them tightly covered. The chocolate flavor deepens and the crumb becomes even fudgier by the next day.
Fun Mix-In Ideas
Customize these brownies with your favorite additions:
- Peanut butter chips
- White chocolate chips
- Dark chocolate chunks
- Toasted walnuts
- Chopped pecans
- Mini marshmallows
- Crushed peppermint candies (holiday version)
- Chopped toffee bits
- Caramel baking chips
- Crushed chocolate sandwich cookies
- Peanut butter swirls
- Salted caramel ribbons
- Fresh raspberries folded into the batter
- Mini peanut butter cups
Serving Suggestions
These brownies are delicious on their own, but they’re even more indulgent when served with:
- Vanilla bean ice cream
- Fresh whipped cream
- Chocolate ganache
- Salted caramel sauce
- Fresh strawberries
- Fresh raspberries
- Chocolate shavings
- Powdered sugar
- Hot espresso
- Cold brew coffee
- A glass of milk
For an easy brownie sundae, top a warm brownie with vanilla ice cream, hot fudge, whipped cream, chopped nuts, and a cherry.
Why This Recipe Works
The science behind these brownies is simple but effective:
- Blooming the cocoa powder in warm butter intensifies the chocolate flavor by releasing fat-soluble flavor compounds.
- A blend of granulated and brown sugar creates the perfect balance of a shiny, crackly top and moist, chewy interior.
- An extra egg yolk adds richness and helps produce a dense, fudgy texture.
- A modest amount of flour keeps the brownies tender without becoming cakey.
- Semi-sweet chocolate chips melt into pockets of chocolate throughout each bite.
- Slightly underbaking ensures the centers stay soft and fudgy even after cooling.
When these elements work together, the result is a bakery-style brownie with deep cocoa flavor, crisp edges, a paper-thin glossy crust, and irresistibly rich centers.
Reader Tips
If you’re making these brownies for a party, bake sale, or holiday dessert tray, consider baking them the day before. They slice more cleanly, travel well, and the flavor only gets better with time.
For extra picture-perfect brownies, garnish the top with a sprinkle of flaky sea salt and a few chopped chocolate pieces just before serving. It’s a simple finishing touch that adds visual appeal and balances the sweetness beautifully.
Whether you enjoy them plain, topped with ice cream, or dressed up for a special occasion, these chocolate brownies with cocoa powder are the kind of recipe you’ll find yourself making again and again. They’re rich enough to satisfy serious chocolate lovers, easy enough for beginner bakers, and reliable enough to become your go-to brownie recipe for years to come.
Recipe Tips at a Glance
✔ Bloom the cocoa powder in warm melted butter for a richer chocolate flavor.
✔ Measure your flour using the spoon-and-level method to avoid dry brownies.
✔ Don’t overmix after adding the flour or your brownies can become cakey.
✔ Bake until a toothpick has moist crumbs—not wet batter or a completely clean toothpick.
✔ Let the brownies cool completely before slicing for clean bakery-style squares.
✔ Chill for 20–30 minutes before cutting if you want perfectly sharp edges.
✔ Sprinkle flaky sea salt on top after baking for an incredible sweet and salty finish.
✔ Store in an airtight container to keep brownies soft and fudgy for days.
✔ Freeze individual brownies for easy desserts whenever a chocolate craving strikes.
✔ These brownies taste even better the next day as the chocolate flavor continues to develop.
Caraway Cookware Makes Brownie Baking Even Better
One of my favorite ways to bake desserts is with Caraway’s non-toxic ceramic-coated bakeware. Their naturally slick surface helps brownies release effortlessly, promotes even baking, and makes cleanup surprisingly easy. If you’re looking to upgrade your bakeware with beautiful pieces that perform just as well as they look, Caraway is one of my favorite kitchen investments. Shop this link for extra savings automatically applied at checkout.
More Chocolate Recipes You’ll Love
If you’re as obsessed with chocolate desserts as I am, here are a few more reader favorites from the blog:
• Best Homemade Brownies from Scratch
• Chocolate Lava Cake in a Skillet
• Chocolate Cupcakes with Chocolate Buttercream
• Chocolate Cake with Chocolate Buttercream
• Chewy Chocolate Chip Cookies
These recipes are perfect for building your own homemade dessert collection and are packed with baking tips to help you get bakery-quality results every time.
Frequently Asked Questions
Can I make brownies using only cocoa powder?
Yes! Cocoa powder creates incredibly rich brownies with deep chocolate flavor and a wonderfully chewy texture. Many bakers actually prefer cocoa powder over melted chocolate.
Which cocoa powder is best?
High-quality natural or Dutch-process cocoa powder both work well. Dutch-process produces darker brownies with a smoother flavor, while natural cocoa offers a brighter, classic chocolate taste.
Can I use Dutch-process cocoa?
Yes. Since this recipe uses baking powder-free chemistry, either natural or Dutch-process cocoa works beautifully.
Why do my brownies have a shiny top?
The shiny crust forms when sugar dissolves into the warm butter and eggs before baking, creating a delicate meringue-like layer.
Why didn’t my brownies get shiny?
The sugar may not have dissolved enough, the butter wasn’t warm enough, or the batter was overmixed after adding the flour.
Can I double this recipe?
Absolutely. Bake it in a 9×13-inch pan and increase the baking time by about 5–10 minutes.
Can I make these brownies gluten-free?
Yes. Substitute your favorite 1:1 gluten-free flour blend designed for baking.
Can I reduce the sugar?
You can reduce it slightly, but sugar contributes to texture, moisture, and the shiny top, so large reductions will change the final result.
Why are my brownies dry?
Dry brownies are usually caused by too much flour or overbaking.
Should brownies be gooey?
Yes. Properly baked brownies should be moist and fudgy in the center with set edges.
Can I use salted butter?
Yes. Simply reduce the added salt slightly.
Can I add chocolate chunks?
Definitely. Chocolate chunks melt into irresistible pockets of chocolate throughout the brownies.
Why add espresso powder?
Espresso enhances chocolate flavor without making the brownies taste like coffee.
Can I leave out the espresso powder?
Absolutely. The brownies will still be delicious.
How do I know when brownies are done?
A toothpick inserted into the center should come out with moist crumbs attached—not wet batter and not completely clean.
Can I use dark cocoa powder?
Yes. Dark cocoa creates richer color and a more intense chocolate flavor.
Why do brownies crack on top?
Those beautiful cracks are actually a sign that the shiny crust formed properly.
How long should brownies cool?
At least one hour for clean slices.
Can I refrigerate brownies?
Yes. Refrigeration makes them even fudgier.
How long do homemade brownies last?
About four days at room temperature or one week refrigerated.
Can I freeze brownies?
Yes. Freeze tightly wrapped brownies for up to three months.
Are brownies better the next day?
Many people think so. The texture becomes denser and the chocolate flavor deepens overnight.
Can I make these in advance for a party?
Definitely. They’re one of the best make-ahead desserts.
Can I add nuts?
Yes. Walnuts, pecans, hazelnuts, and almonds all pair beautifully with chocolate.
What’s the secret to fudgy brownies?
Using melted butter, blooming the cocoa powder, measuring flour carefully, slightly underbaking, and allowing the brownies to cool completely before slicing.

Chocolate Brownies with Cocoa Powder
Equipment
- 8x8 baking pan or 9x9 baking pan
Ingredients
- ¾ cup unsalted butter (170g)
- 1 cup unsweetened cocoa powder (85g)
- 1 tsp espresso powder optional
- 1 cup granulated sugar (200g)
- ½ cup dark brown sugar (110g) or light brown sugar
- 2 large eggs
- 1 large egg yolk
- 2 tsp vanilla extract
- ¾ cup all-purpose flour (95g)or gluten-free flour
- ½ tsp salt optional, you can always sprinkle sea salt as a topping instead
- ¾ cup semi-sweet chocolate (130g)
- sea salt for topping
Instructions
- Preheat oven to 325°F. Line an 8x8-inch metal baking pan with parchment paper.
- Melt the butter.
- Whisk cocoa powder and espresso powder into the warm butter until smooth.
- Whisk in both sugars for about one minute.
- Add eggs, egg yolk, and vanilla. Whisk until smooth.
- Fold in flour and salt just until combined.
- Fold in chocolate chips.
- Spread batter evenly into prepared pan.
- Top with additional chocolate chips and flaky sea salt if desired.
- Bake for 32–35 minutes until a toothpick comes out with moist crumbs.Cool completely before slicing into 9 squares.
Notes
Recipe Notes
- Blooming cocoa powder creates deeper chocolate flavor.
- Use a metal pan instead of glass for the best texture.
- Don't overbake—brownies continue cooking as they cool.
- Refrigerating before slicing creates beautiful clean edges.
- Store airtight for up to four days.
Nutrition Facts (Per Brownie)
Recipe Yield: 9 brownies| Nutrient | Amount Per Brownie |
|---|---|
| Calories | 423 |
| Total Fat | 22 g |
| Saturated Fat | 13 g |
| Cholesterol | 82 mg |
| Sodium | 110 mg |
| Total Carbohydrates | 57 g |
| Dietary Fiber | 4 g |
| Total Sugars | 34 g |
| Protein | 6 g |


