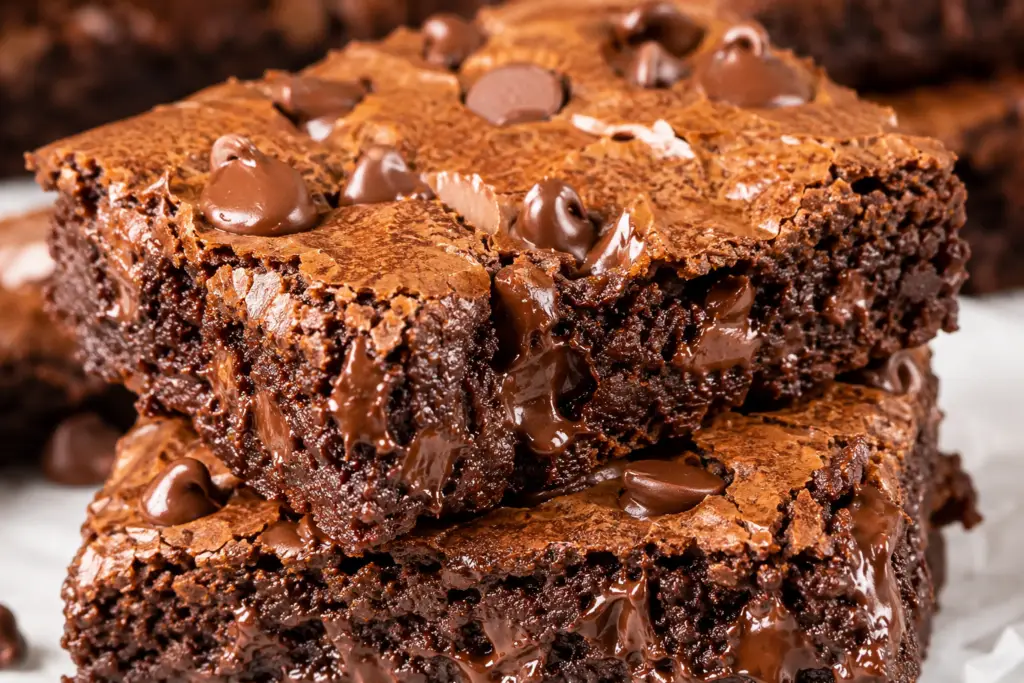
Brownies Without Eggs
These brownies without eggs are thick, ultra-fudgy, intensely chocolatey, and have those irresistible crackly tops everyone loves. Made with pantry staples in just one bowl, they’re perfect whether you’re baking for someone with an egg allergy, following a vegetarian diet, or simply ran out of eggs. After dozens of test batches, this recipe delivers everything you want in a homemade brownie—rich flavor, chewy edges, and a soft, gooey center—without missing the eggs one bit.
The Best Brownies Without Eggs
There’s a common misconception that brownies need eggs to be rich and fudgy. After all, eggs traditionally provide structure, moisture, and help create that classic shiny top. But here’s the secret: with the right balance of butter, sugar, chocolate, and milk, you can make brownies that are every bit as decadent—if not better—than traditional versions.
These homemade brownies without eggs are proof.
Instead of relying on applesauce, bananas, flax eggs, or yogurt (which can sometimes change the flavor or texture), this recipe uses a carefully balanced combination of melted butter, whole milk, brown sugar, and just enough flour to create a brownie that’s incredibly moist with a dense, bakery-style crumb. The addition of chopped chocolate melts into little pockets throughout the batter, while a tiny amount of espresso powder deepens the chocolate flavor without making the brownies taste like coffee.
The result? Thick brownies with crisp edges, chewy centers, glossy crackly tops, and a rich chocolate flavor that rivals your favorite bakery.
Whether you’re baking because of an egg allergy, dietary preference, or you’ve simply opened the refrigerator to discover you’re out of eggs (we’ve all been there), this easy one-bowl recipe has you covered.
The best part? Everything comes together in about 10 minutes before heading into the oven.
Once you try these, they’ll quickly become your go-to chocolate dessert whenever the craving strikes.
Why You’ll Love These Brownies Without Eggs
If you’ve ever worried that eggless brownies might turn out dry or cakey, you’re in for a surprise. This recipe is designed to deliver the same indulgent texture you’d expect from a classic bakery brownie—without compromising on flavor or richness.
You’ll love this recipe because:
✔️ Super fudgy and dense texture
✔️ Rich chocolate flavor in every bite
✔️ Gorgeous shiny, crackly tops
✔️ One bowl means easy cleanup
✔️ No fancy egg replacers needed
✔️ Pantry staple ingredients
✔️ Beginner-friendly recipe
✔️ Ready in under an hour
✔️ Perfect for egg allergies
✔️ Freezes beautifully
✔️ Incredible with ice cream
✔️ Great for holidays, bake sales, and parties
What Makes These the BEST Brownies Without Eggs?
There are thousands of eggless brownie recipes online, but many fall into one of two categories:
- Too cakey
- Too gummy
Neither is what chocolate lovers are after.
Traditional brownies rely on eggs for structure, but removing them without adjusting the rest of the ingredients often leaves brownies that crumble, sink in the center, or bake up dense in the wrong way.
The key is understanding why eggs work in brownies and recreating those effects through ingredient balance rather than simply swapping in an egg substitute.
In this recipe:
- Melted butter provides richness and moisture.
- Brown sugar keeps the brownies soft and chewy.
- Granulated sugar helps create those signature shiny tops.
- Whole milk adds moisture without making the batter too loose.
- Dutch-process cocoa powder creates an intensely chocolatey flavor.
- Melted dark chocolate gives the brownies a luxurious texture.
- Espresso powder enhances the chocolate without tasting like coffee.
- A small amount of flour keeps the brownies dense instead of cakey.
- Extra chopped chocolate melts into gooey chocolate pockets throughout each brownie.
The result is a brownie that tastes intentional—not like a compromise.
Even people who aren’t avoiding eggs won’t guess they’re missing.
The Secret to Perfect Eggless Brownies
The biggest mistake people make when baking brownies without eggs is trying to directly replace eggs with ingredients like applesauce or mashed banana.
While those substitutions certainly work, they often produce softer, cake-like brownies with noticeable fruit flavors or extra moisture.
Instead, this recipe focuses on building the texture from the ground up.
Melted Butter
Butter coats the flour proteins, helping prevent gluten from overdeveloping. This keeps the brownies tender while delivering a rich, buttery flavor.
Brown Sugar + Granulated Sugar
Using both sugars creates the perfect balance.
Brown sugar adds moisture thanks to its molasses content, while granulated sugar contributes to those beautiful crackly tops by dissolving into the warm butter and chocolate mixture.
Melted Chocolate
Instead of relying solely on cocoa powder, melted chocolate adds extra cocoa butter and richness that helps replace some of the body eggs typically provide.
Espresso Powder
You won’t taste coffee.
Instead, espresso enhances the cocoa, making every bite taste deeper, darker, and more chocolate-forward.
Whole Milk
Whole milk supplies moisture and a bit of fat, helping create a smooth batter that bakes into a fudgy center rather than a dry crumb.
Don’t Overmix
Once the flour goes in, mix only until you no longer see dry streaks. Overmixing develops gluten, which can make brownies tough instead of tender.
Ingredients You’ll Need
One of the reasons this recipe has become a favorite in my kitchen is that every ingredient has a purpose. Together, they create that signature fudgy texture and rich chocolate flavor without relying on eggs or specialty ingredients.
Unsalted Butter
Melted butter forms the rich, buttery foundation of these brownies. Using unsalted butter allows you to control the overall salt level while keeping the chocolate flavor front and center.
Granulated Sugar
Granulated sugar not only sweetens the brownies but also helps create the iconic glossy, crackly top by dissolving into the warm butter and chocolate mixture before baking.
Light Brown Sugar
Brown sugar adds moisture and chewiness thanks to its molasses content. It also gives the brownies a deeper caramel-like richness that pairs beautifully with chocolate.
Whole Milk
Whole milk replaces much of the moisture that eggs normally provide while keeping the batter smooth and rich. The extra fat also contributes to a softer crumb.
Vanilla Extract
Pure vanilla rounds out the chocolate flavor and adds warmth to every bite.
Dutch-Process Cocoa Powder
Dutch-process cocoa gives these brownies their dark color and smooth, rich chocolate flavor with less bitterness than natural cocoa powder.
Melted Dark Chocolate
Using real melted chocolate creates an incredibly fudgy texture that cocoa powder alone can’t achieve. Choose a good-quality baking chocolate around 60–70% cacao for the best flavor.
Espresso Powder
Just one teaspoon deepens the chocolate flavor dramatically. It won’t make your brownies taste like coffee—it simply intensifies the cocoa.
All-Purpose Flour
A relatively small amount of flour keeps these brownies dense and chewy instead of light and cake-like. Be careful not to overmeasure; spoon and level the flour for the best results.
Cornstarch
A little cornstarch helps create a softer, melt-in-your-mouth texture while adding just enough structure to compensate for the missing eggs.
Baking Powder
Just a small amount gives the brownies enough lift without making them cakey.
Fine Sea Salt
Salt balances the sweetness and makes the chocolate taste even richer.
Semi-Sweet Chocolate Chunks
Folding chopped chocolate into the batter creates irresistible melted pockets throughout each brownie.
Kitchen Equipment
You don’t need any special equipment to make these easy eggless brownies.
- 8×8-inch metal baking pan
- Parchment paper
- Large microwave-safe mixing bowl
- Whisk
- Rubber spatula
- Measuring cups and spoons
- Kitchen scale (recommended for the most accurate baking)
- Cooling rack
- Sharp chef’s knife for clean slices
How to Make Brownies Without Eggs
These brownies come together in one bowl with simple pantry ingredients, making them just as easy as they are delicious.
Step 1: Prepare the Pan
Preheat your oven to 350°F (175°C). Line an 8×8-inch metal baking pan with parchment paper, leaving an overhang on two sides to make lifting the brownies out easier after baking. Lightly grease the parchment with nonstick spray or a thin layer of butter.
Step 2: Melt the Butter and Chocolate
In a large microwave-safe bowl, melt the butter. Add the chopped dark chocolate and stir until completely smooth. If needed, microwave in 10-second intervals, stirring between each, until fully melted and glossy.
Step 3: Dissolve the Sugars
While the butter and chocolate mixture is still warm, whisk in the granulated sugar and brown sugar until the mixture looks smooth and glossy. This step is key for achieving that beautiful crackly top.
Step 4: Add the Wet Ingredients
Whisk in the whole milk and vanilla extract until fully incorporated. Sprinkle in the espresso powder and whisk again until dissolved.
Step 5: Combine the Dry Ingredients
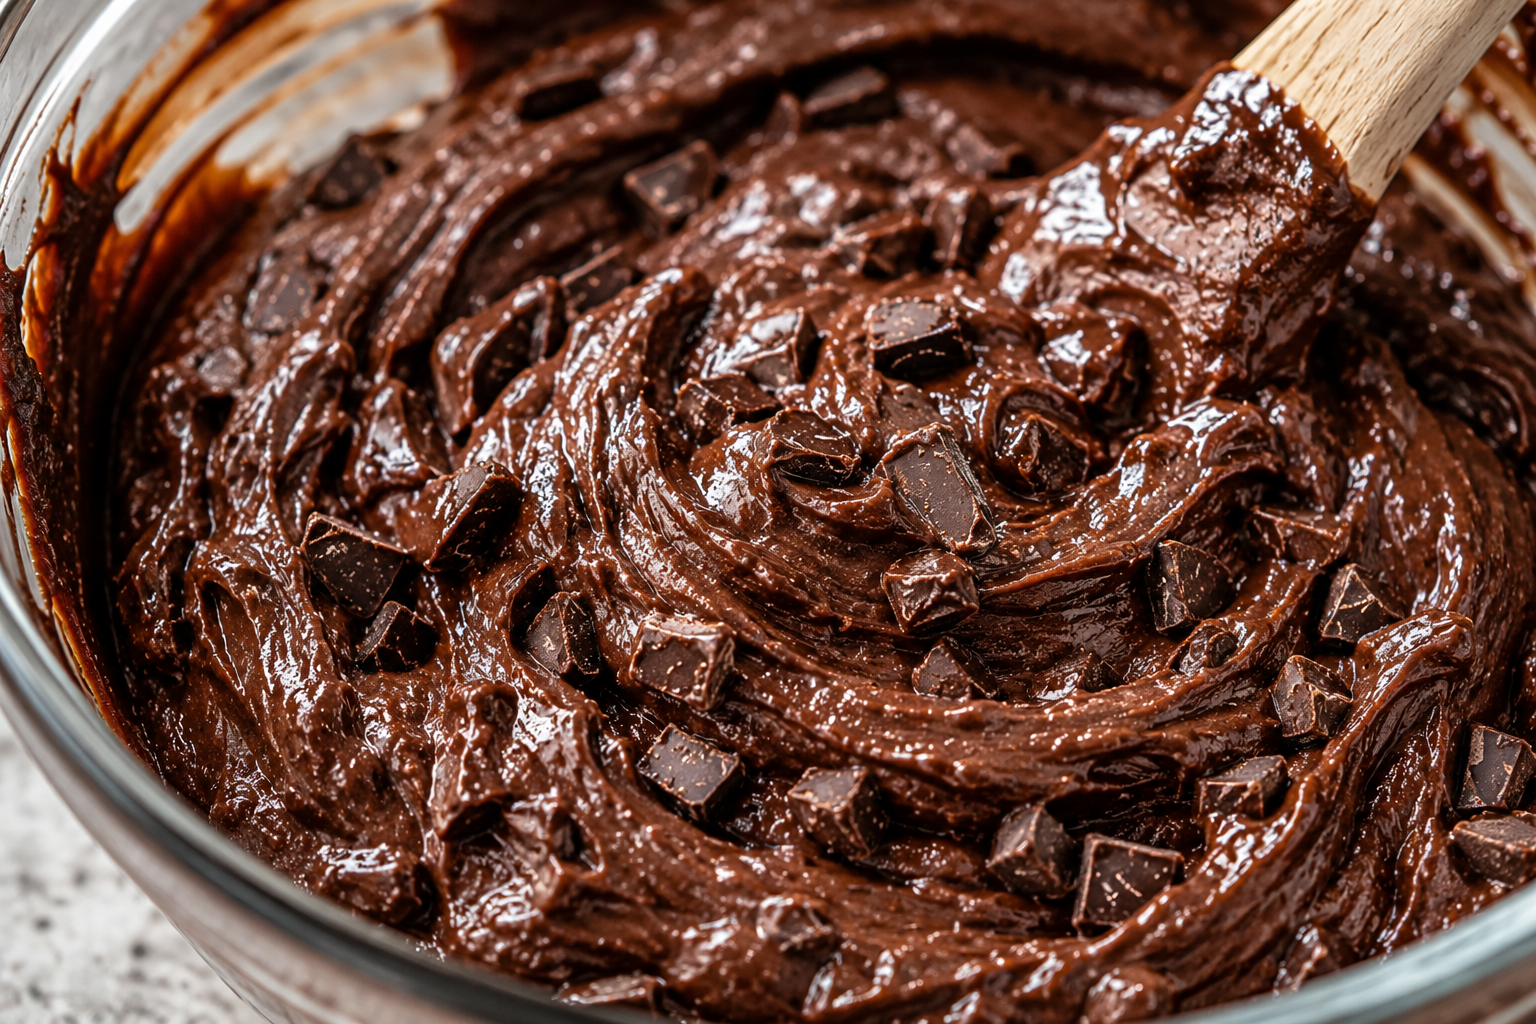
In a separate bowl, whisk together the flour, Dutch-process cocoa powder, cornstarch, baking powder, and sea salt. Add the dry ingredients to the wet mixture and gently fold with a rubber spatula just until combined. Fold in the chocolate chunks, being careful not to overmix.
Step 6: Fill the Pan
Spread the thick batter evenly into the prepared baking pan using an offset spatula or the back of a spoon. Tap the pan gently on the counter a few times to release any large air bubbles. Sprinkle a few extra chocolate chunks over the top if desired for a bakery-style finish.
How to Bake the Perfect Brownies Without Eggs
One of the biggest challenges with eggless brownies is knowing exactly when they’re done. Because they don’t contain eggs, the center can seem softer than traditional brownies while they’re still hot. That’s completely normal—and it’s actually one of the secrets to achieving that ultra-fudgy texture.
The key is to slightly underbake them and allow them to finish setting as they cool.
Step 7: Bake
Place the pan on the center oven rack and bake for 30–36 minutes.
Since every oven bakes differently, begin checking around the 30-minute mark.
You’ll know they’re ready when:
- The edges look set and slightly pulled away from the pan.
- The top is shiny with delicate crackly layers.
- The center no longer jiggles when the pan is gently shaken.
- A toothpick inserted about 2 inches from the edge comes out with a few moist crumbs—not wet batter.
Avoid waiting for a completely clean toothpick. That usually means the brownies are overbaked and will lose their signature fudgy texture.
Step 8: Cool Completely
This is one of the hardest steps—but also one of the most important.
Allow the brownies to cool in the pan for at least 1 hour, then transfer them to a wire rack using the parchment overhang.
For the cleanest slices and the fudgiest texture, refrigerate the brownies for 30–60 minutes before cutting. Chilling helps the chocolate firm up slightly while keeping the centers irresistibly rich and chewy.
Step 9: Slice Like a Bakery
For beautiful bakery-style squares:
- Use a large sharp chef’s knife.
- Wipe the blade clean between every cut.
- Warm the knife under hot water, dry it thoroughly, and slice slowly.
- Repeat between cuts for crisp, clean edges.
If you’re serving these warm with ice cream, don’t worry about perfect cuts—the gooey centers are part of the charm!
Expert Tips for the Best Eggless Brownies
These simple techniques make all the difference between good brownies and unforgettable ones.
Use Good-Quality Chocolate
Since chocolate is the star of this recipe, choose a baking chocolate you enjoy eating. Chocolate bars generally melt more smoothly than chocolate chips and create a richer, silkier brownie.
Weigh Your Flour
Too much flour is one of the fastest ways to end up with dry, cakey brownies.
If you have a kitchen scale, use it. If not, spoon the flour into your measuring cup and level it off with a knife instead of scooping directly from the bag.
Mix the Sugar While Warm
Whisking the sugars into the warm butter and melted chocolate helps dissolve the sugar crystals, contributing to those beautiful shiny tops everyone loves.
Don’t Skip the Espresso Powder
Even if you don’t drink coffee, espresso powder enhances the chocolate flavor without making the brownies taste like mocha. It’s one of my favorite bakery secrets for creating deep, rich chocolate desserts.
Fold—Don’t Beat
Once the dry ingredients are added, gently fold them into the batter. Overmixing develops gluten, which can make brownies tough instead of tender.
Slightly Underbake
Brownies continue to cook as they cool. Pulling them from the oven when they still have a few moist crumbs on the toothpick keeps the centers soft, rich, and fudgy.
Common Mistakes to Avoid
Avoid these common baking mistakes for consistently perfect brownies every time.
Measuring Too Much Flour
Extra flour creates dense, dry, cakey brownies. Always measure carefully.
Using Cold Ingredients
Cold milk can cause the melted chocolate to seize. Let refrigerated ingredients come to room temperature before mixing.
Overbaking
The number one cause of dry brownies is baking them too long. Keep a close eye on them during the final few minutes.
Overmixing the Batter
A few streaks of flour are okay while folding. Stop mixing as soon as everything is incorporated.
Cutting While Hot
Fresh-from-the-oven brownies are delicious but difficult to slice neatly. Cooling allows the chocolate to set and creates that classic fudgy texture.
Why This Recipe Works Without Eggs
Eggs usually provide:
- Structure
- Moisture
- Fat
- Emulsification
- Stability
This recipe recreates those qualities through a carefully balanced combination of ingredients.
- Butter supplies richness and fat.
- Whole milk adds moisture and tenderness.
- Brown sugar helps retain moisture and creates chewiness.
- Melted chocolate contributes structure through cocoa butter while making the brownies extra fudgy.
- Cornstarch gently supports the crumb without making it dense or gummy.
Instead of replacing eggs with fruit purees or commercial substitutes, this recipe is designed from the ground up to produce bakery-quality brownies naturally.
Delicious Variations
Once you’ve mastered the base recipe, try one of these fun twists.
Double Chocolate Brownies
Fold in an extra ½ cup chocolate chips for even more melty chocolate throughout.
Sea Salt Brownies
Sprinkle flaky sea salt over the batter just before baking to balance the sweetness and enhance the chocolate flavor.
Espresso Brownies
Increase the espresso powder to 2 teaspoons for a subtle mocha-inspired brownie.
Walnut Brownies
Add ¾ cup chopped toasted walnuts or pecans for crunch and nutty flavor.
Cookies and Cream Brownies
Gently fold in chopped chocolate sandwich cookies for a fun cookies-and-cream variation.
Peanut Butter Swirl Brownies
Drop spoonfuls of creamy peanut butter over the batter and swirl gently with a butter knife before baking.
Salted Caramel Brownies
Swirl thick caramel sauce through the batter and finish with flaky sea salt for a decadent dessert.
Mint Chocolate Brownies
Add ½ teaspoon peppermint extract and fold in dark chocolate chunks for a refreshing holiday version.
Serving Suggestions
These brownies are incredible on their own, but they’re even better paired with:
- Vanilla bean ice cream
- Fresh whipped cream
- Chocolate ganache
- Salted caramel sauce
- Fresh raspberries
- Strawberries
- Hot fudge
- Crushed peppermint candies during the holidays
- A glass of cold milk
- Freshly brewed coffee
- Homemade espresso
Storage Instructions
Because these brownies are so fudgy, they stay moist for days.
At Room Temperature:
Store in an airtight container for up to 4 days.
Place parchment paper between layers to prevent sticking.
Refrigerator:
Store for up to 1 week.
Allow brownies to come to room temperature before serving, or warm them in the microwave for 10–15 seconds.
Can You Freeze Eggless Brownies?
Absolutely.
These freeze beautifully.
To Freeze:
- Cool completely.
- Slice into squares.
- Wrap each brownie individually in plastic wrap.
- Place in a freezer-safe bag or airtight container.
- Freeze for up to 3 months.
To Thaw:
Leave at room temperature for about an hour, or microwave for 15–20 seconds for that fresh-from-the-oven taste.
Make-Ahead Instructions
These brownies actually taste even better the next day. The chocolate flavor deepens overnight, and the texture becomes even fudgier.
You can:
- Bake them 24 hours ahead for parties.
- Freeze individual portions for quick desserts.
- Prepare the dry ingredients in advance and store them in an airtight container until you’re ready to bake.
My Favorite Pan for Perfect Homemade Brownies
One of the easiest ways to improve your brownies isn’t changing the recipe—it’s baking them in the right pan.
I bake nearly every dessert in my kitchen using Caraway Home cookware and bakeware because their naturally ceramic-coated pans heat evenly, release baked goods beautifully, and help prevent overbaked edges while keeping the centers perfectly fudgy.
For these brownies, I love using my Caraway 8-inch Square Baking Pan. The thick construction promotes even baking from edge to center, while the naturally nonstick ceramic coating makes lifting the brownies out incredibly easy with almost no cleanup.
If you’re looking to upgrade your bakeware, I genuinely recommend Caraway. You can also save on your purchase by clicking this link. A generous discount is applied at checkout!
Whether you’re baking brownies, cookies, cakes, bars, or casseroles, it’s one of my favorite investments in the kitchen.
More Chocolate Recipes You’ll Love
If you’re a fellow chocolate lover, don’t stop here! Here are some of my favorite homemade chocolate desserts from Sugar Face Bakes that pair perfectly with this recipe:
Cakes & Cupcakes
Brownies & Bars
Cookies
- Bakery-Style Chocolate Chip Cookies
- Brown Butter Oatmeal Cookies
- Chewy Sugar Cookies
- Bakery-Style Peanut Butter Cookies
No-Bake Favorites
Cozy Desserts
There’s always something fresh coming out of my kitchen, so be sure to browse the full recipe collection for more homemade desserts, family favorites, and bakery-inspired treats!
Why You’ll Make These Brownies Again and Again
Some recipes become favorites because they’re easy.
Others because they’re delicious.
These brownies check both boxes.
They come together in one bowl with simple pantry ingredients, don’t require any special egg replacers, and bake into the kind of rich, fudgy brownies you’d expect to find behind the glass case of your favorite bakery.
Whether you’re baking for an egg allergy, avoiding eggs by choice, or simply discovered you’re out of eggs halfway through dessert prep, this recipe proves you don’t have to sacrifice texture or flavor.
Every bite is intensely chocolatey, soft in the center, slightly chewy around the edges, and finished with that irresistible shiny crackly top.
It’s the kind of recipe you’ll memorize after making it once—and one you’ll come back to whenever a chocolate craving strikes.
If you make these brownies, I’d love to hear how they turned out! Leave a comment below, share your photos, and don’t forget to tag @SugarFaceBakes on social media so I can see your delicious creations.
Happy baking!
Frequently Asked Questions
Can you make brownies without eggs?
Yes! With the right balance of butter, milk, chocolate, and flour, you can create brownies that are every bit as rich, chewy, and fudgy as traditional recipes.
Why are my eggless brownies dry?
Dry brownies are usually caused by too much flour or overbaking. Measure carefully and remove the brownies from the oven when a toothpick comes out with moist crumbs.
What replaces eggs in this recipe?
Rather than using a single egg substitute, this recipe relies on whole milk, melted butter, dark chocolate, brown sugar, and cornstarch to recreate the moisture and structure eggs typically provide.
Can I use natural cocoa powder?
Dutch-process cocoa is recommended for the richest flavor and darkest color, but natural cocoa powder will also work. The flavor will be slightly more intense and tangy.
Can I use chocolate chips instead of baking chocolate?
Yes, but chopped baking chocolate melts more smoothly and creates a silkier batter. Chocolate chips often contain stabilizers that prevent them from melting as evenly.
Can I make these brownies dairy-free?
Yes. Replace the butter with a quality plant-based butter, use full-fat oat or almond milk, and choose dairy-free dark chocolate.
Are these brownies vegan?
Not as written, since they contain butter and whole milk. However, with dairy-free substitutions they can easily become vegan-friendly.
Can I double the recipe?
Absolutely! Double all ingredients and bake in a 9×13-inch pan. Increase the baking time to approximately 35–42 minutes, checking for doneness toward the end.
Why didn’t my brownies get shiny tops?
Shiny tops usually come from thoroughly whisking the sugars into the warm butter and melted chocolate until partially dissolved. This simple step helps create that signature glossy finish.
Can I add chocolate chips?
Definitely! Stirring chocolate chips or chopped chocolate into the batter creates irresistible pockets of melted chocolate throughout every bite.
Can brownies be made without eggs?
Yes! This recipe is specially developed to create rich, fudgy brownies without eggs by balancing butter, milk, chocolate, and cornstarch for moisture and structure.
What’s the best egg substitute for brownies?
Many recipes use applesauce, yogurt, or flaxseed, but this recipe is designed so you don’t need a direct egg replacement.
Are brownies without eggs still fudgy?
Absolutely! These brownies are intentionally formulated to be thick, chewy, and ultra-fudgy.
Can I freeze eggless brownies?
Yes. Wrap individual brownies tightly and freeze for up to three months.
Do eggless brownies taste different?
Not at all. Most people can’t tell these brownies are made without eggs.
Can I use milk chocolate instead of dark chocolate?
Yes, though dark chocolate gives a richer, more intense flavor.
Can I use chocolate chips?
Yes. Chocolate chips work well, but chopped chocolate bars melt more smoothly into the batter.
Should brownies be refrigerated?
They don’t have to be, but refrigerating them creates an even fudgier texture.
Why didn’t my brownies get shiny tops?
Whisking the sugar into the warm butter and melted chocolate until glossy is one of the keys to creating shiny tops.
Can I make these gluten-free?
Yes. Substitute a quality 1:1 gluten-free flour blend designed for baking.
Can I use oat milk?
Yes! Full-fat oat milk works beautifully in this recipe.
Can I add nuts?
Absolutely. Walnuts and pecans are both delicious additions.
How do I know when brownies are done?
The edges should be set, the center should no longer jiggle, and a toothpick should come out with moist crumbs—not raw batter.
Why are my brownies gummy?
Too much liquid or underbaking can cause a gummy texture. Measure carefully and allow the brownies to cool completely before slicing.
Can I double the recipe?
Yes. Bake a doubled batch in a 9×13-inch pan and add a few extra minutes to the baking time.
Can I use natural cocoa powder?
Yes, though Dutch-process cocoa creates a richer, darker brownie.
How long do brownies stay fresh?
Stored in an airtight container, they’ll stay fresh for up to four days at room temperature or one week in the refrigerator.
Can I make these ahead of time?
Definitely! In fact, the flavor and texture improve after resting overnight.
What chocolate is best for brownies?
Use a high-quality baking chocolate between 60–70% cacao for the richest flavor.
Can I add caramel?
Yes! Swirl caramel sauce into the batter before baking.
Are these brownies kid-friendly?
Absolutely. They’re a favorite for birthday parties, lunchboxes, and bake sales.
Can I make these dairy-free too?
Yes. Use dairy-free butter, dairy-free milk, and dairy-free chocolate.
Why do brownies crack on top?
Those delicate cracks are a sign that the sugar dissolved properly and baked into a thin, glossy crust.
Can I make these in muffin tins?
Yes! Reduce the baking time to approximately 18–22 minutes.
What’s the secret to chewy brownies?
Using brown sugar, melted butter, and avoiding overbaking creates a perfectly chewy texture.

Brownies Without Eggs
Ingredients
Wet Ingredients
- ¾ cup unsalted butter (170g)
- 4 oz dark chocolate (113g)(60–70% cacao), chopped
- ¾ cup granulated sugar (150g)
- ½ cup light brown sugar (100g)packed
- ½ cup whole milk (120g)
- 2 tsp vanilla extract
Dry Ingredients
- ¾ cup all-purpose flour (90g) or gluten-free flour
- ½ cup Dutch-process cocoa powder
- 1 tbsp cornstarch
- 1 tsp espresso powder
- ½ tsp baking powder
- ½ tsp salt
- ¾ cup semi-sweet chocolate (130g)
- sea salt for topping
Instructions
- Preheat your oven to 350°F (175°C). Line an 8×8-inch metal baking pan with parchment paper, leaving an overhang for easy removal. Lightly grease the parchment.
- In a large microwave-safe bowl, melt the butter. Add the chopped dark chocolate and stir until smooth and glossy. Microwave in 10-second intervals if needed.
- Whisk in the granulated sugar and brown sugar while the chocolate mixture is still warm. Continue whisking until the mixture is smooth and glossy.
- Whisk in the milk and vanilla extract until fully incorporated.
- In a separate bowl, whisk together the flour, cocoa powder, cornstarch, espresso powder, baking powder, and salt.
- Fold the dry ingredients into the wet ingredients using a rubber spatula until just combined. Fold in the chocolate chunks.
- Spread the batter evenly into the prepared pan and smooth the top. Sprinkle with extra chocolate chunks, optional, or flaky sea salt, if desired.
- Bake for 30–36 minutes, or until the edges are set and a toothpick inserted near the edge comes out with moist crumbs.
- Cool completely in the pan for at least 1 hour before lifting out and slicing. For extra fudgy brownies, chill for 30–60 minutes before cutting.
Notes
Recipe Notes
- Use room-temperature milk to prevent the chocolate from seizing.
- For the richest flavor, use high-quality dark chocolate.
- Do not overmix the batter after adding the flour.
- Slightly underbaking results in a fudgier brownie.
- Sprinkle flaky sea salt on top for a gourmet finish.
- For clean slices, chill the brownies and wipe your knife between cuts.
Storage
- Room Temperature: Up to 4 days in an airtight container.
- Refrigerator: Up to 1 week.
- Freezer: Up to 3 months. Wrap individual brownies tightly before freezing.
Nutrition Facts (Per Brownie)
Yield: 16 brownies| Nutrient | Amount Per Serving |
|---|---|
| Calories | 255 kcal |
| Total Fat | 15 g |
| Saturated Fat | 9 g |
| Trans Fat | 0 g |
| Cholesterol | 23 mg |
| Sodium | 90 mg |
| Total Carbohydrates | 31 g |
| Dietary Fiber | 3 g |
| Total Sugars | 23 g |
| Added Sugars | 22 g |
| Protein | 3 g |
| Vitamin D | 0 mcg |
| Calcium | 35 mg |
| Iron | 2.5 mg |
| Potassium | 180 mg |
