Loaded Potato Skins

Facebook
LinkedIn
Pinterest
Email
Print
Threads

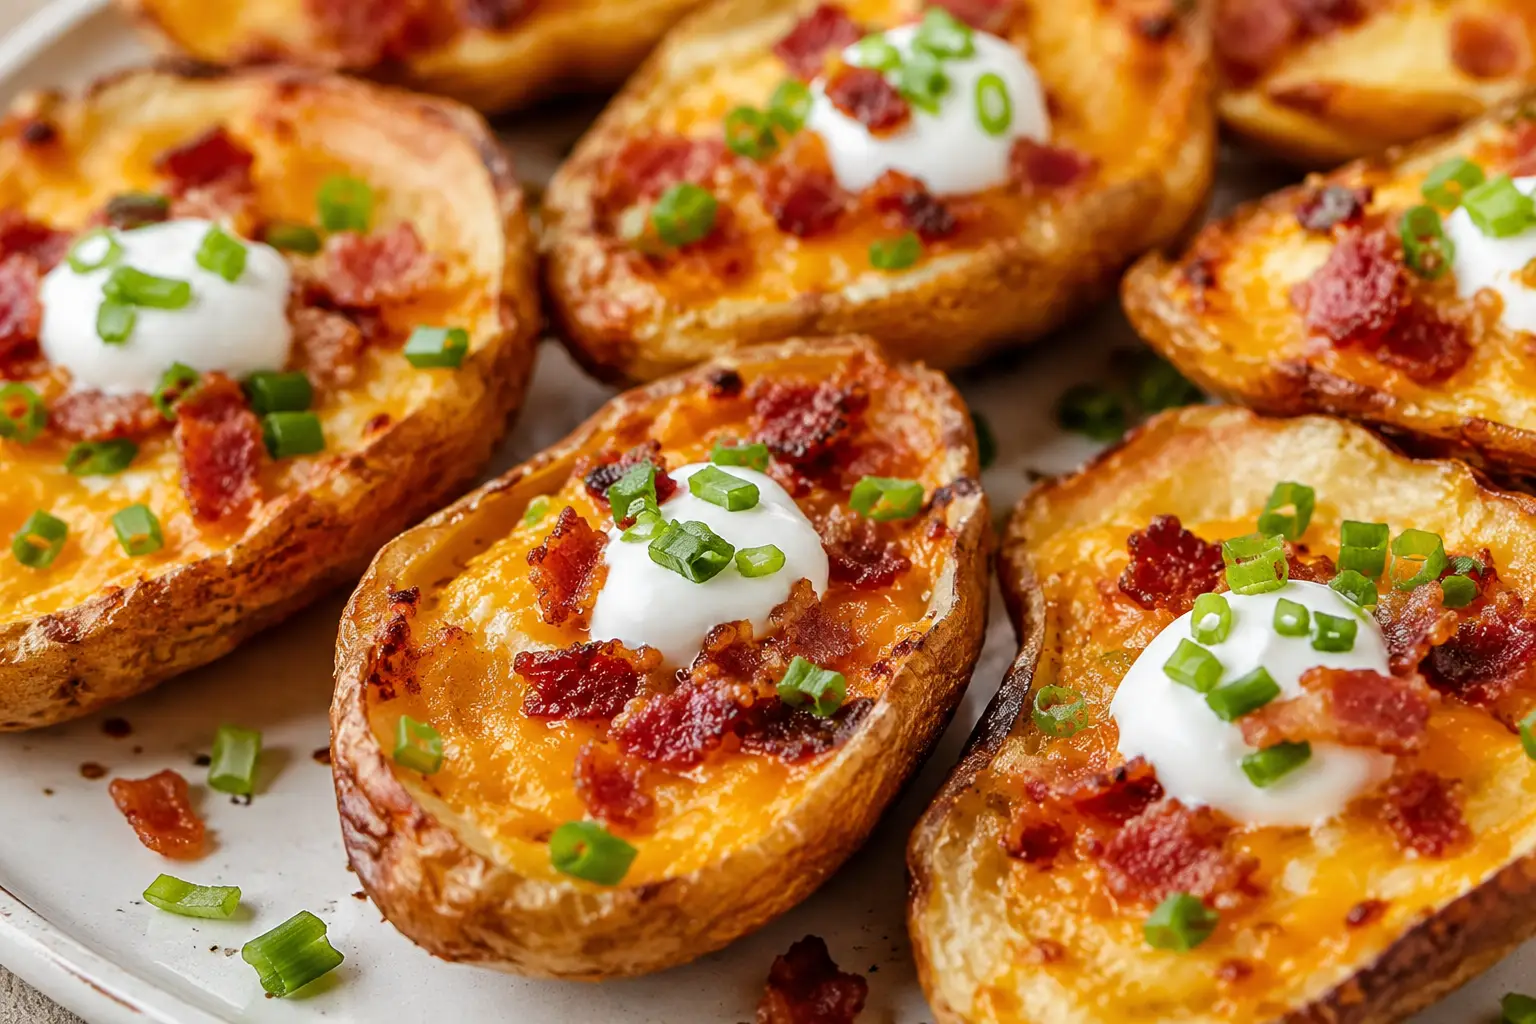
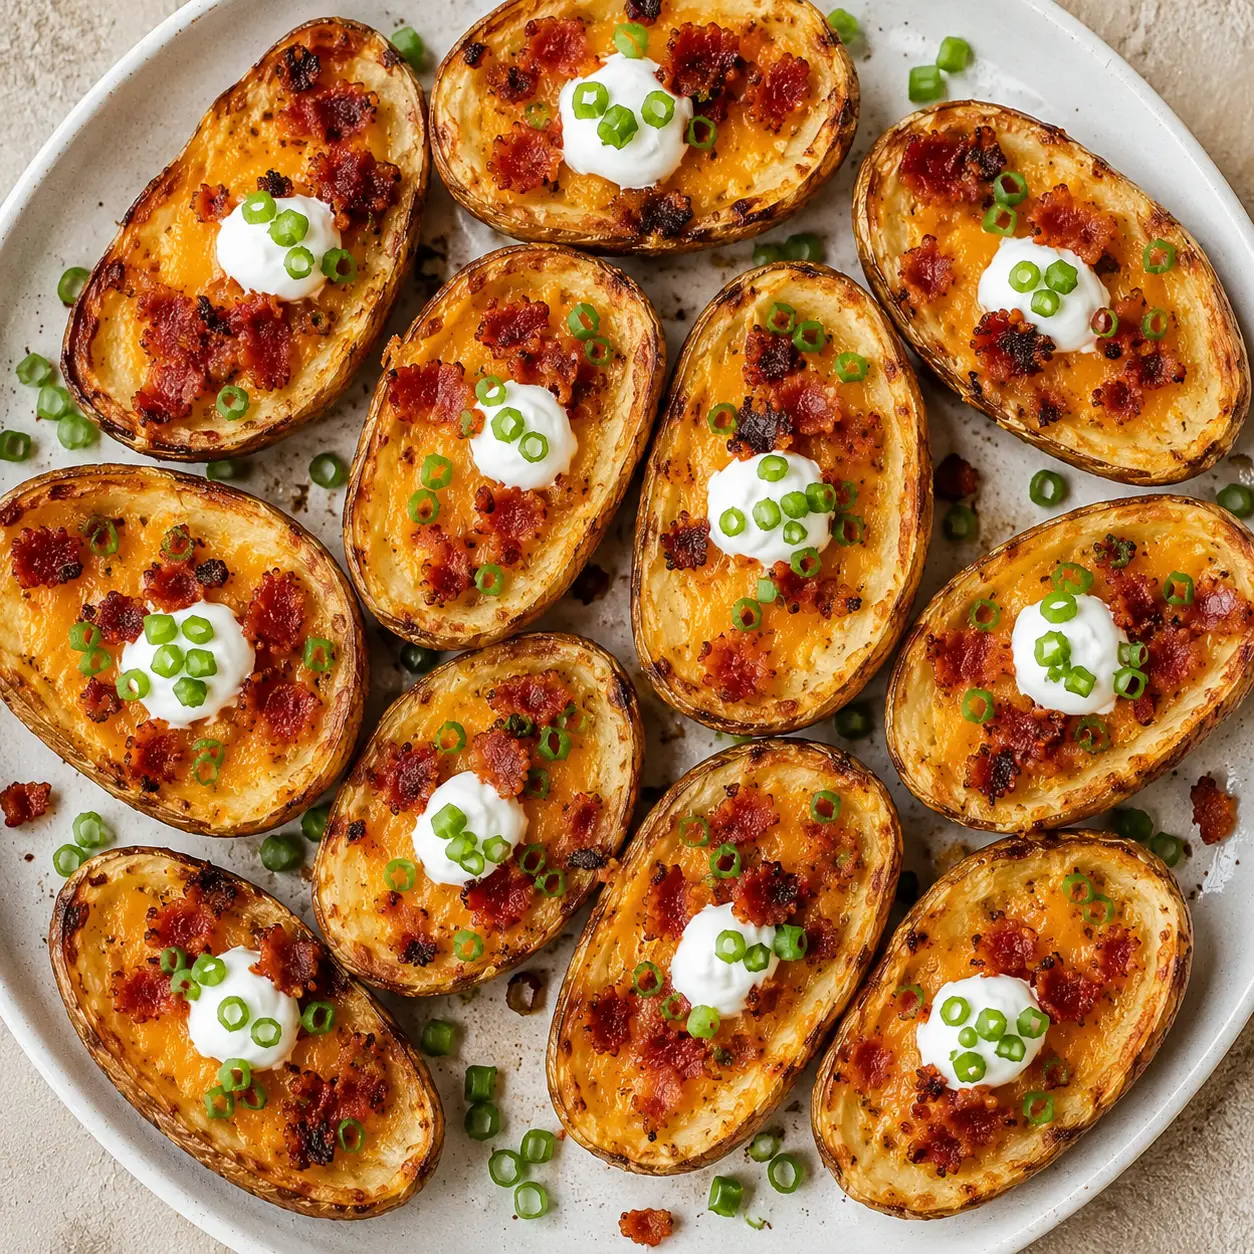
Loaded potato skins are the ultimate party appetizer. Crispy baked potato shells are filled with melted cheddar cheese, smoky bacon, and topped with cool sour cream and fresh green onions. They are everything you love about a loaded baked potato, transformed into a handheld appetizer that disappears within minutes.


Whether you’re hosting football season gatherings, holiday parties, movie nights, or simply craving comfort food, these crispy potato skins are always a crowd favorite. The secret to restaurant-style potato skins is creating extra crispy potato shells before adding the toppings. This easy recipe delivers perfectly crunchy edges, fluffy centers, gooey cheese, and savory bacon in every bite.


If you are looking for the best loaded potato skins recipe, this version is simple, customizable, and packed with flavor.

Why You’ll Love This Recipe

  • Perfect appetizer for game day parties
  • Extra crispy potato shells
  • Easy to make ahead
  • Family-friendly recipe
  • Uses simple ingredients
  • Customizable toppings
  • Great way to use leftover baked potatoes

What Are Loaded Potato Skins?

Potato skins became popular in restaurants during the 1970s and 1980s and quickly became one of America’s favorite appetizers. Traditionally, they are made by baking potatoes, scooping out most of the flesh, brushing the shells with butter, and baking again until crispy before filling them with cheese and bacon.

This homemade version gives you that restaurant-style flavor with simple ingredients and easy steps.

Why Russet Potatoes Work Best

Russet potatoes are ideal for loaded potato skins because they have thick skins and fluffy interiors. Their sturdy skins hold toppings beautifully while becoming perfectly crispy in the oven.

Avoid waxy potatoes like red potatoes or Yukon Gold potatoes, as they do not crisp in the same way.

How to Make Loaded Potato Skins

Step 1: Bake the Potatoes

Preheat your oven to 400°F.

Wash and dry the potatoes thoroughly. Pierce each potato several times with a fork and rub lightly with olive oil and salt.

Bake directly on the oven rack for 50 to 60 minutes or until fork tender.

Allow the potatoes to cool enough to handle.

Step 2: Scoop Out the Centers

Slice each potato in half lengthwise.

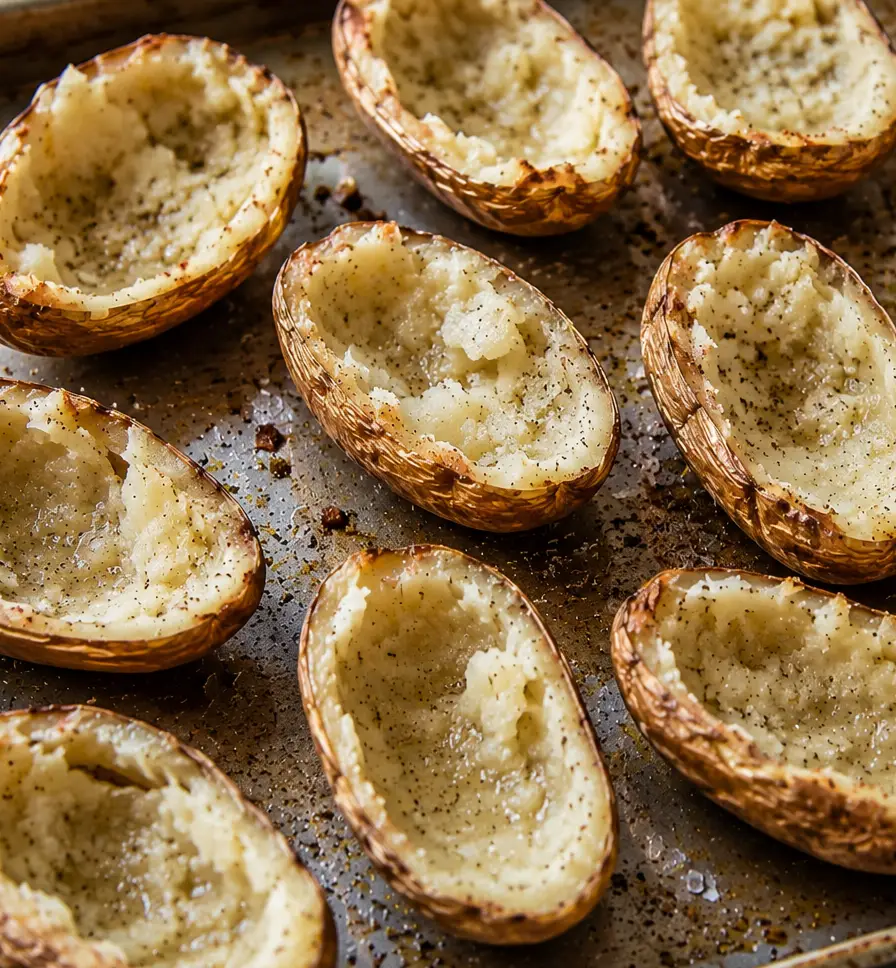
Using a spoon, carefully scoop out the flesh, leaving about ¼ inch of potato attached to the skin. This helps prevent the skins from tearing.

Save the potato filling for mashed potatoes, potato soup, shepherd’s pie, or breakfast potatoes.

Step 3: Crisp the Potato Shells

Brush both sides of the potato skins with melted butter and olive oil.

Season with garlic powder, onion powder, salt, and pepper.

Place skin side up on a baking sheet and bake for 10 minutes.

Flip and bake another 10 minutes until golden and crispy.

Step 4: Add the Toppings

Fill each potato shell with cheddar cheese and bacon crumbles.

Bake for another 5 to 7 minutes until the cheese is melted and bubbly.

Step 5: Garnish and Serve

Top with sour cream, sliced green onions, extra bacon, or your favorite toppings.

Serve immediately while hot and crispy.

Caraway Sheet Pan 

For perfectly crispy loaded potato skins, I love using the Caraway Half Sheet Pan. The ceramic-coated surface helps promote even browning while making cleanup incredibly easy—especially when melted cheese inevitably bubbles over the edges. The large baking surface gives the potato skins plenty of room so they roast instead of steam, helping create those extra crispy edges everyone loves. Plus, the naturally slick surface means less sticking and no need for excessive oil. Click here to shop with a generous discount applied at checkout.

Tips and Tricks for the Best Loaded Potato Skins

Dry the Potatoes Well

Moisture is the enemy of crispy skins. Pat the potatoes completely dry before baking.

Don’t Scoop Too Much

Leave a thin layer of potato inside the skins for structure and flavor.

Use a Combination of Butter and Oil

Butter adds flavor while olive oil encourages crispiness.

Bake Twice

The second bake is what gives restaurant-style potato skins their signature crunch.

Shred Your Own Cheese

Freshly shredded cheese melts smoother and tastes better than pre-shredded cheese.

Serve Immediately

Potato skins are best served hot while the cheese is melty and the shells remain crispy.

Topping Variations

Buffalo Chicken Potato Skins

Top with shredded buffalo chicken and drizzle with ranch.

BBQ Bacon Potato Skins

Add pulled pork and barbecue sauce.

Southwest Potato Skins

Top with black beans, corn, jalapeños, and avocado.

Pizza Potato Skins

Add mozzarella, pepperoni, and pizza sauce.

Cheeseburger Potato Skins

Fill with seasoned ground beef and cheddar cheese.

What to Serve with Loaded Potato Skins

These crispy potato skins pair perfectly with:

  • Ranch dressing
  • Buffalo wings
  • Sliders
  • Pulled pork sandwiches
  • Chili
  • Fresh veggie trays
  • Spinach dip
  • Queso dip

Make Ahead Instructions

Bake and crisp the potato shells up to one day in advance.

Store them in the refrigerator and simply add cheese and toppings before baking again.

This makes them perfect for holiday entertaining and game day gatherings.

Storage Instructions

Store leftovers in an airtight container in the refrigerator for up to 3 days.

Reheat in a 375°F oven or air fryer for 5 to 8 minutes to restore crispiness.

Avoid microwaving, as it can make the skins soggy.

Can You Freeze Potato Skins?

Yes.

Freeze the baked potato shells before adding toppings. Place them on a baking sheet until frozen, then transfer to a freezer-safe bag.

Bake directly from frozen and add toppings during the final minutes.

More Appetizer Recipes to Try

If you love easy party foods, be sure to try:

Close-up of crispy loaded potato skins topped with melted cheddar cheese, crumbled bacon, sour cream, and fresh green onions.

Loaded Potato Skins

These Loaded Potato Skins are the ultimate crowd-pleasing appetizer featuring crispy baked russet potato shells filled with melted cheddar cheese, smoky bacon, and finished with cool sour cream and fresh green onions. Double-baked for extra crunch and packed with savory flavor, this easy potato skins recipe is perfect for game day parties, holidays, and family gatherings. Serve them fresh from the oven for a restaurant-style appetizer everyone will love.
Prep Time 20 minutes
Cook Time 1 hour 20 minutes
Total Time 1 hour 40 minutes
Course Appetizer, Snack
Cuisine American
Servings 12 skin halves
Calories 285 kcal

Ingredients
  

  • 6 medium russet potatoes
  • 3 tbsp olive oil
  • 2 tbsp melted butter
  • 1 tsp garlic powder
  • 1 tsp onion powder
  • ½ tsp ground black pepper
  • 2 cups shredded cheddar cheese
  • 8 slices bacon cooked and crumbled
  • sour cream for garnish
  • green onions sliced
  • sea salt for garnish

Instructions
 

  • Bake potatoes at 400°F for 50–60 minutes.
  • Cool slightly and cut in half. Scoop out most of the potato flesh.
  • Brush skins with butter and oil mixture. Bake skin side up for 10 minutes.
  • Flip and bake another 10 minutes.
  • Fill with cheese and bacon. Bake 5–7 minutes until cheese melts.
  • Garnish with sour cream and green onions.

Notes

Nutritional Information (Approximate Per Serving)

Calories: 285
Carbohydrates: 21g
Protein: 10g
Fat: 18g
Saturated Fat: 8g
Cholesterol: 35mg
Fiber: 2g
Sugar: 1g
Sodium: 490mg
Keyword loaded potato skins, potato skins

Frequently Asked Questions

Can I make loaded potato skins in advance?

Yes! You can bake the potatoes, scoop out the flesh, and brush the shells with seasoned butter up to 24 hours in advance. Store the hollowed shells in an airtight container in the fridge. Perform the high-heat crisping bake and add toppings right before serving.

Yes, air frying makes them extra crispy! After scooping and brushing with butter, air fry the shells at 400°F (200°C) for 5 minutes cut-side down, flip, add cheese and bacon, and air fry for another 2–3 minutes until the cheese is melted.

Don’t throw them away! The scooped russet potato flesh is perfect for making quick garlic mashed potatoes, potato soup, shepherd’s pie topping, or potato pancakes.

Store leftover assembled skins in an airtight container in the refrigerator for up to 3 to 4 days. Reheat them in a 400°F oven or air fryer for 5–7 minutes to restore their crispiness—avoid microwaving, as it will make the skins soft and chewy.

Yes! You can freeze the baked, crisp shells topped with cheese and bacon (before adding sour cream and chives). Freeze on a baking sheet until solid, then transfer to a freezer bag for up to 2 months. Bake straight from frozen at 400°F for 12–15 minutes until hot and bubbly.

Picture of Stacie

Stacie

Hello out there! My name is Stacie.

I'm a home baker whose guilty pleasure is homemade food and desserts. My blog is for the non-professionals, the at-home bakers and cooks, lovers of desserts, and anyone who desires delicious food right from home.

For daily recipes delivered straight to your inbox, sign up now!

Nothing is better than a homemade meal or dessert made from scratch, except the reward when the whole dish is devoured by your guests. Questions, comments, idea are all welcomed!

Sign Up Here!

Most LATEST Recipe

Close-up comparison of a fudgy brownie resting on a stack of cakey brownies with the text, “Why Are My Brownies Cakey Instead of Fudgy?”

Why Are My Brownies Cakey Instead of Fudgy? — What Went Wrong

Homemade vanilla cake sunk in the middle while cooling in a round baking pan.

Why Did My Cake Sink in the Middle? — Causes, Fixes, and Prevention

Chocolate chip cookies baked on a cream sheet pan for an oven temperature conversion guide covering Fahrenheit, Celsius, and Gas Mark.

Oven Temperature Conversion Chart — Fahrenheit, Celsius, and Gas Mark

baking measurement conversion chart

Baking Measurement Conversion Chart (Cups, Tablespoons, Teaspoons, and Grams)

Homemade buttermilk substitute in a glass measuring cup with milk and fresh lemon on a rustic wooden table.

Buttermilk Substitute: 5 Easy Ways to Make It With What You Have

Stick of butter with cut tablespoon portions beside measuring spoons, a butter knife, and a kitchen scale on a wooden counter.

Butter Measurement Guide — Sticks, Cups, Tablespoons, and Grams Converted